
I had the good luck, back in 2016, of being part of the excellent team making Numizmatic Games’ Nintendo Switch release Light Fingers, as the concept artist, and one of my favourite parts of the whole project was designing the game board!
You can see the final board here in motion; my concept design process follows:
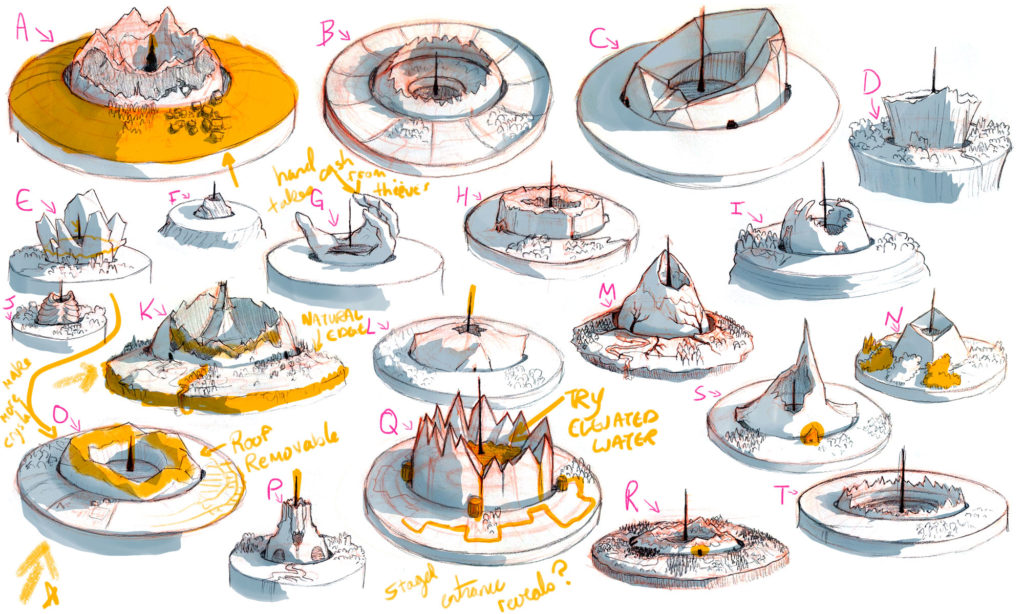
We planned out the board from a distance first:
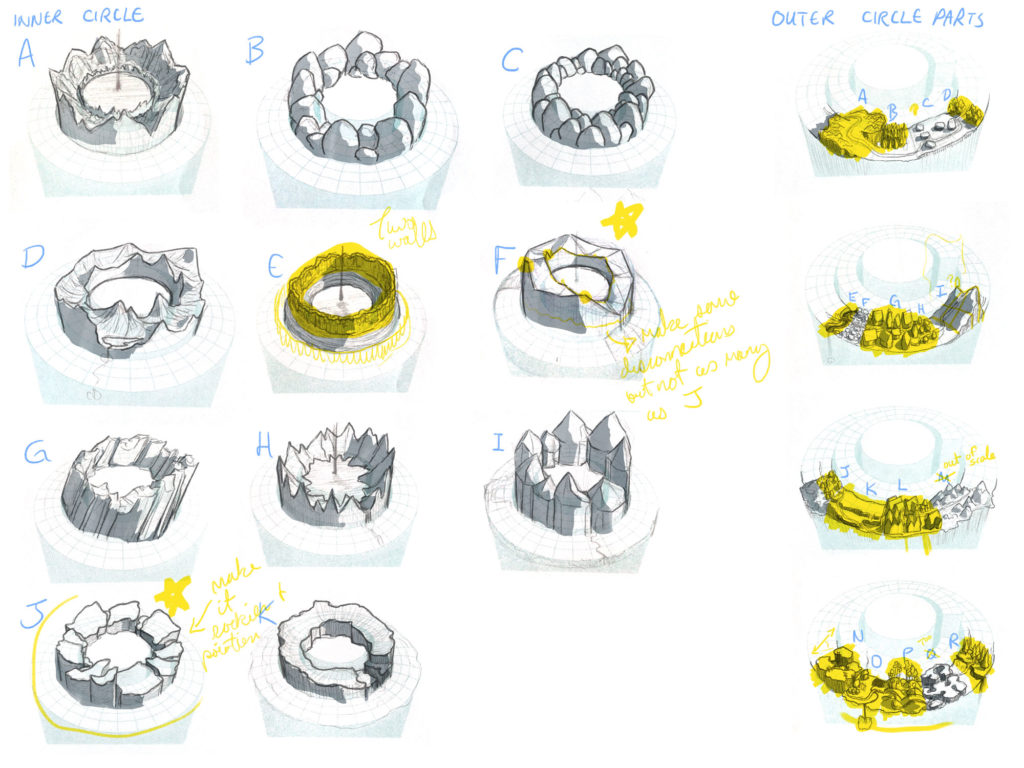
Once we had a better idea of what the zoomed-out view would feel like, we started to fine tune – and to come up with different types of tiles:
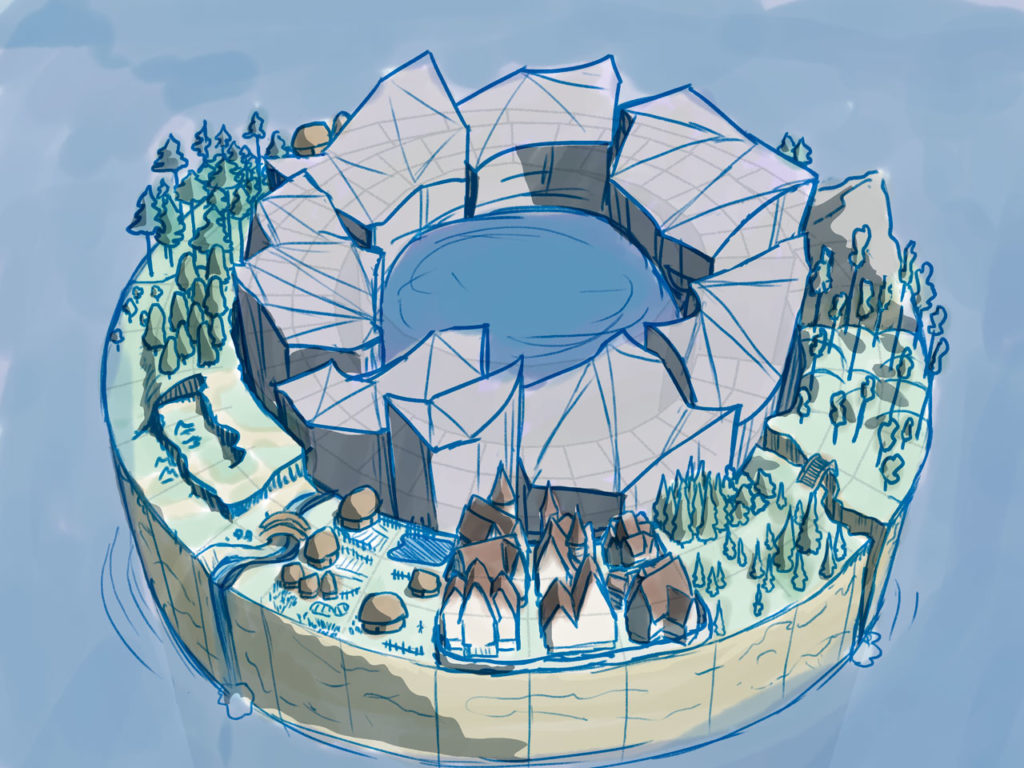
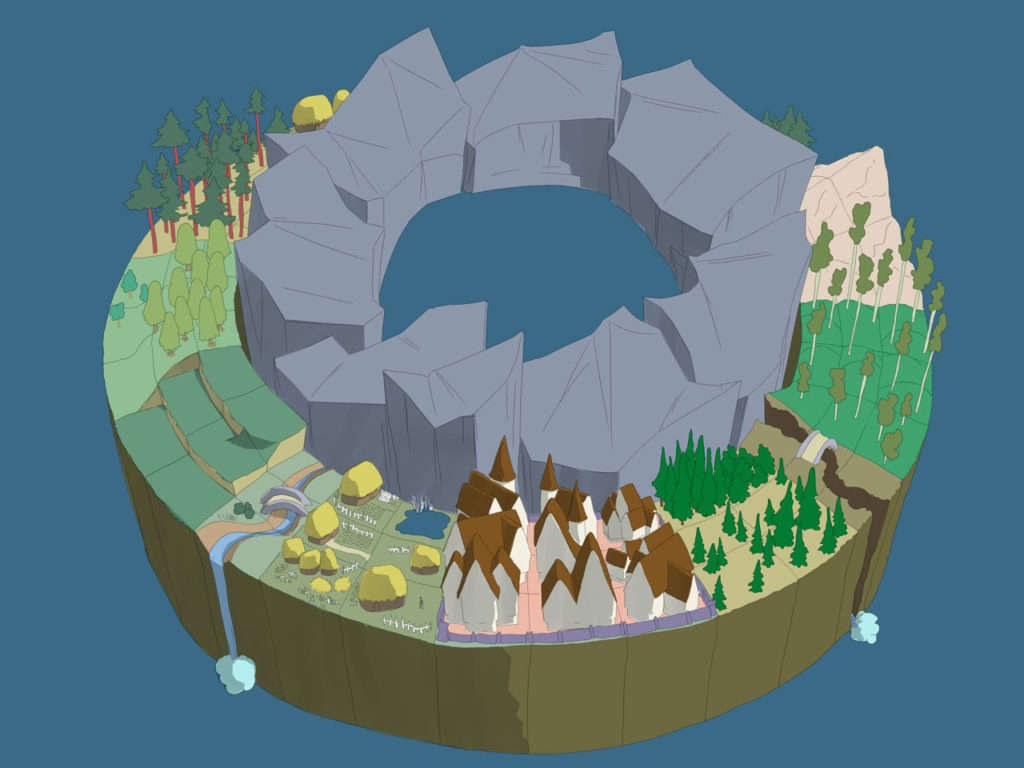
Then I created a rough version of the board’s mockup – a kind of visual menu folks could pull asset categories from. This isn’t mean to look like the final game board, but more to guide folks creating that board:
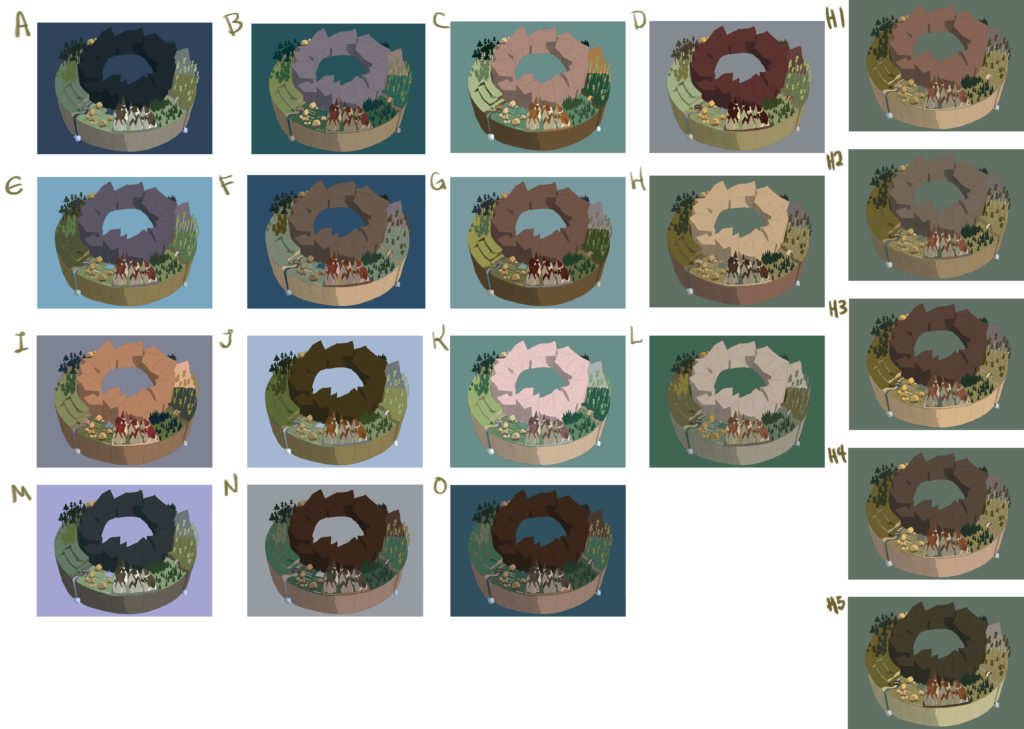
With approval on this, I tightened up the drawing, flatted it (filled it with temporary colours), and then we tested a LOT of different colour schemes:
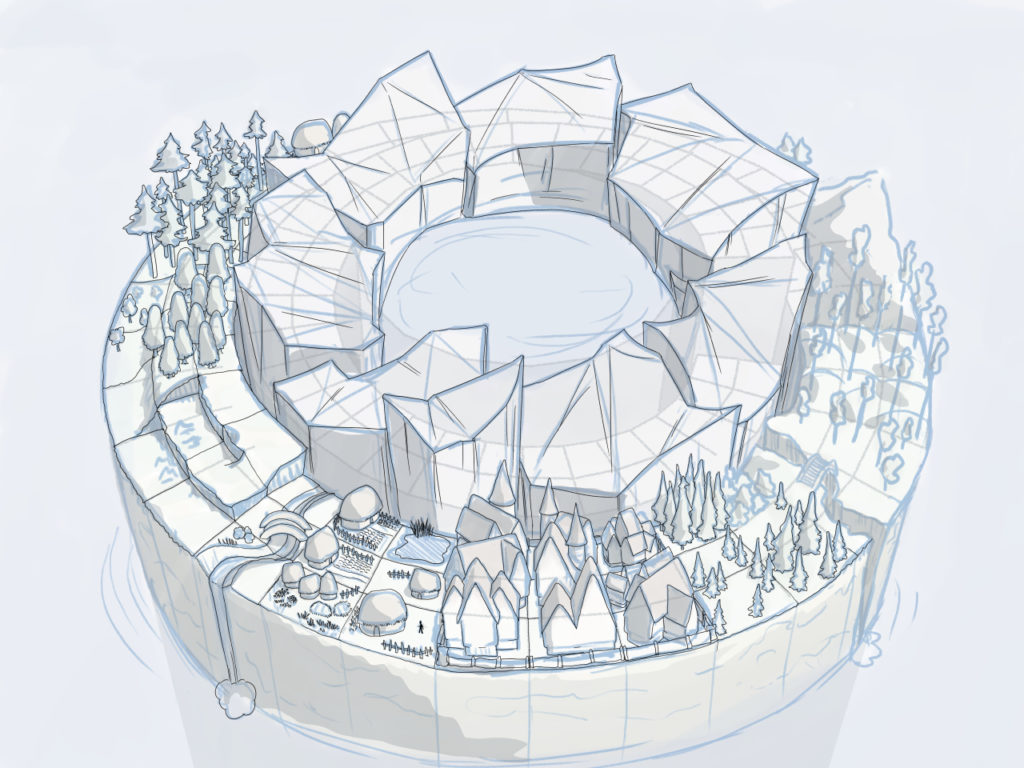
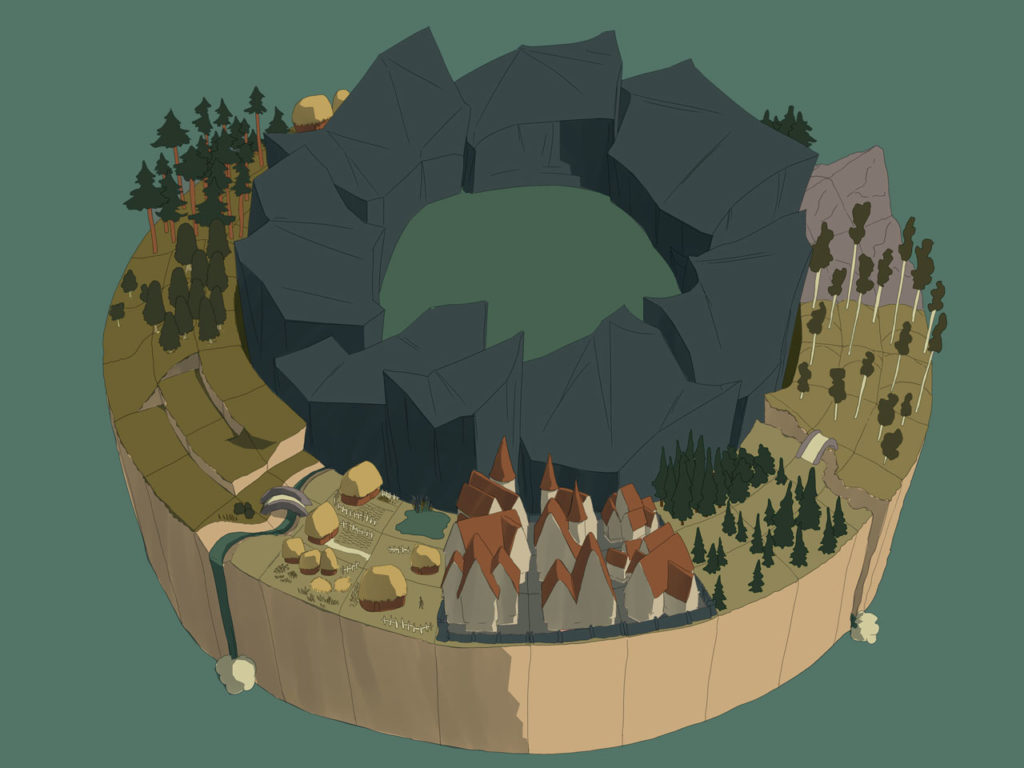
This is the final game board mockup I left with the Numizmatic crew:
Leave a Reply