-
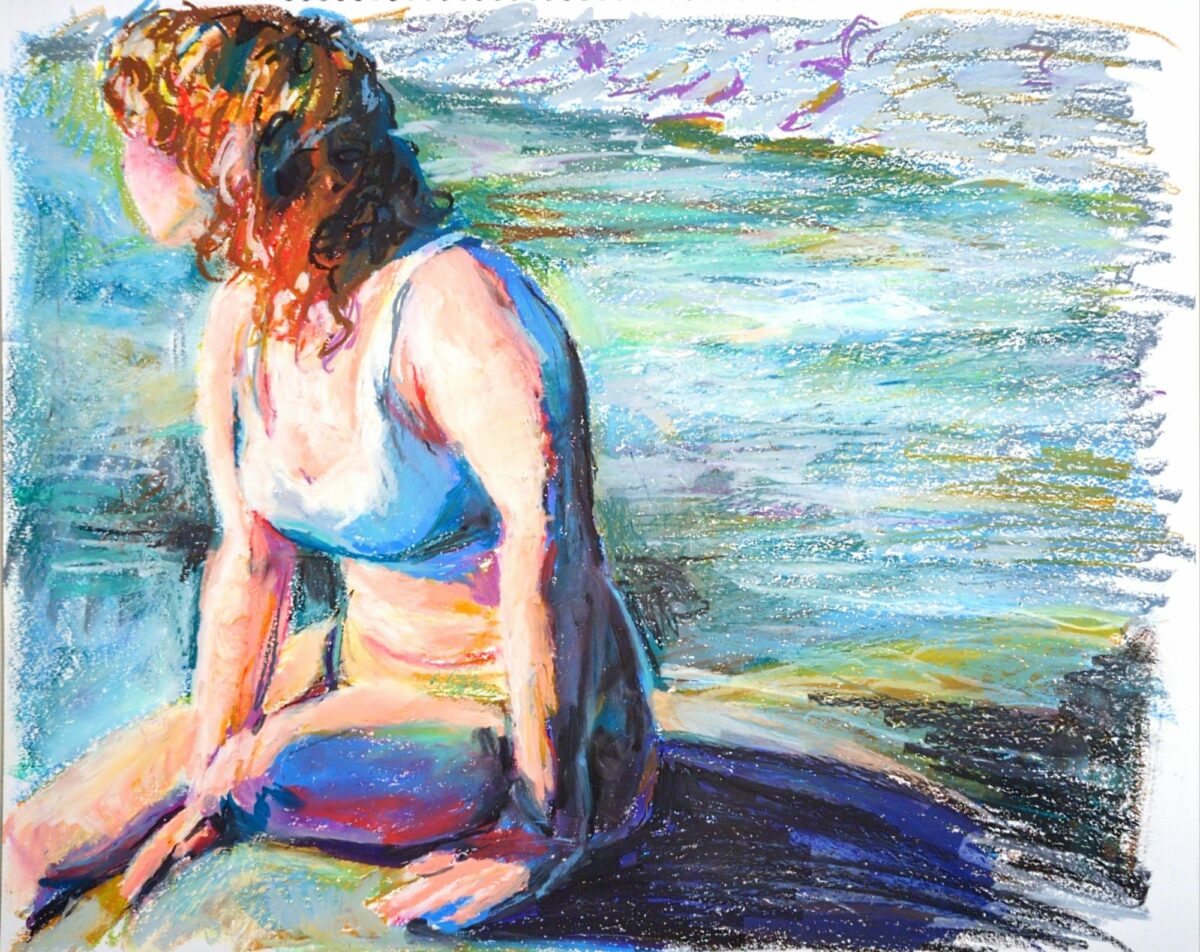
this is the biggest thing I’ve painted yet with the oil pastels; gonna be working in it for a while
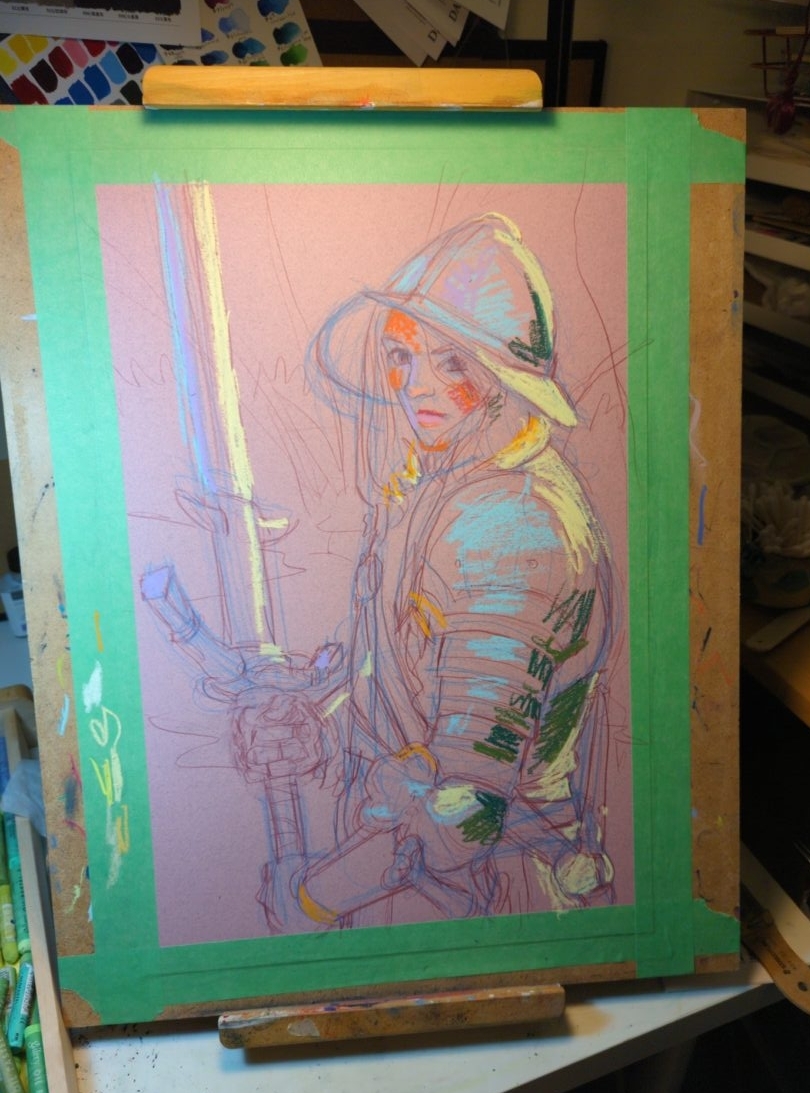

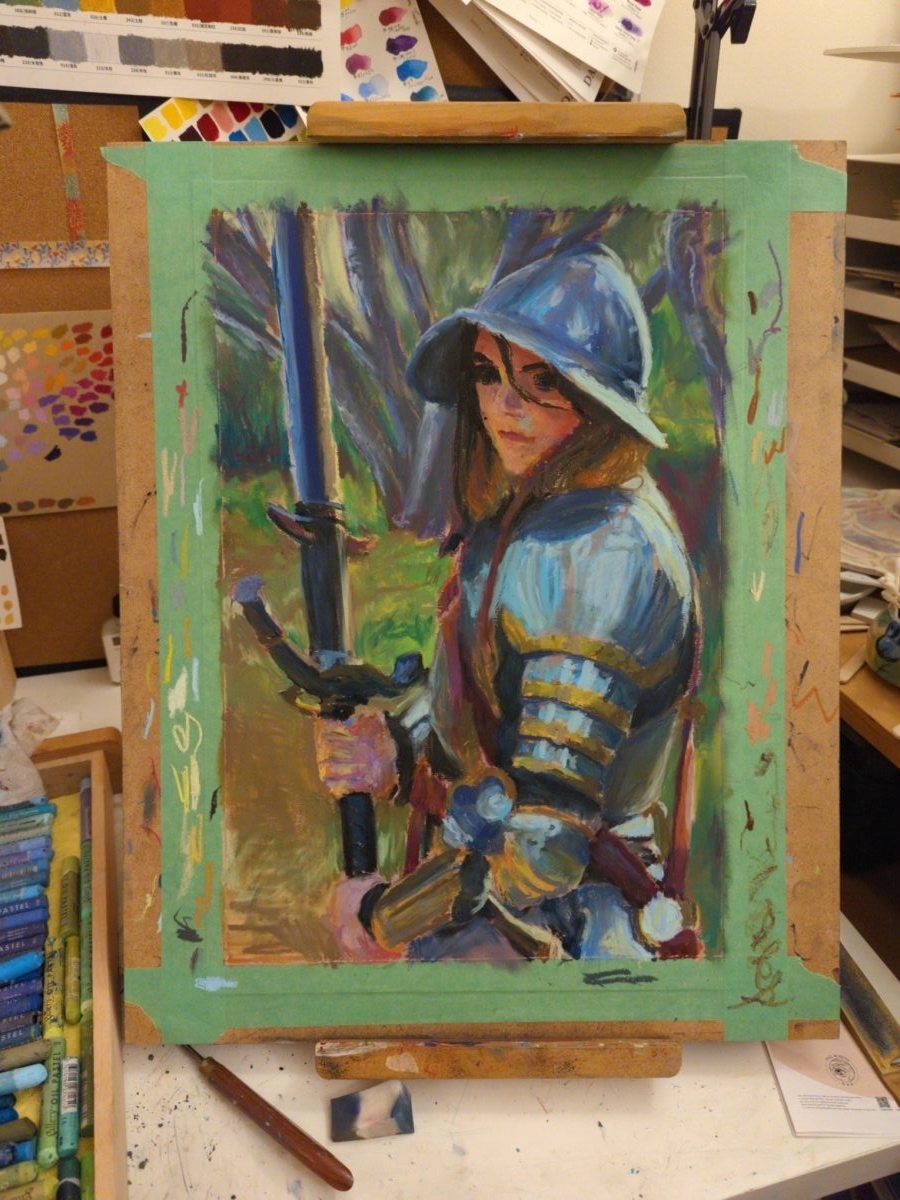
i was looking at digital paintings from 2022, and thinking about the method I had started using back then of having a mark making stage and a blending stage as two separate things; and the oil pastels are letting me start to approximate the same workflow, but on paper! interesting…
leave a comment
-
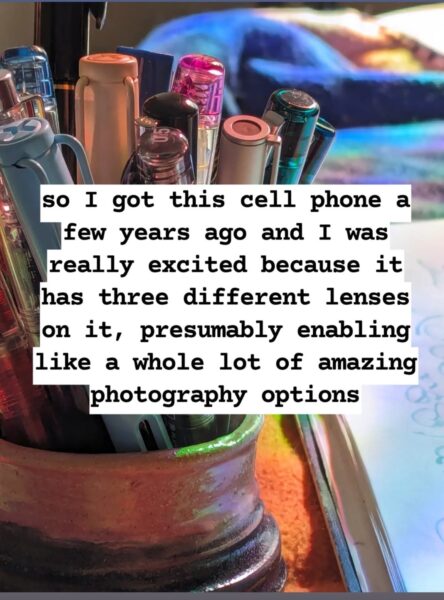
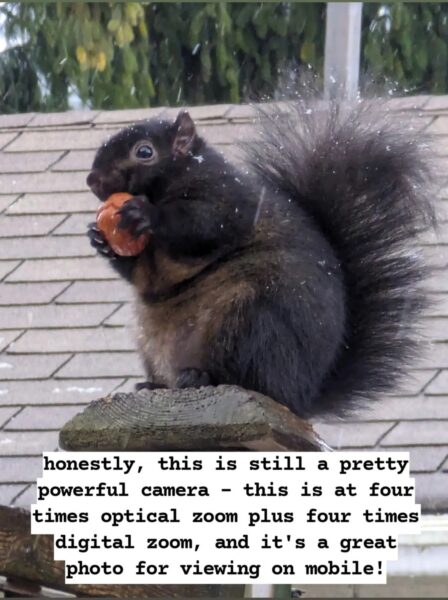
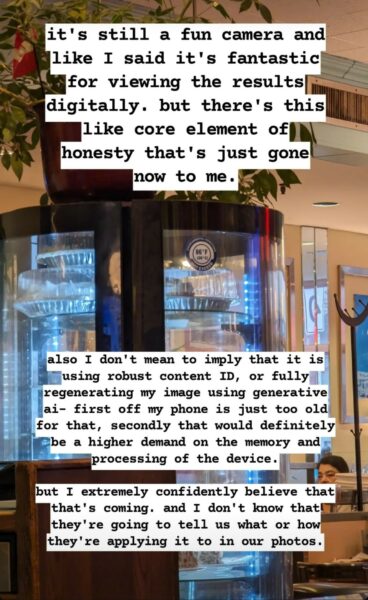
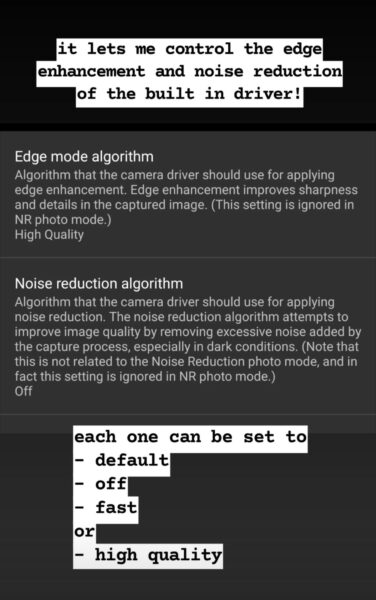
I am mad about cellphone cameras hiding the processing they do to my photos, and I am glad about software I found that lets me control it and opt in and out.
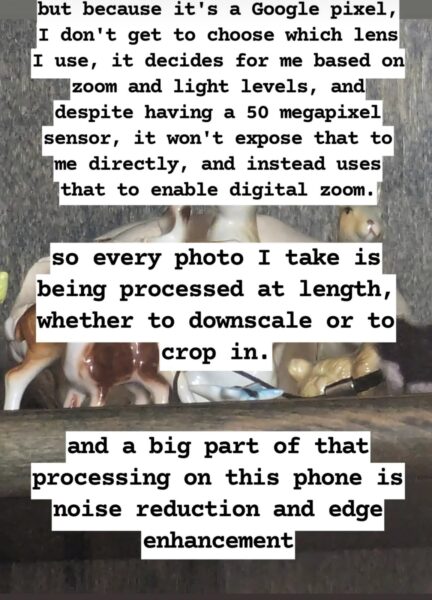
A breakdown of what I noticed on my Pixel 6 Pro camera and what I used to get around it:
This was initially written on instagram, dictated into the stories feature, so, uh , that’s what I’m putting here, at least to start. As I am still living that partial dominant hand paralysis life, alt text taken from IDs generously written by brianbrianbrian on tumblr.

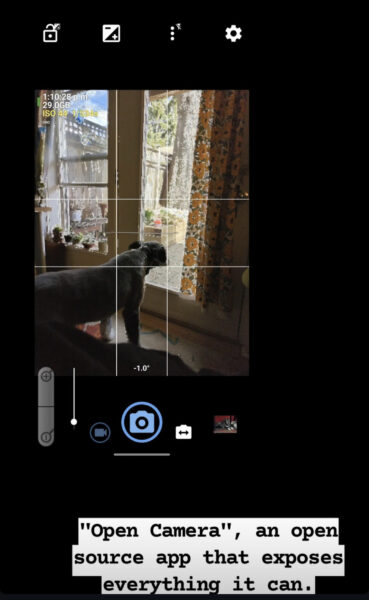

Here’s the website for the app I’m getting so much good use out of: https://opencamera.org.uk/ – it’s open source, android only. A comparable app iOS folks have recommended is Camera+, but I don’t think it’s free.
important note! this is an open source app, and that means scammers can copy it, relist it, and fill it with ads or malware. Make sure the version you get is published by Mark Harman, and remember it’s free and you shouldn’t be asked to pay for it on the app store at all.
An example of how much this means to me:
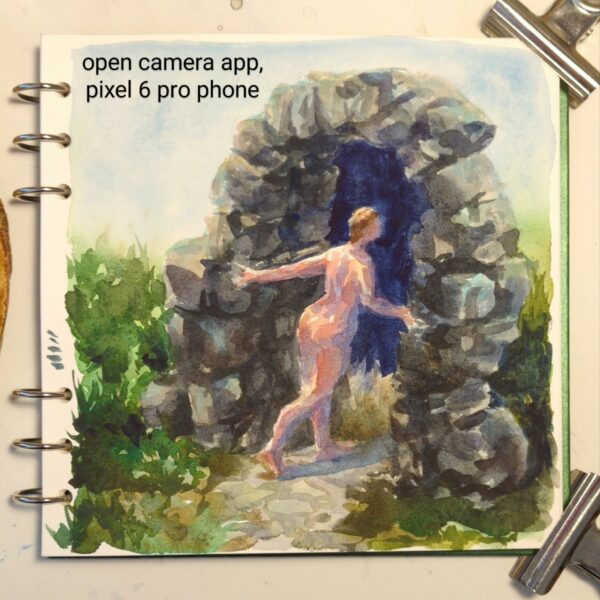
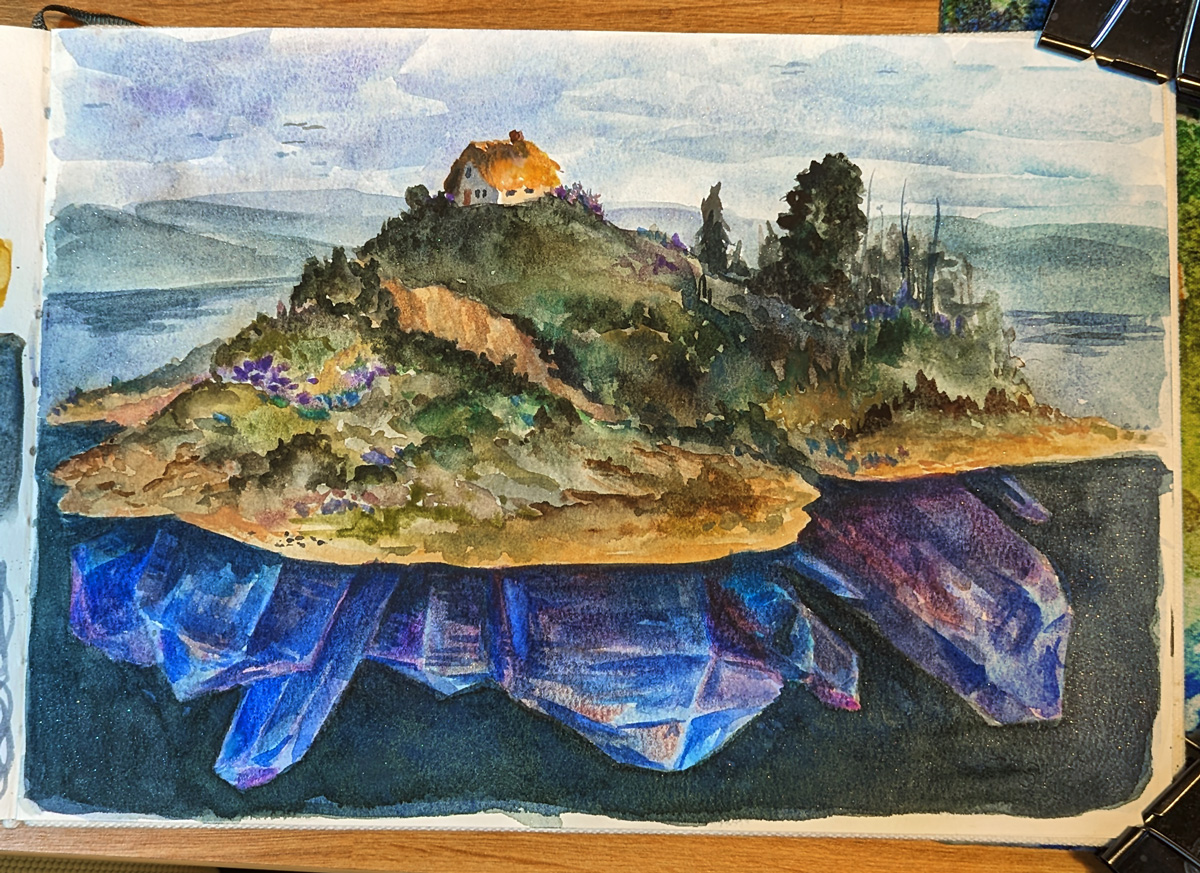
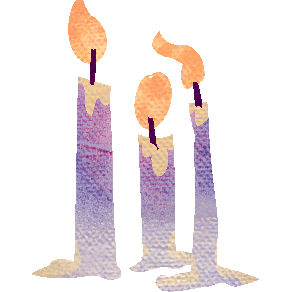
I’ve been really feeling like I’m terrible at photographing my own work, especially watercolour, and i can’t seem to really capture what makes a painting special in person.
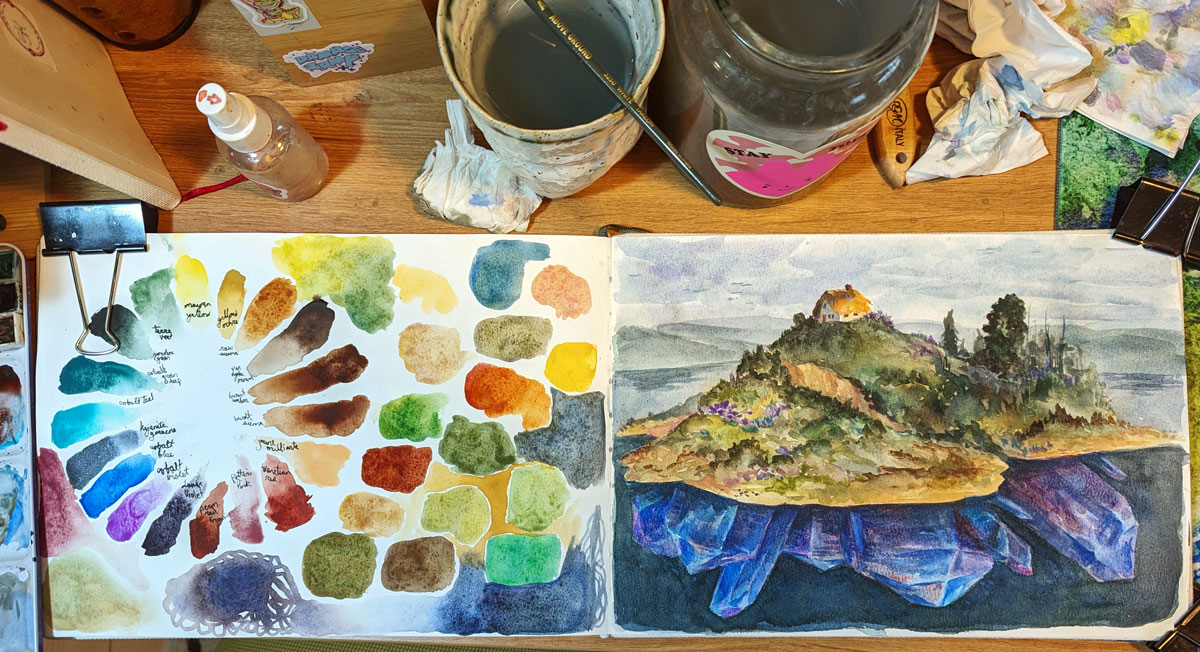
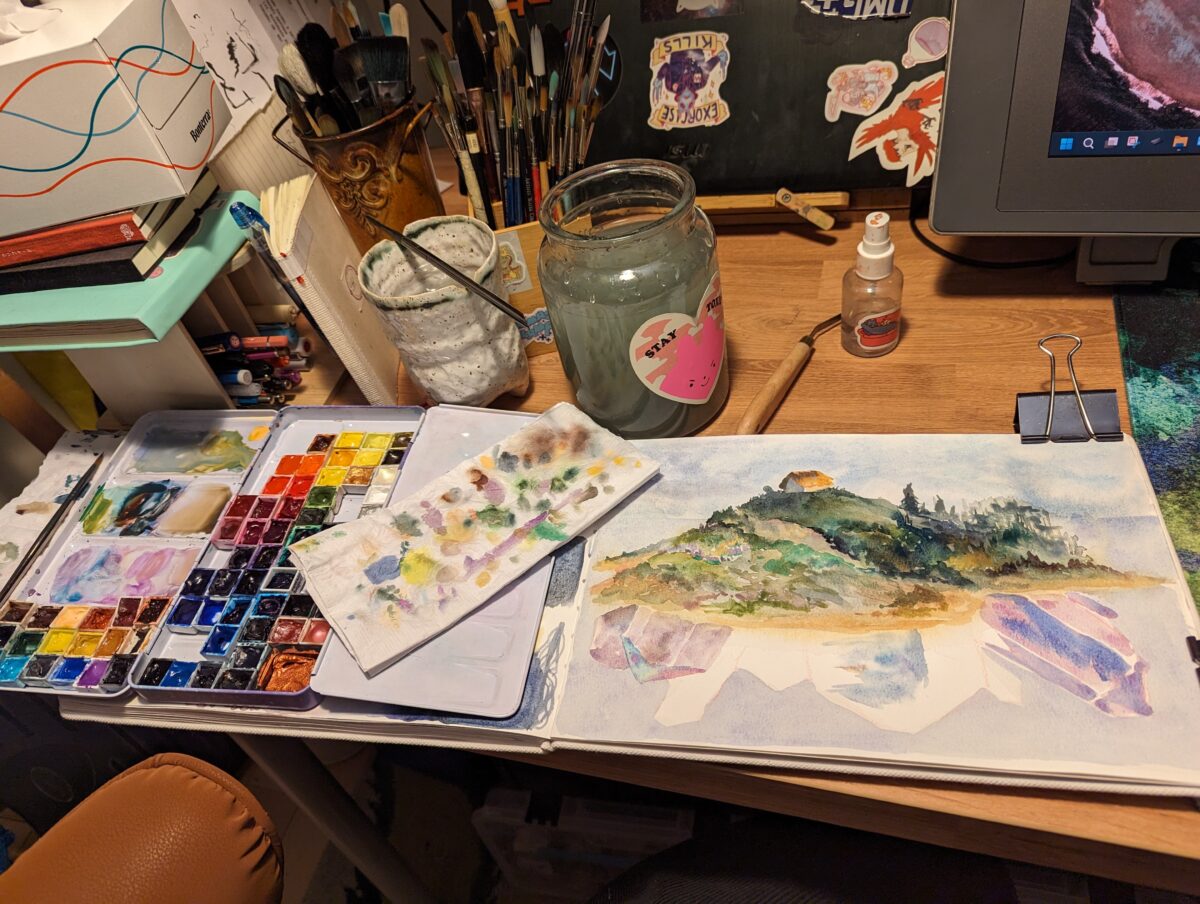
Here’s some examples of my attempts to photograph this sketchbook painting using the native camera app on my phone:
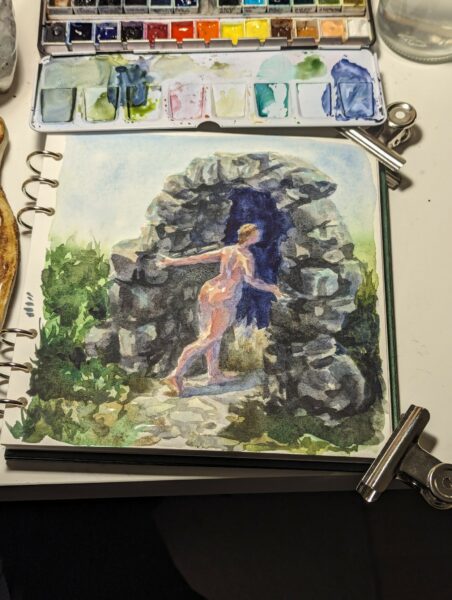

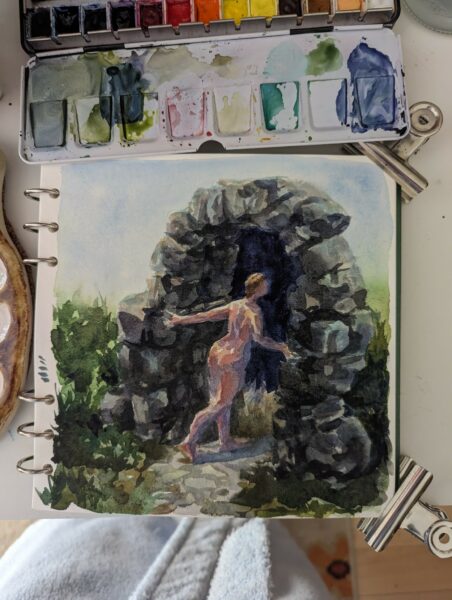

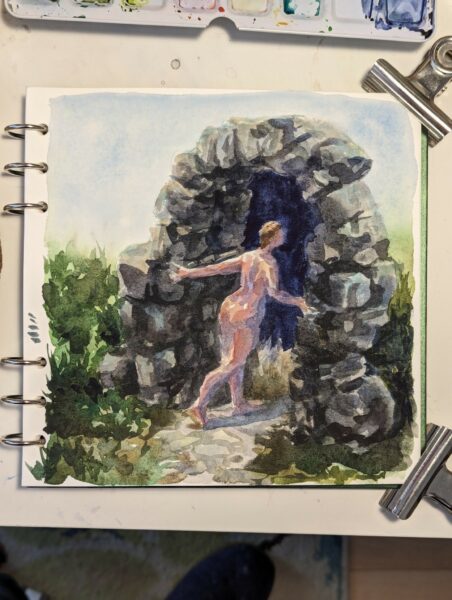
no matter the exposure, the lighting, the lens I use, it’s grainy, blotchy, the colours feel off, the contrast is too much… it really doesn’t capture what’s on paper in front of me!
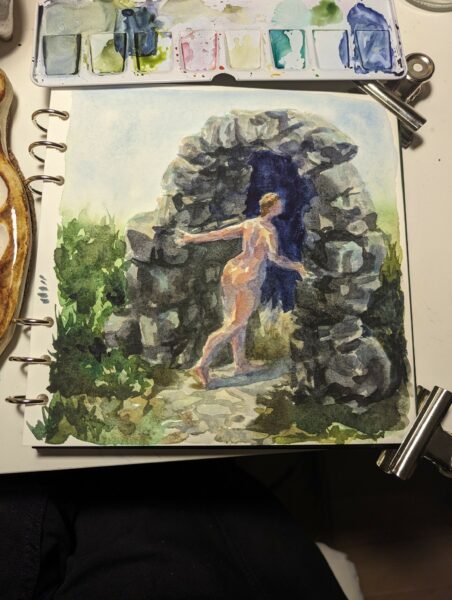
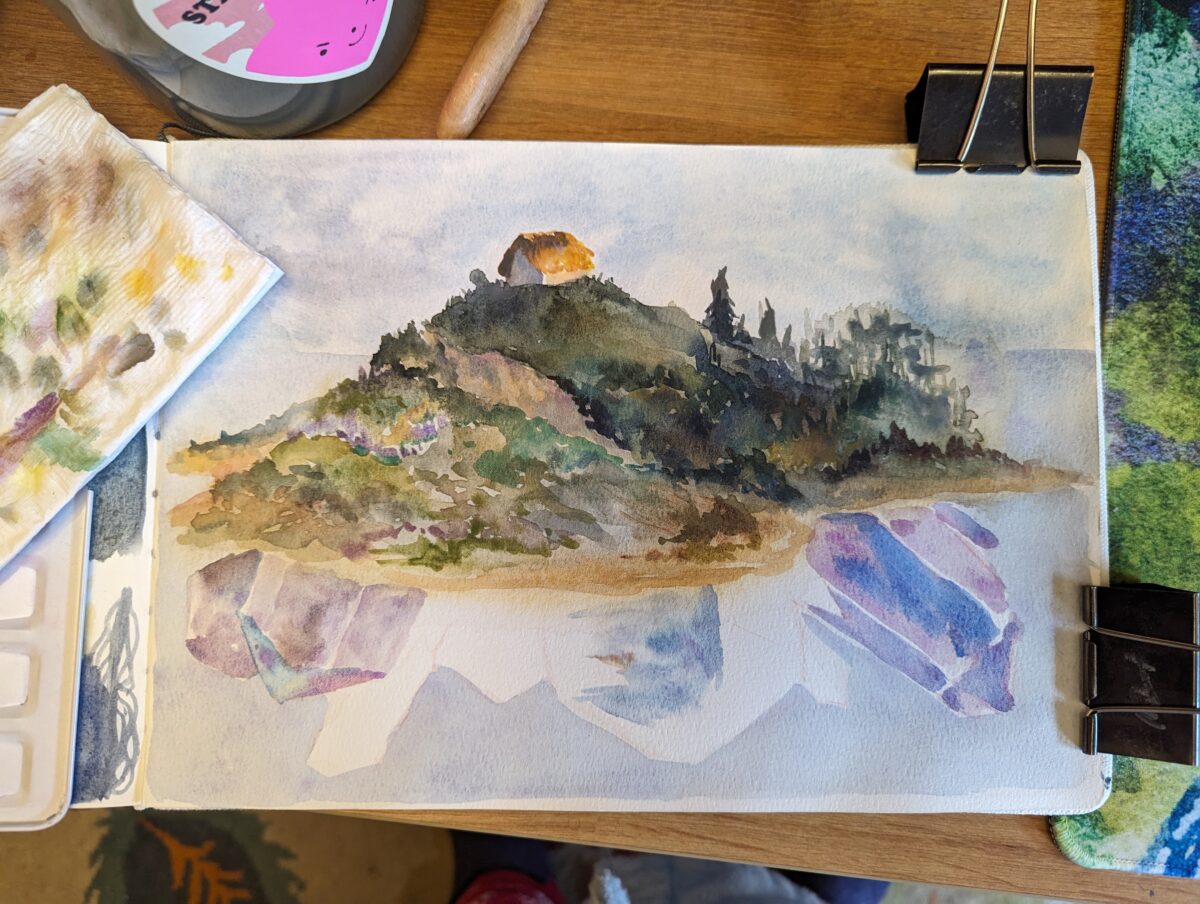
so then i try with the processing turned off in Open Camera:
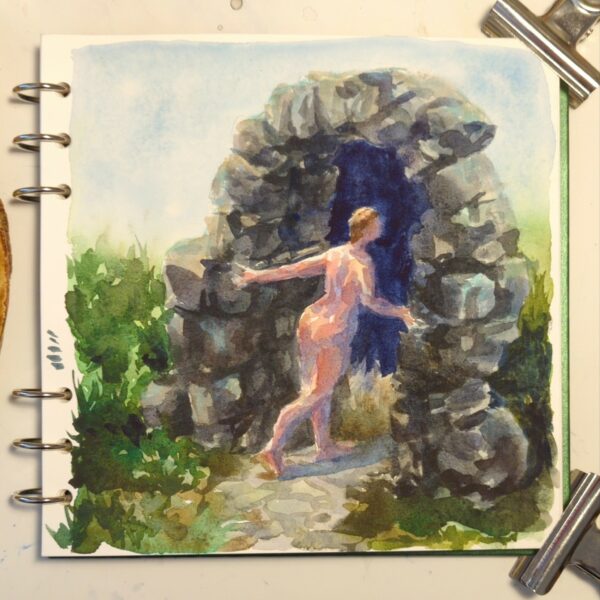
it’s night and day!
A clearer comparison for you:
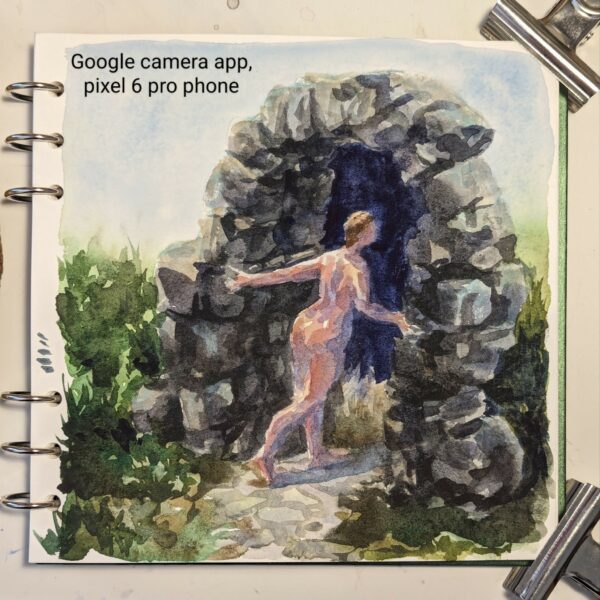
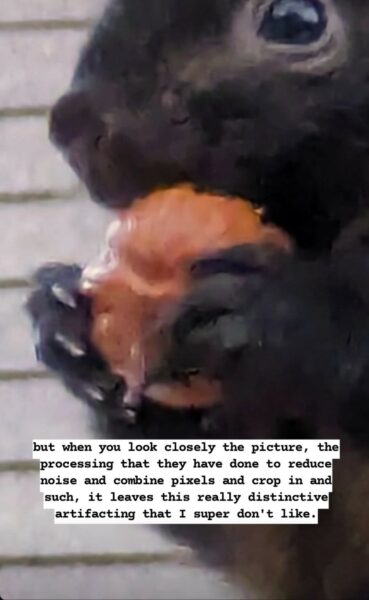
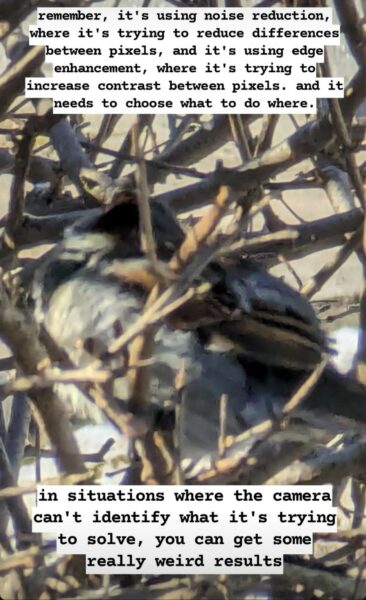
To sum up what’s different: the google camera app is trying to reduce noise AND sharpen the image it creates, leading it to both remove actual colour complexity in my painting and then to oversharpen what details it kept. It’s also doing a ton of HDR value-balancing, attempting to even out contrast across the whole image instead of letting some parts be darker and others lighter. In the end, it makes my watercolour painting grainy and high contrast, while removing all the subtle colour and value choices I made while painting.
The open camera photo shows you the nuance that’s in the actual painting – or at least something much closer to it!
what a game changer!
A few notes!
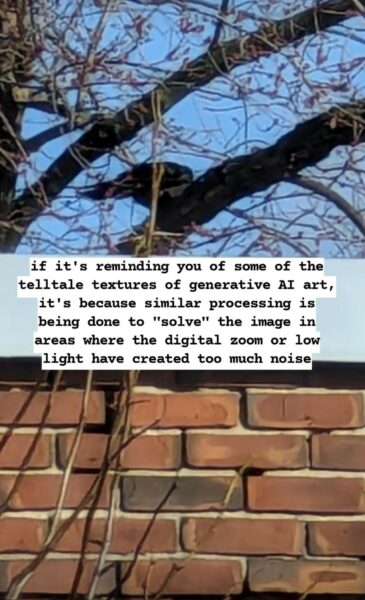
First, this may remind you of a scandal specifically regarding moon photography! You can read more about that here: https://www.theverge.com/2023/3/13/23637401/samsung-fake-moon-photos-ai-galaxy-s21-s23-ultra
Secondly, a lot of folks were confused about why I would need this app when my phone can shoot raw photos in the native app as well! And to that I have a two stage answer!
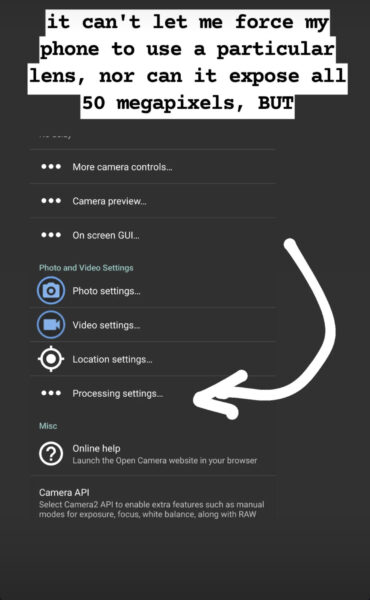
- Bold of you to assume google has made its raw files pristine. They’re certainly less chewed up than the jpgs, but not all raw files are equal, and these are not great. Google also does not allow raw photography through all three of the lenses – only the main one, as far as I can tell. If I want less processing on a photo I take through the telephoto lens, I need to use OpenCamera to take a jpg photo. Additionally, google’s camera app, evenwhen shooting raw, doesn’t give me any granular control over exposure, focus, ISO or colour. OpenCamera solves many problems at once for me, and shooting raw in the native app solves none of them completely.
- It occurs to me that people who do shoot raw might not understand how inaccessible that can be for folks who don’t! And folks who don’t shoot raw at all might not know what it entails. So I’ve put up a post about what I weigh when deciding whether or not to shoot raw right here: https://www.portablecity.net/what-format-you-might-want-to-save-digital-photos-in/
Finally, I intend to keep growing and cleaning up posts like this as I research and experiment and learn about this stuff! So if you have questions I haven’t answered yet, or suggestions, definitely drop me a comment below so I can follow up.
leave a comment
Leave a Reply
-
This was a response to an ask on tumblr! The question was:
What format do you recommend I save photographs in? Like raw or jpeg? I don’t know the difference.
Here are my thoughts!
so it depends on what you wanna do with your photo!
if you want to post it right away, you want a jpg; raw files aren’t web-ready and can’t be viewed by various devices easily.
if you want to take a bazillion photos and keep all of them too look at regularly on your phone, you want a jpg; raw files are much, much bigger sized files and will fill up your storage way more quickly, and they don’t actually look good out of the box.
if you like to post-process your photos on your phone or computer, you might prefer raw; jpg files contain only a fraction of the image data that a raw file does (hence the size difference) and it’s much harder to adjust them in ways that look and feel like professional photography.
however: processing a raw file is not optional – you can’t use it till it’s processed, and processing them is a skill you’ll need to give yourself time to practice. They also can require specific software to process them; famously lightroom and photoshop are the industry standards, and they’re pretty $$$, but I bet folks can drop some cheaper options in the notes!
I never shoot only raw, personally, because I love to share photos with friends ASAP, but sometimes I do shoot jpeg & raw together. If you have never tried out shooting and processing raw photos before, this is my recommendation.
Also, shooting raw is great but it’s super not necessary to do if you don’t want to process all your images by hand. There’s a bazillion reasons to take photos different ways, and “convenience” and “speed” are really good ones.
but also: post processing can be fun as heck. try it out! see what you think!
And for fun, on the left here’s a jpg photo straight from my favourite photo app for my phone, Open Camera, and in the middle here it is as an undeveloped raw photo exported directly to jpg, and on the right here is my processed raw photo exported to jpg:


leave a comment
Leave a Reply
-
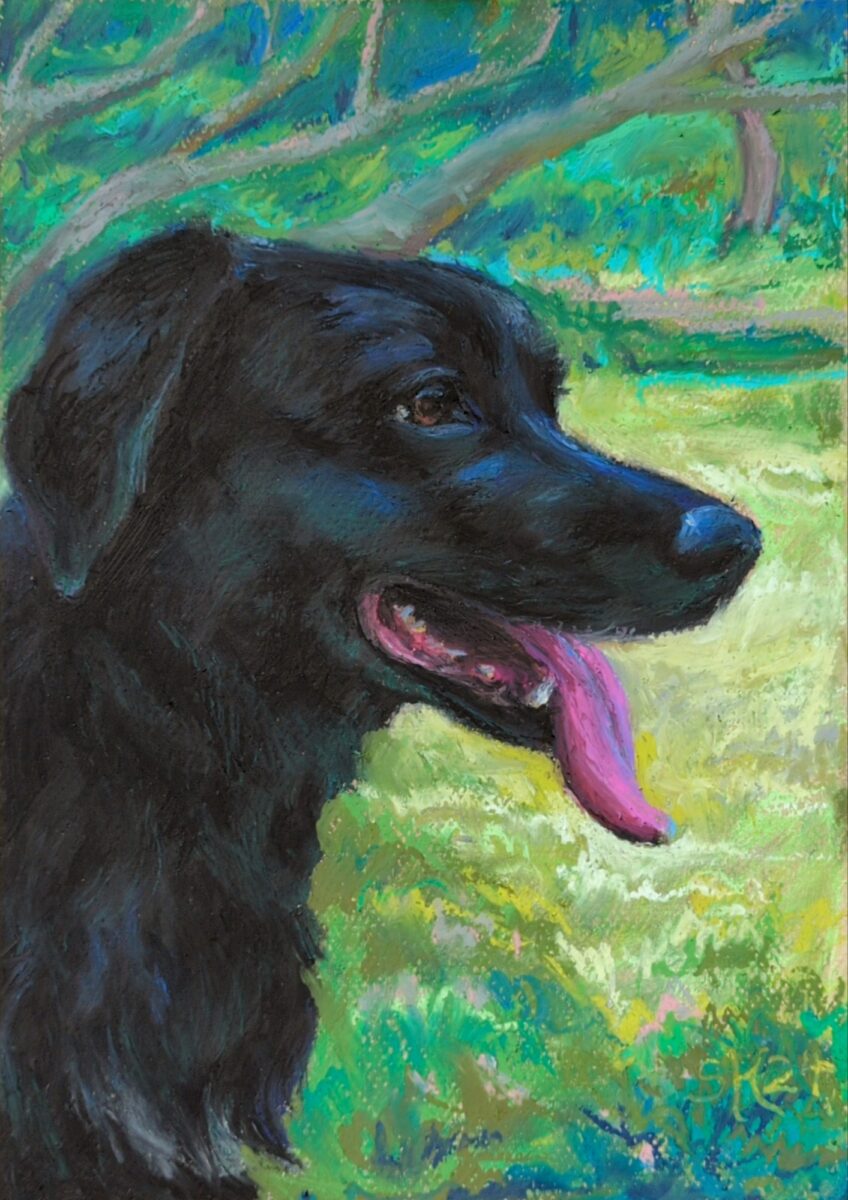
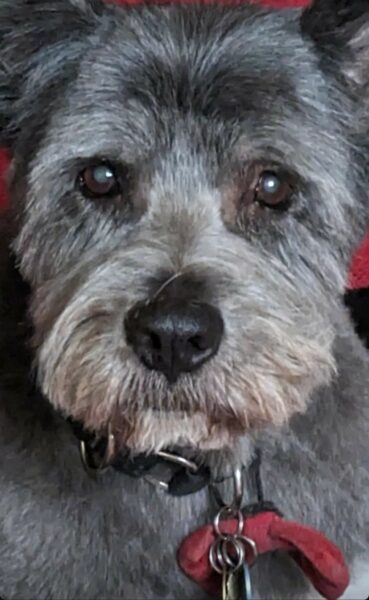
New challenge recognized: glossy black fur. leave a comment
Leave a Reply
-

finished this piece of a much missed lucky boy; oil pastel on canson mi-tientes paper.
leave a comment
Leave a Reply
-
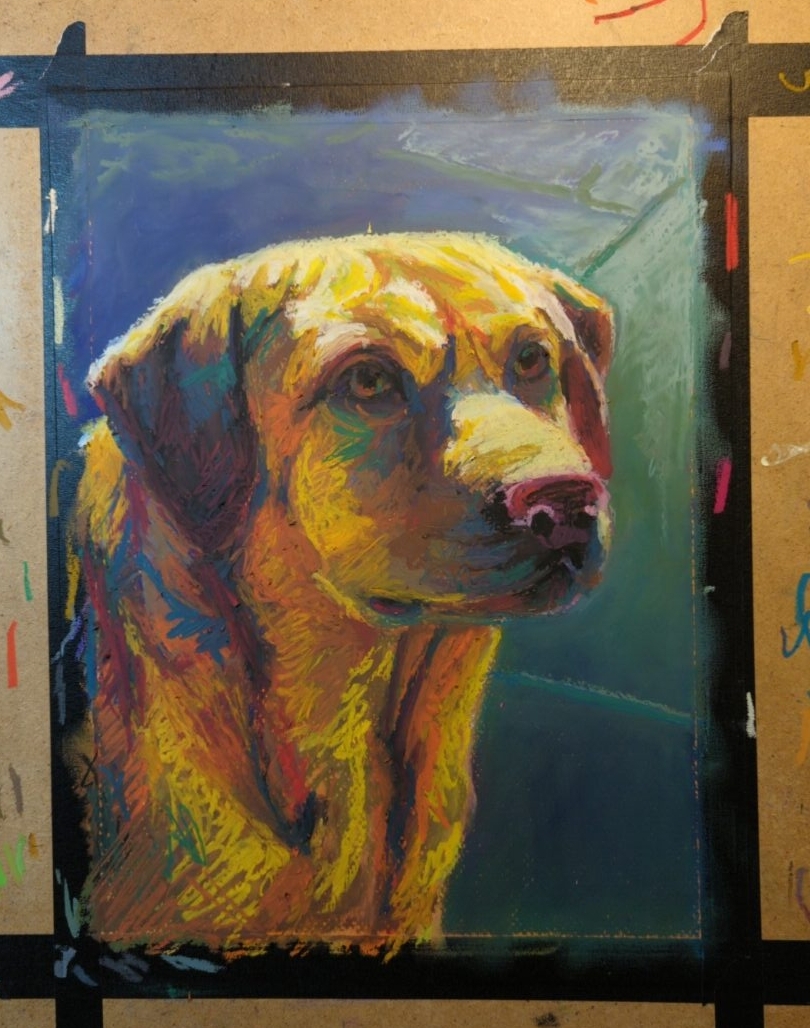

working on canson mi-tientes paper, which really let’s the pastel slide around despite the rougher side’s surface texture.
leave a comment
Leave a Reply
-
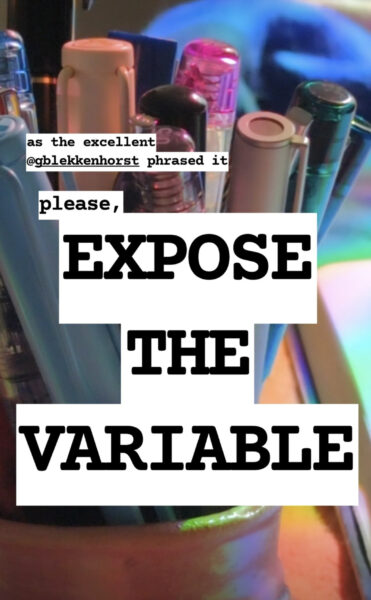
how i am doing accidental exposure therapy for my fear of bugs
posted:
updated:
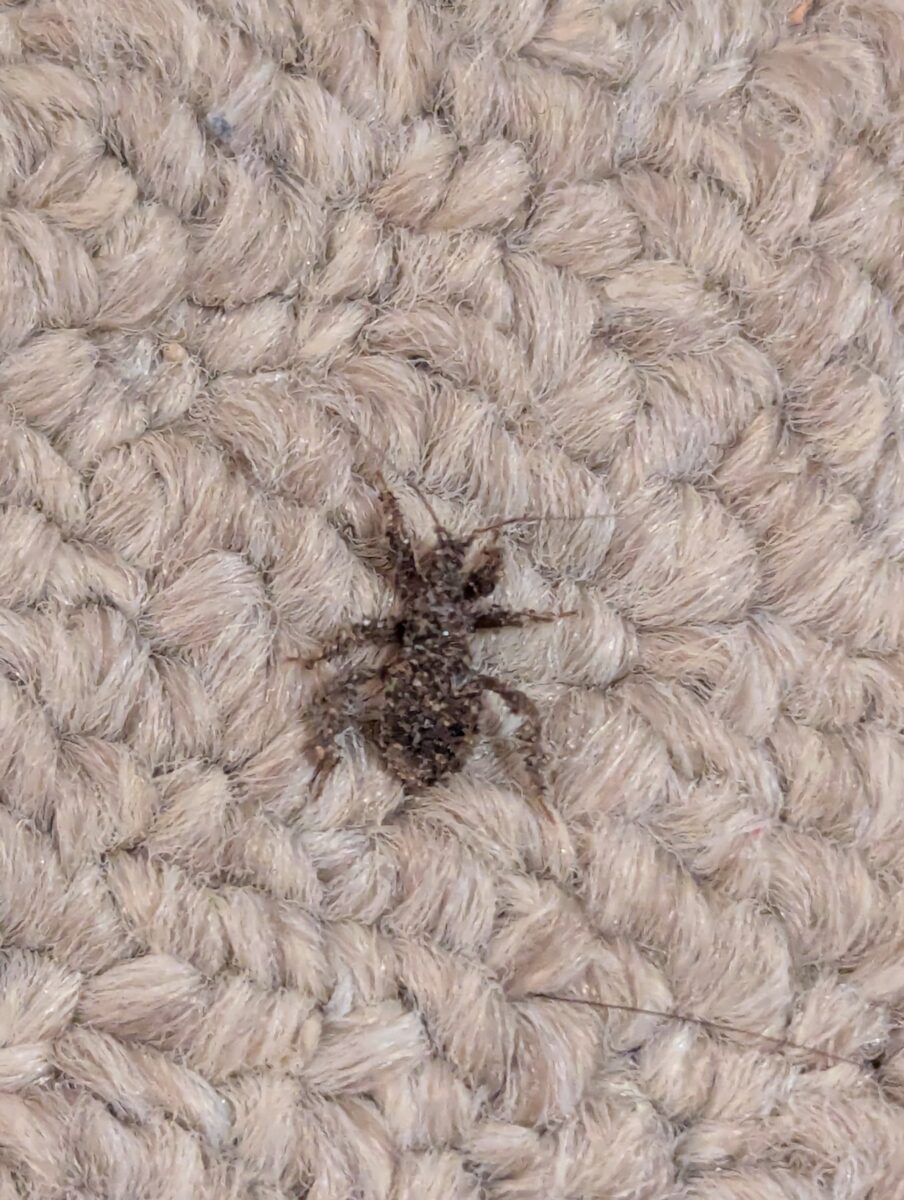
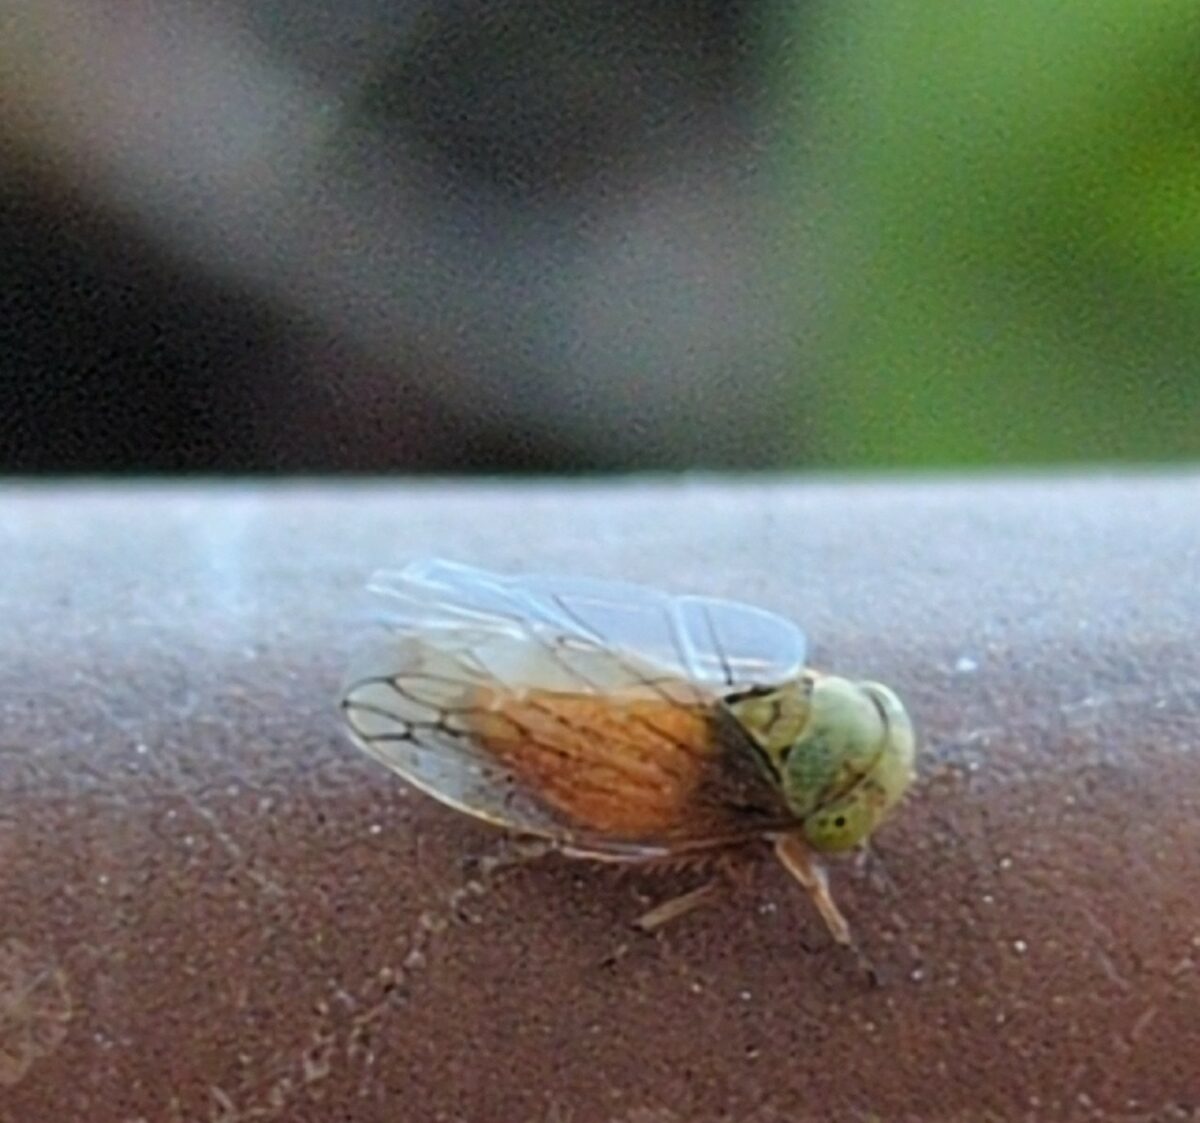
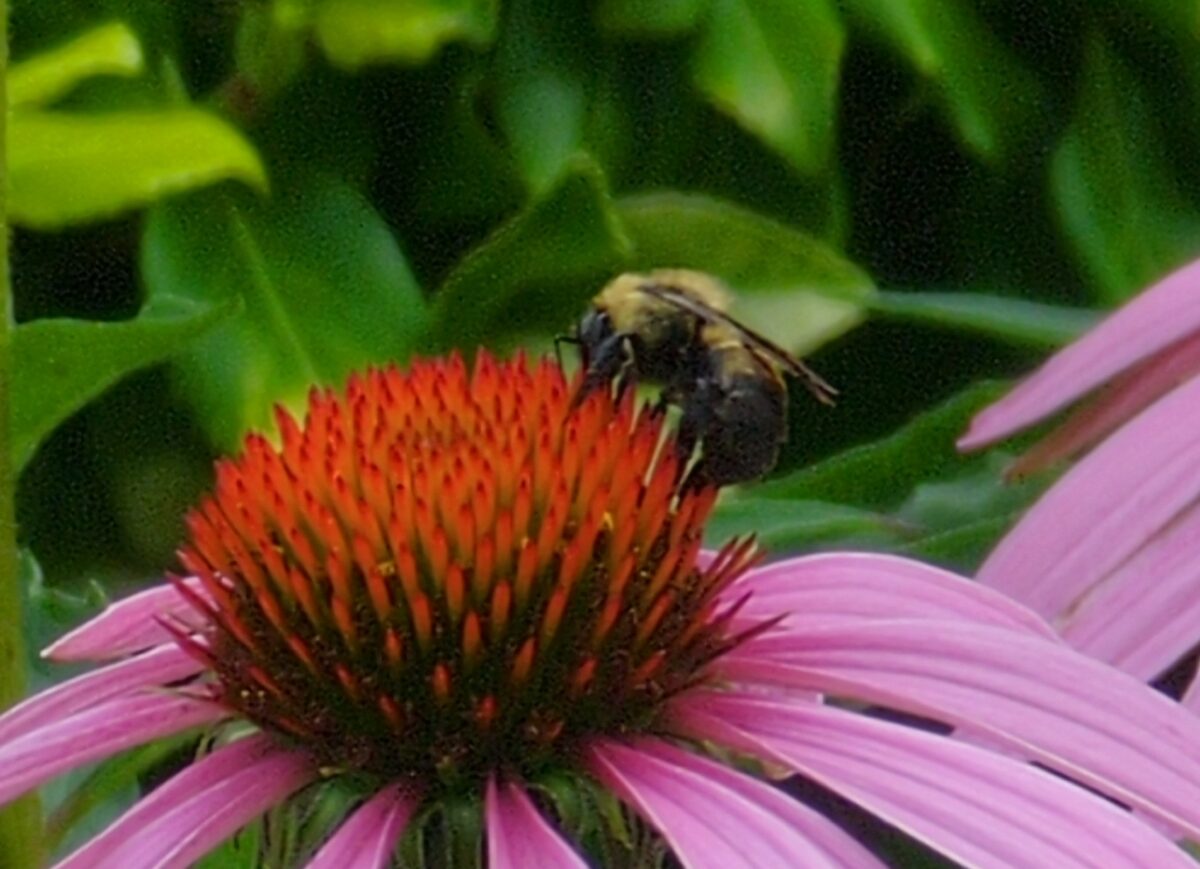
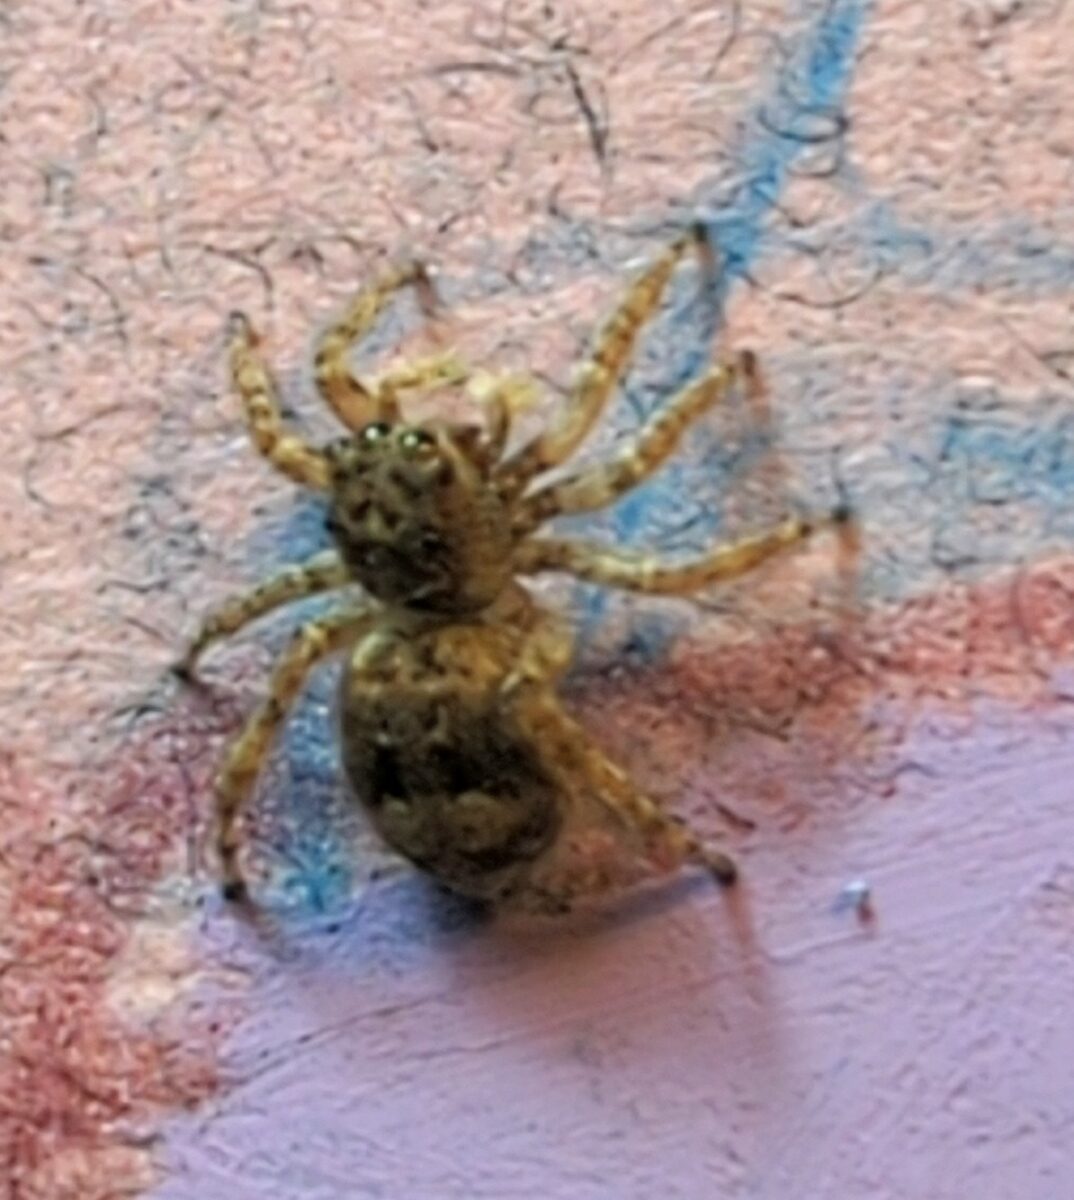
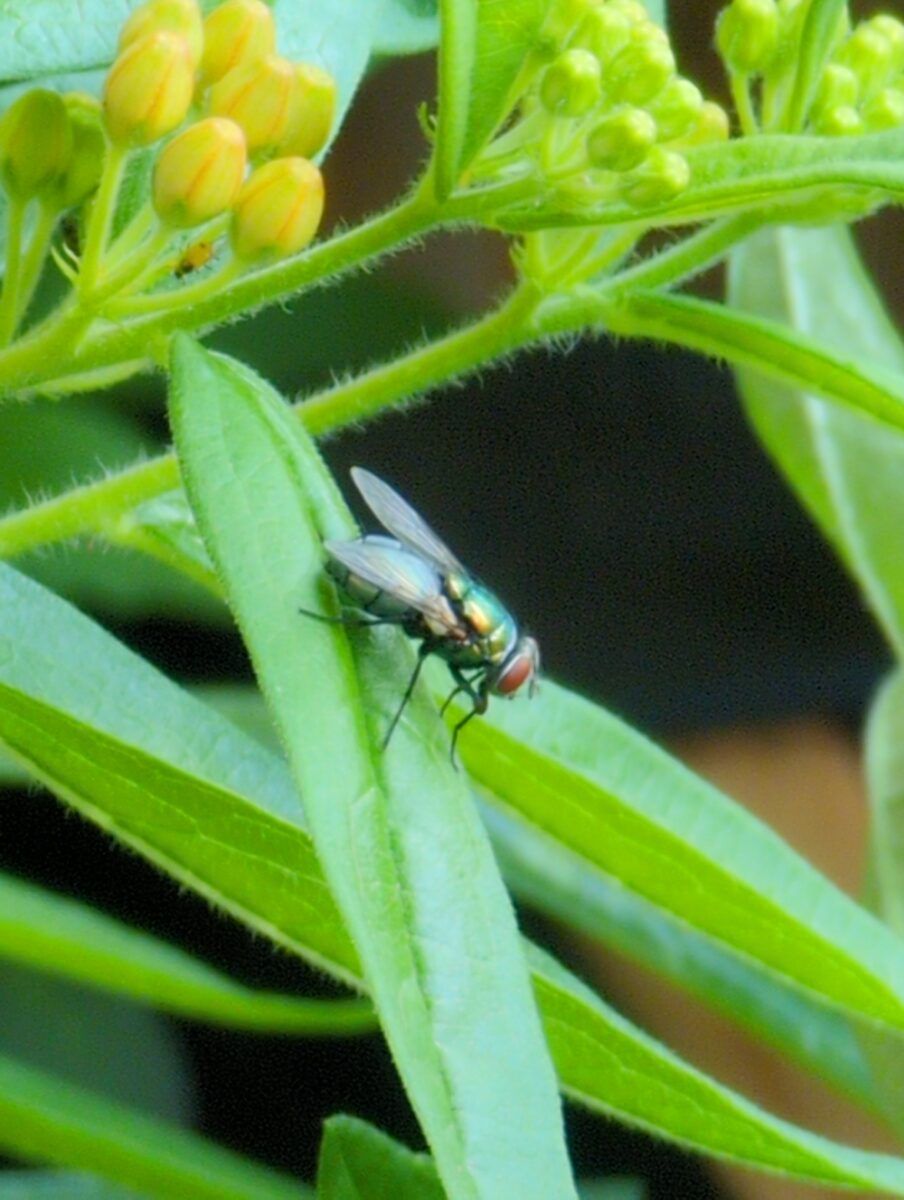
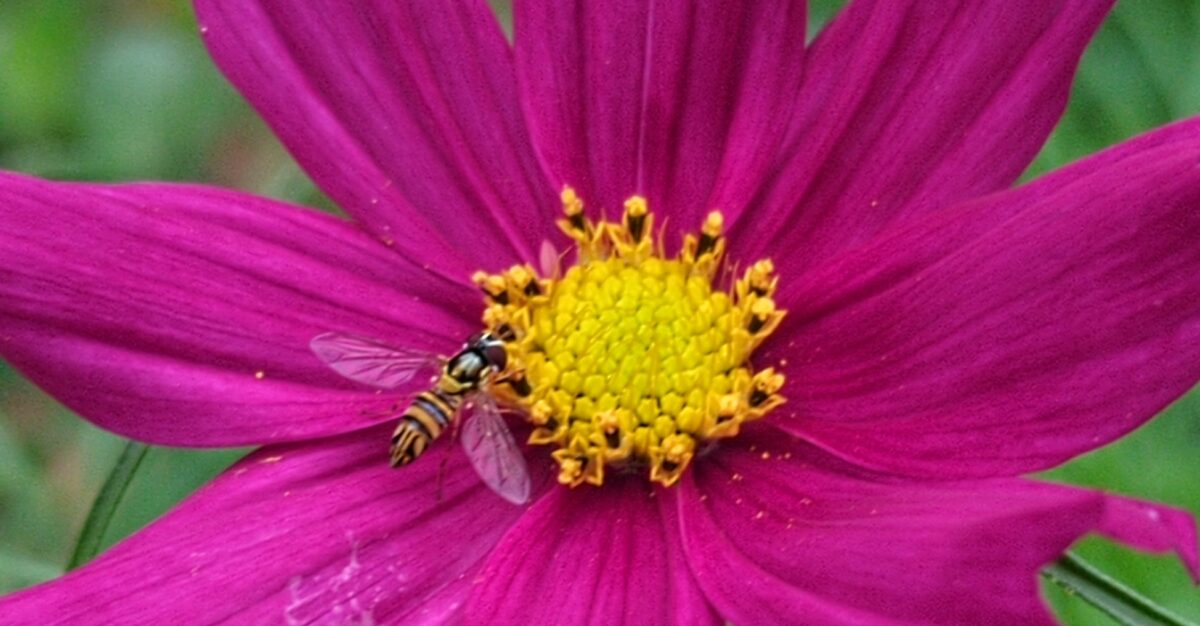
posted to: phototagged: bee, bugs, fly, inaturalist, insects, leaf hopper, moth, nature photography, photography, spider, structureSo I’ve been taking photos of bugs, now that I can trust my phone to not chew up any macro or zoom photography I take, and sharing them onto iNaturalist. it scratches my look I took a photo itch, it scratches my talking about cool things itch, it often tells me what bug I took a photo of, and it connects me with a whole lot of other people who occasionally also look at my photo of a bug and say yep that’s that bug. it’s a really great motivator is what I’m saying. but the best thing about this is that it has completely changed the dance my brain does when it sees a bug.
for context, I am a twitchy and tense person who doesn’t see very well in dim light or out of my peripheral vision, so I am usually very surprised by bugs flapping or running into my field of view — or if I’m very unlucky I hear them first. and because I’m twitchy that often makes me jump, flail, and in general just be stressed. but now, while I might still yell and flail once if I am surprised by a bug, the secondary instinct of taking its photo and putting it on inaturalist to find out what bug it is completely takes over my brain almost immediately. and all of the adrenaline and fear response that I’ve spent a lifetime training myself for just leaves.
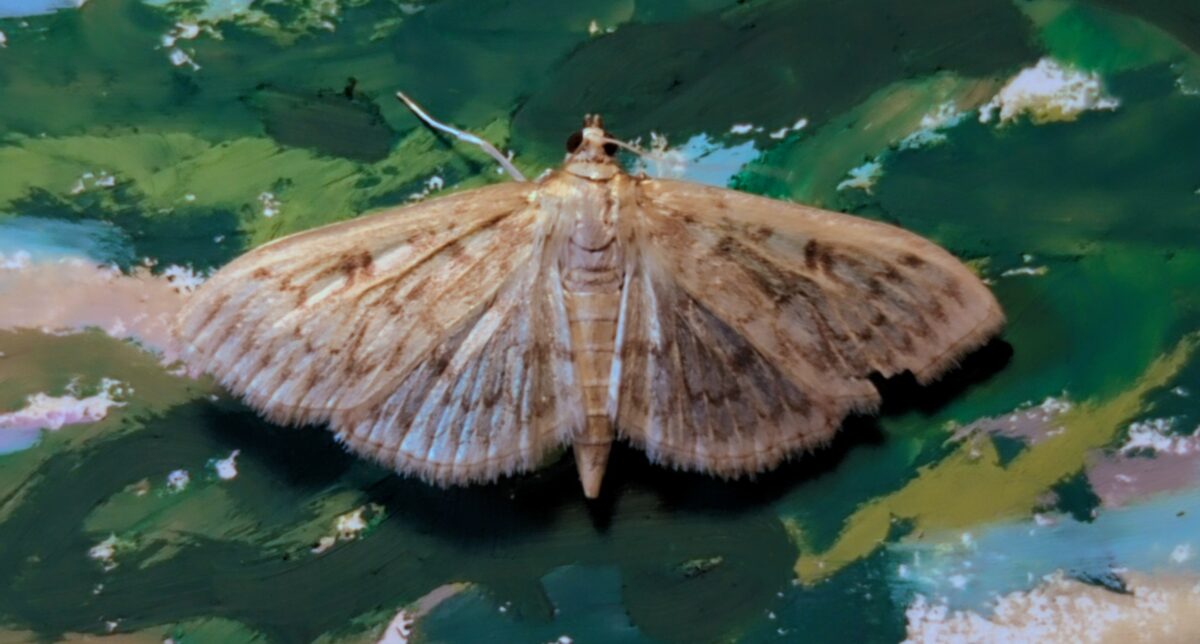
The other night I let this little moth climb onto my hand and it let me carry it outside and it was the sweetest interaction I’ve had with a wild animal maybe ever? and while I extremely do not expect to have that kind of interaction with a house centipede or any of the many wasps in my yard, I don’t think I could have had it with a moth either before improving this loop in my brain.
which is to say, if you too do a lot of yelping and freaking out over bugs despite wishing you were not yelping and freaking out at every bug, maybe try taking a photo of more bugs. going out and opting into finding and looking at a bug has made being surprised by them much, much less awful.
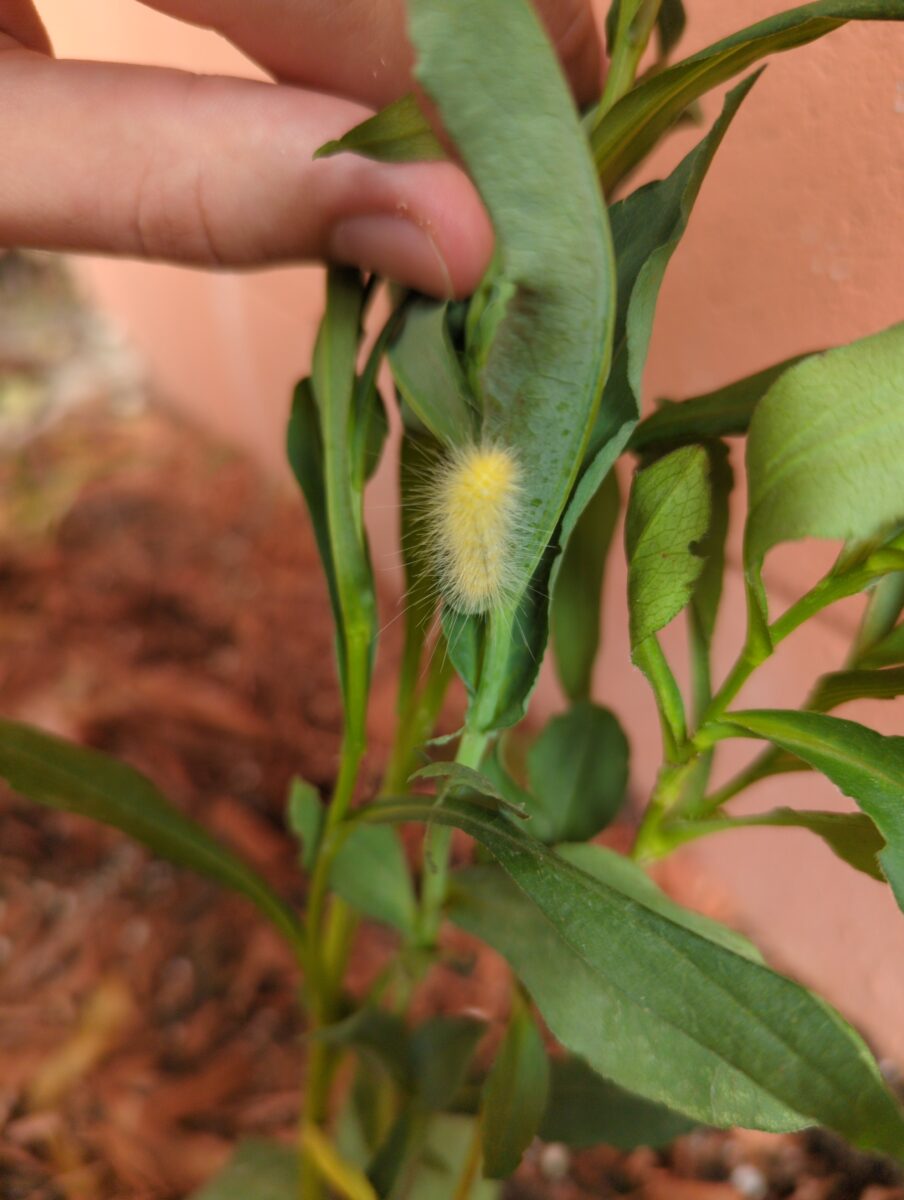
Here, also, have some cool bug photos:


August 2024 update bonus!
Yesterday I watched a small ant wander around my patio table, pause, give herself a good scratch, take a solid look (or smell) around the area, and then go about her day. Relatedly, this tumblr post spoke to my soul:
leave a comment
Leave a Reply
-
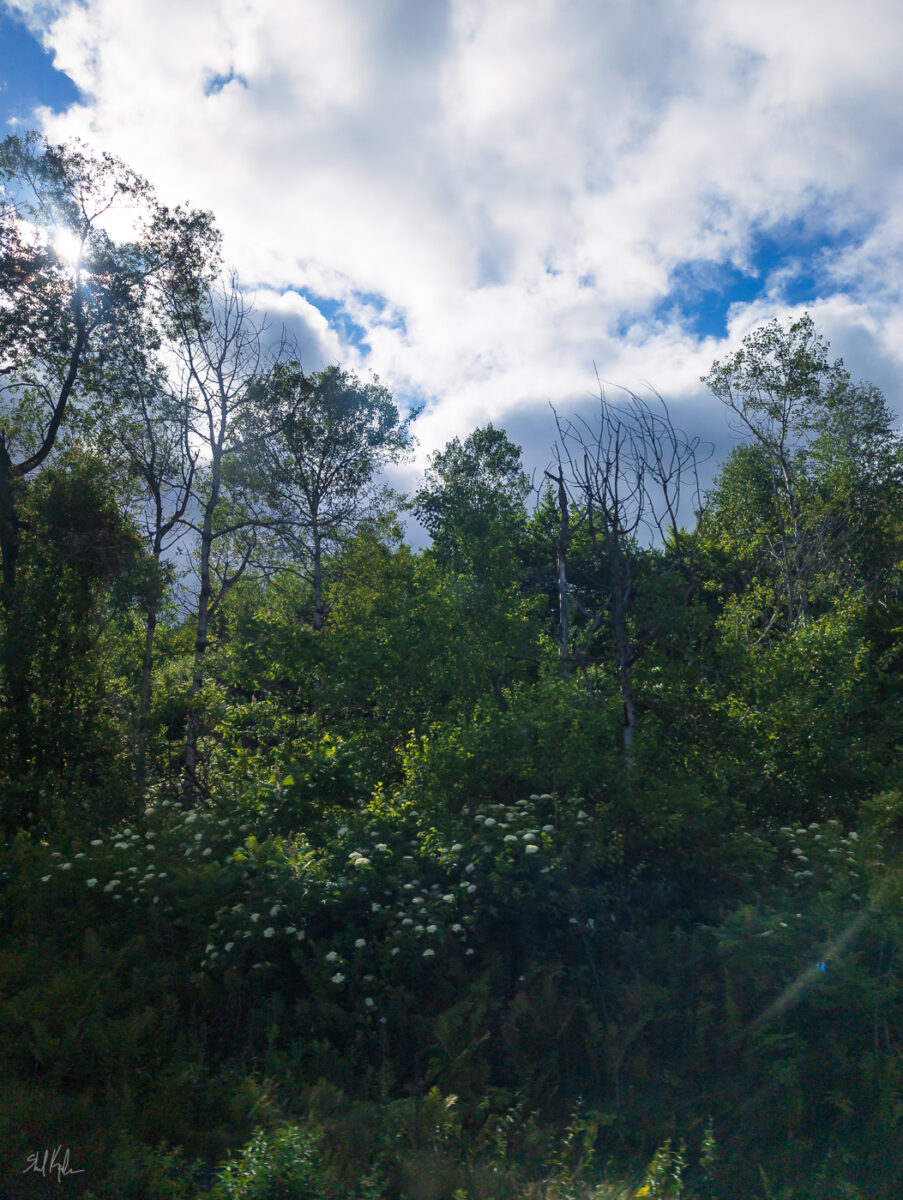
Can’t resist a backlit forest! I love this especially because it feels like a Paul Saari or George Outhwaite painting.
leave a comment
Leave a Reply
-
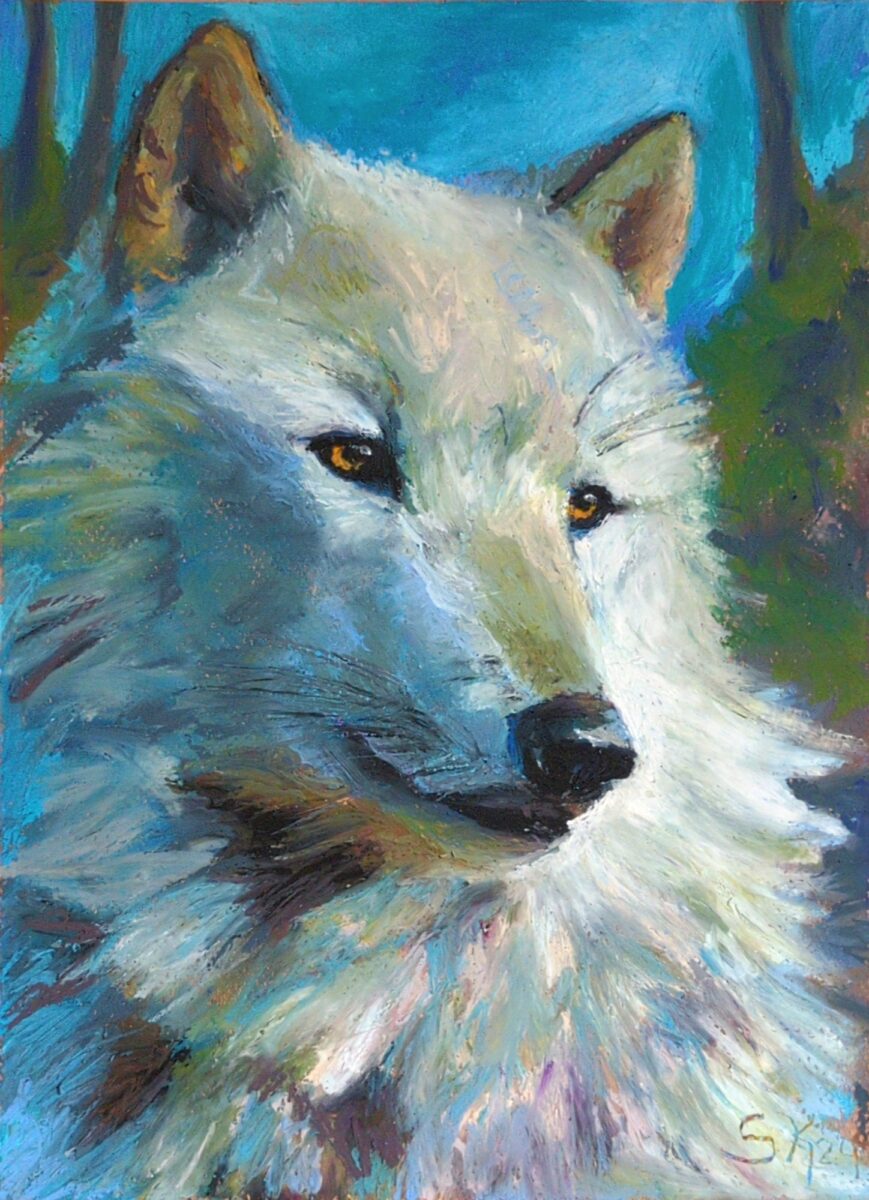
painted on canson mi-tientes pastel paper
2 responses to “Wolf in oil pastel”
-
I love this
-
✨!
-
leave a comment
Leave a Reply
-
-
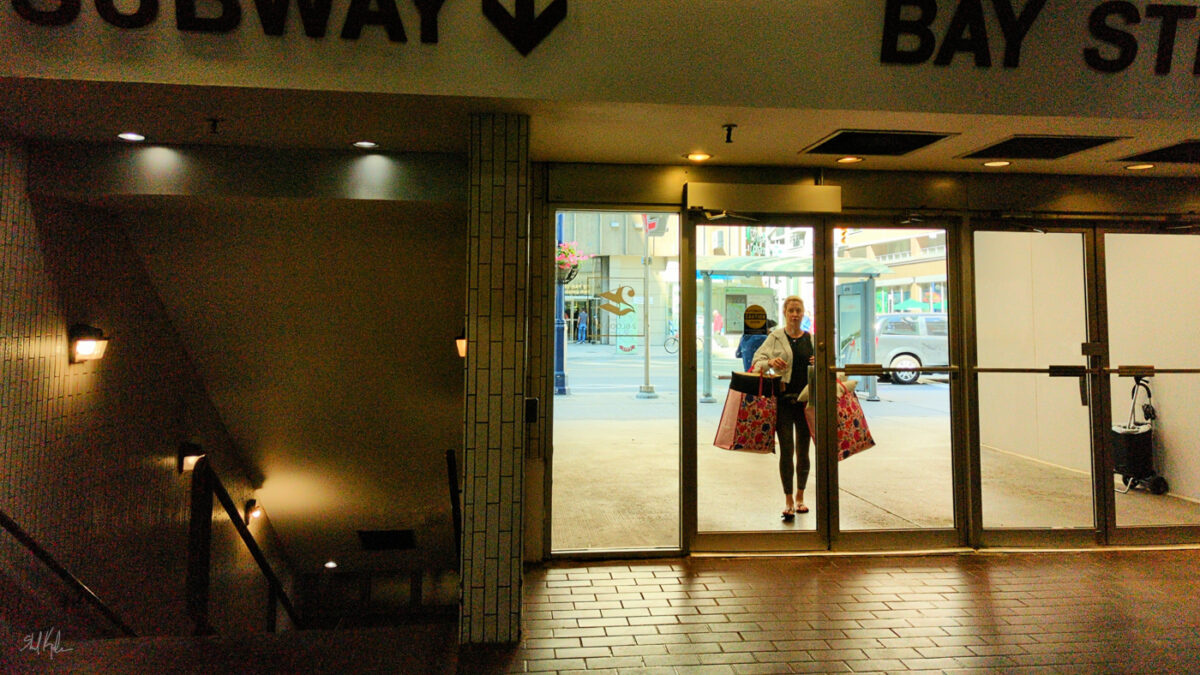
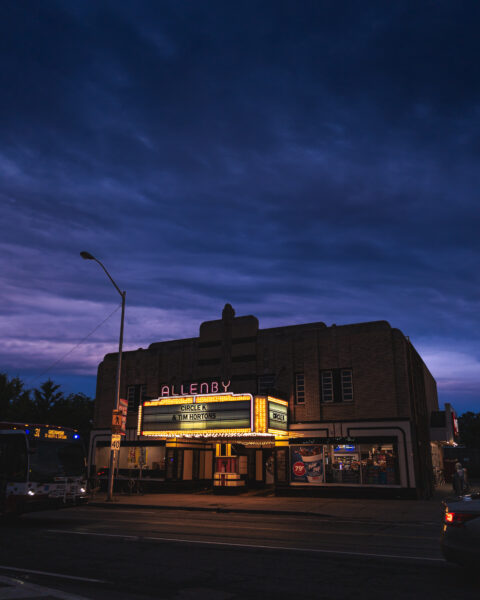
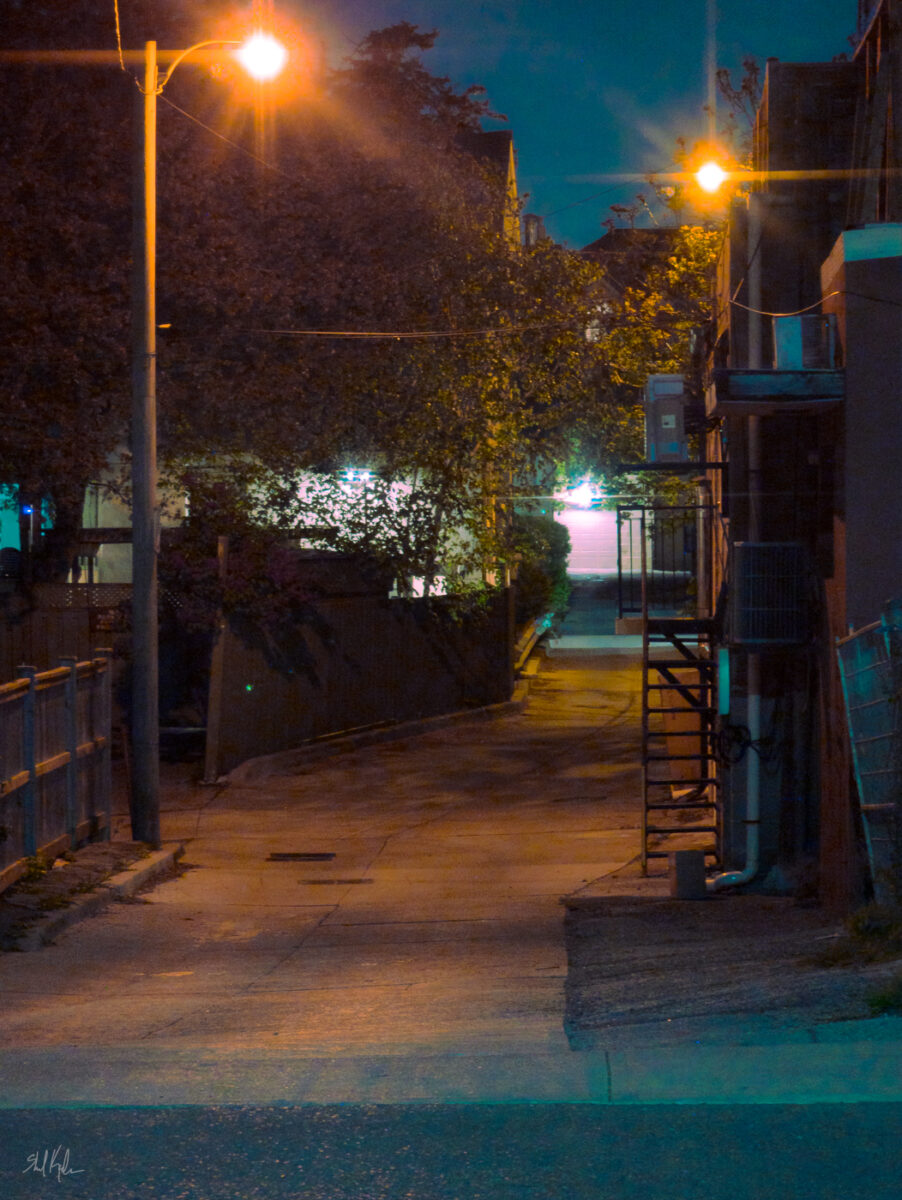
I just love the soft glow of artificial lighting on worn tiles!
leave a comment
Leave a Reply
-
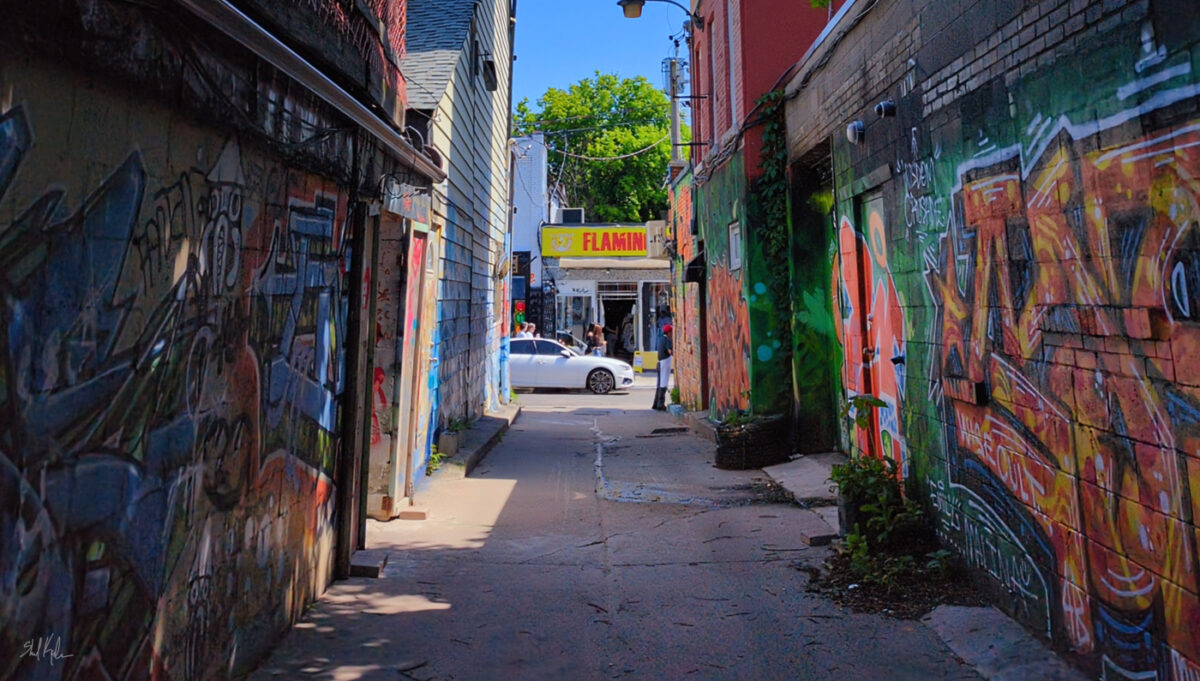
sunlight! graffiti! one weirdly distracting white sedan!
leave a comment
Leave a Reply
-
in a Robert Bateman sketchbook, using Neopastels from Caran d’Ache.
leave a comment
Leave a Reply
-
delightfully sunny alleyway
leave a comment
Leave a Reply
-
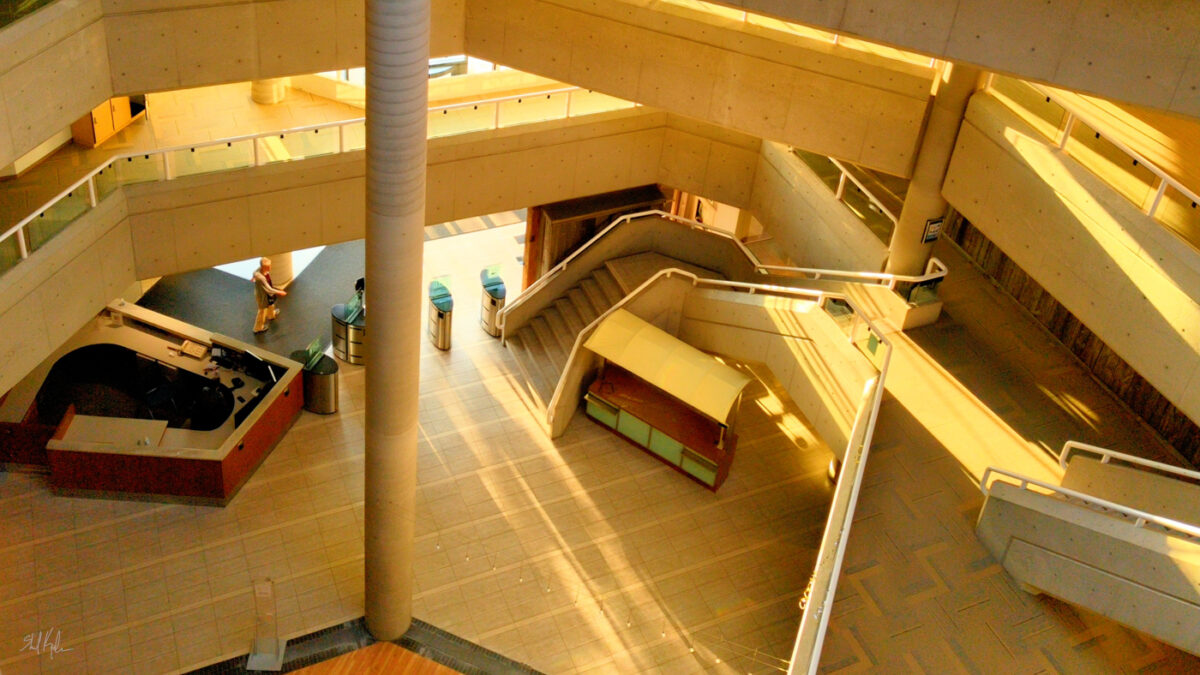
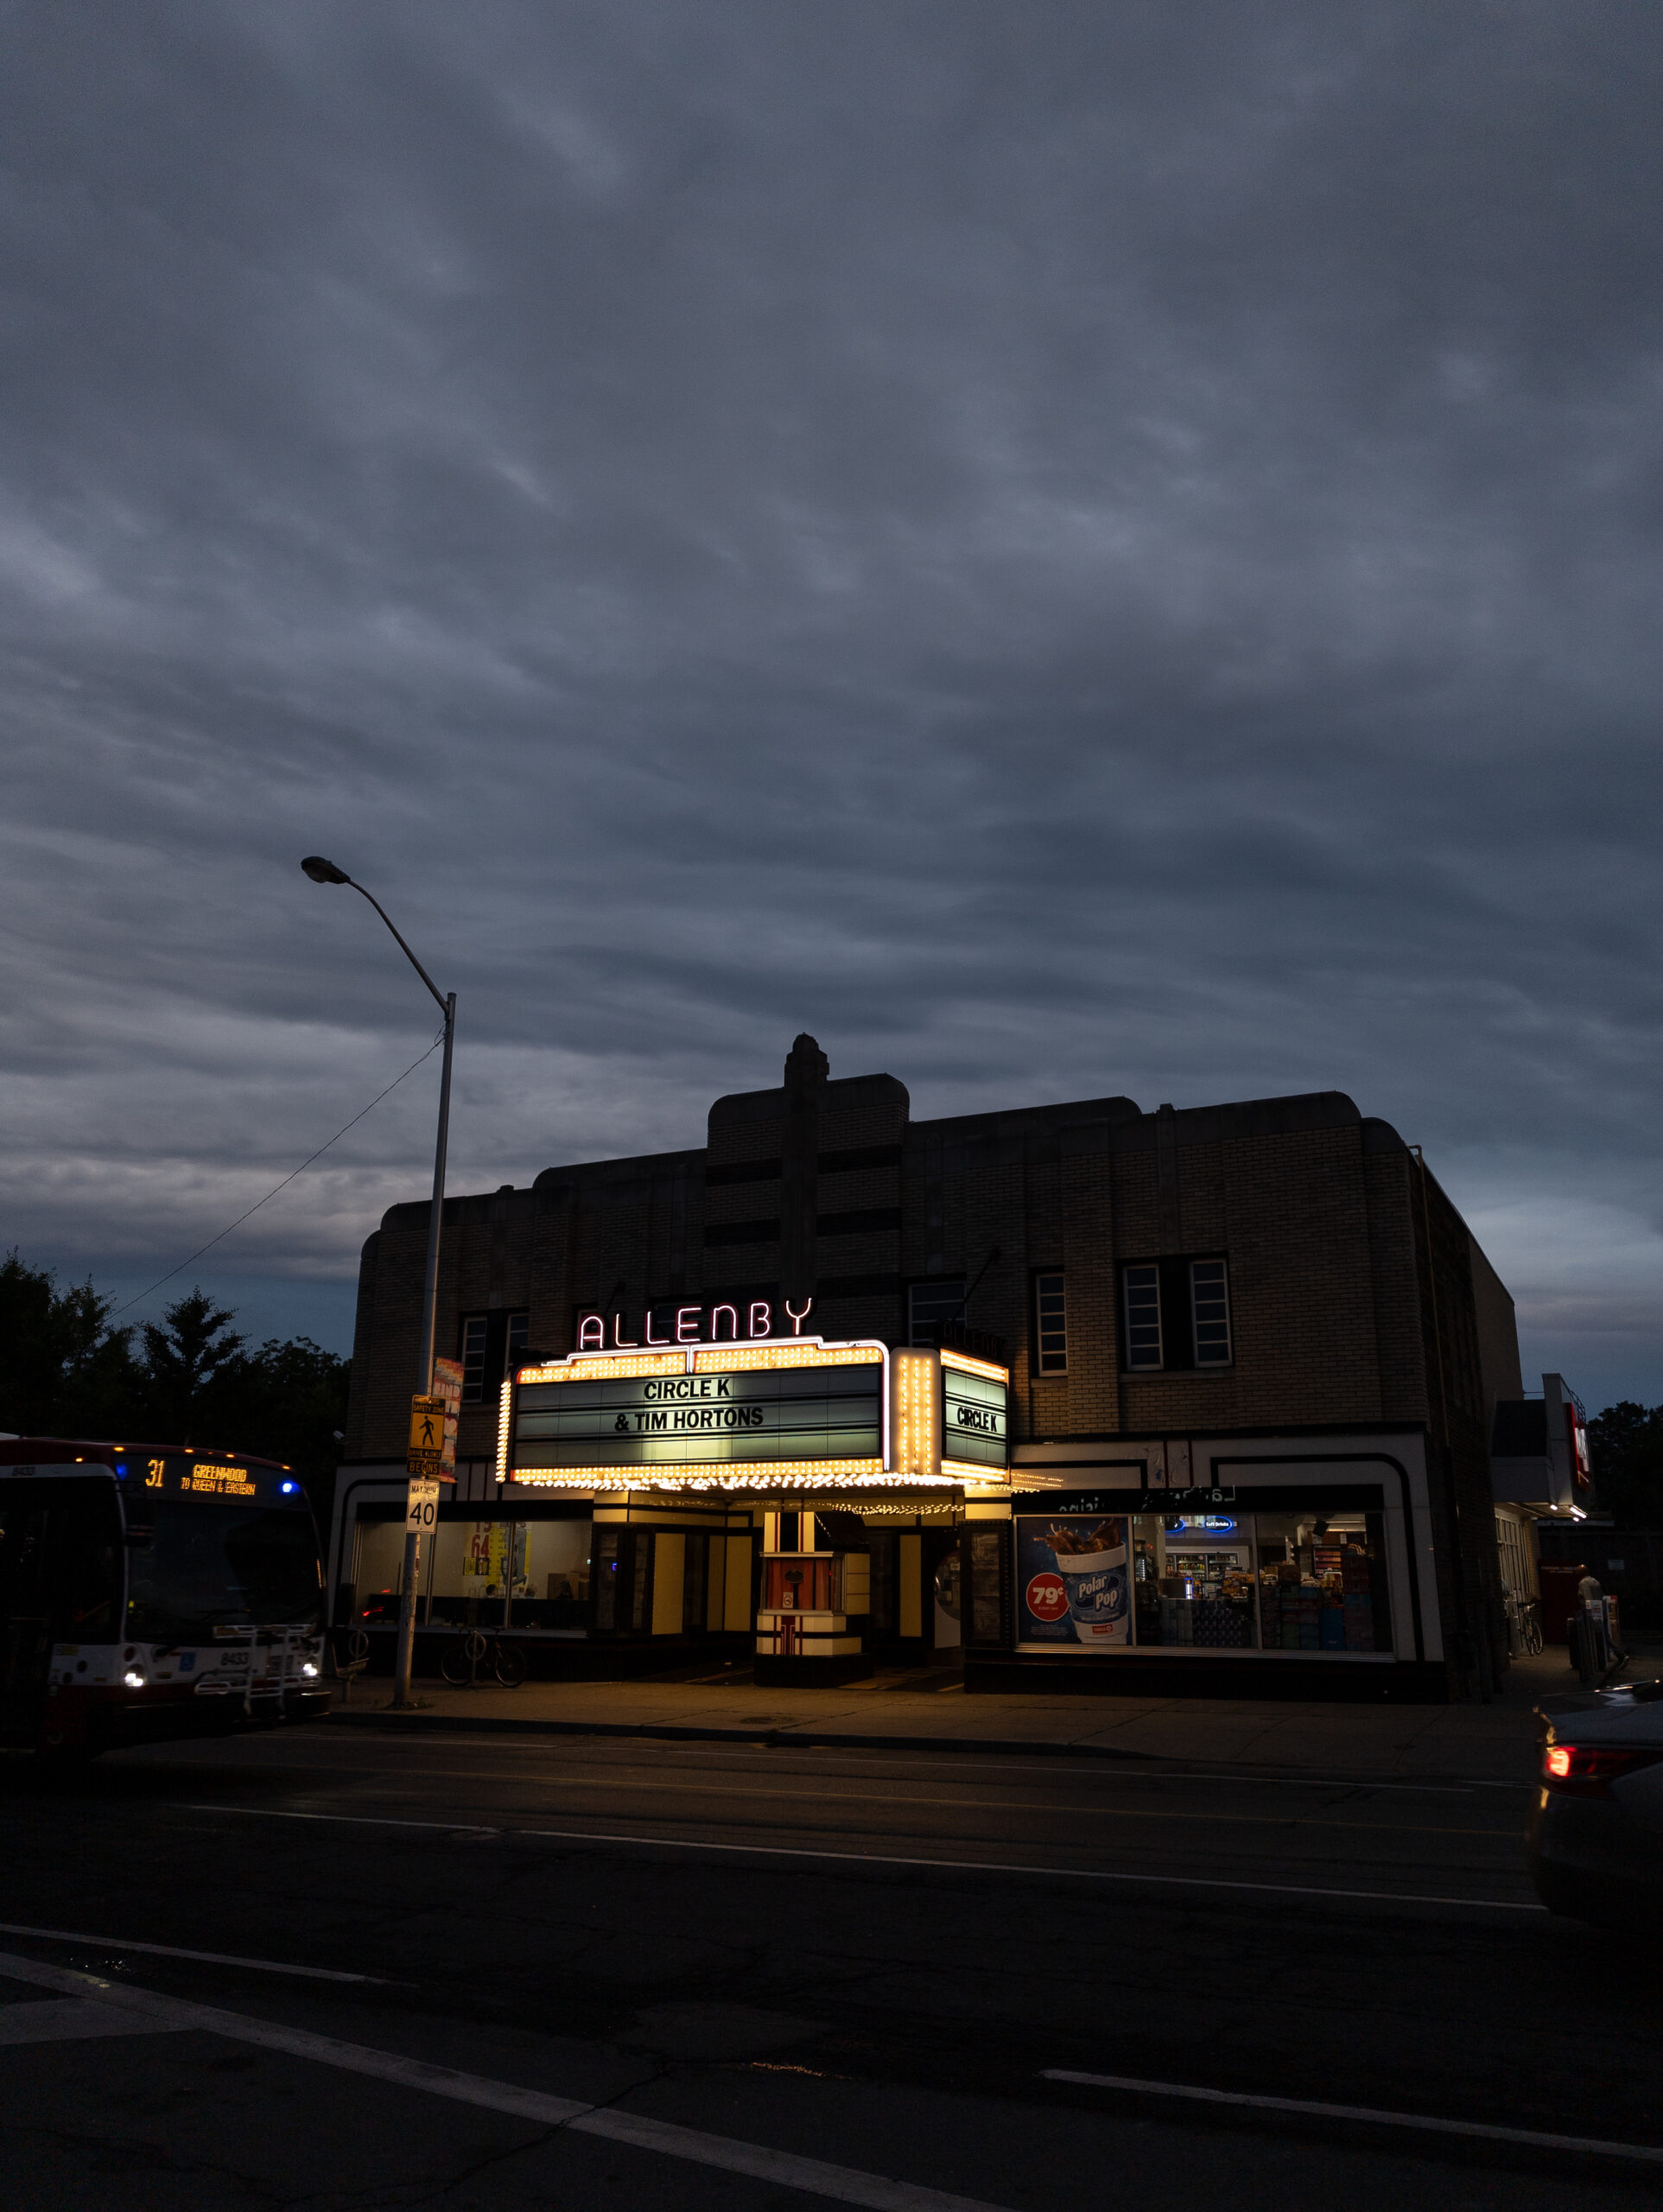
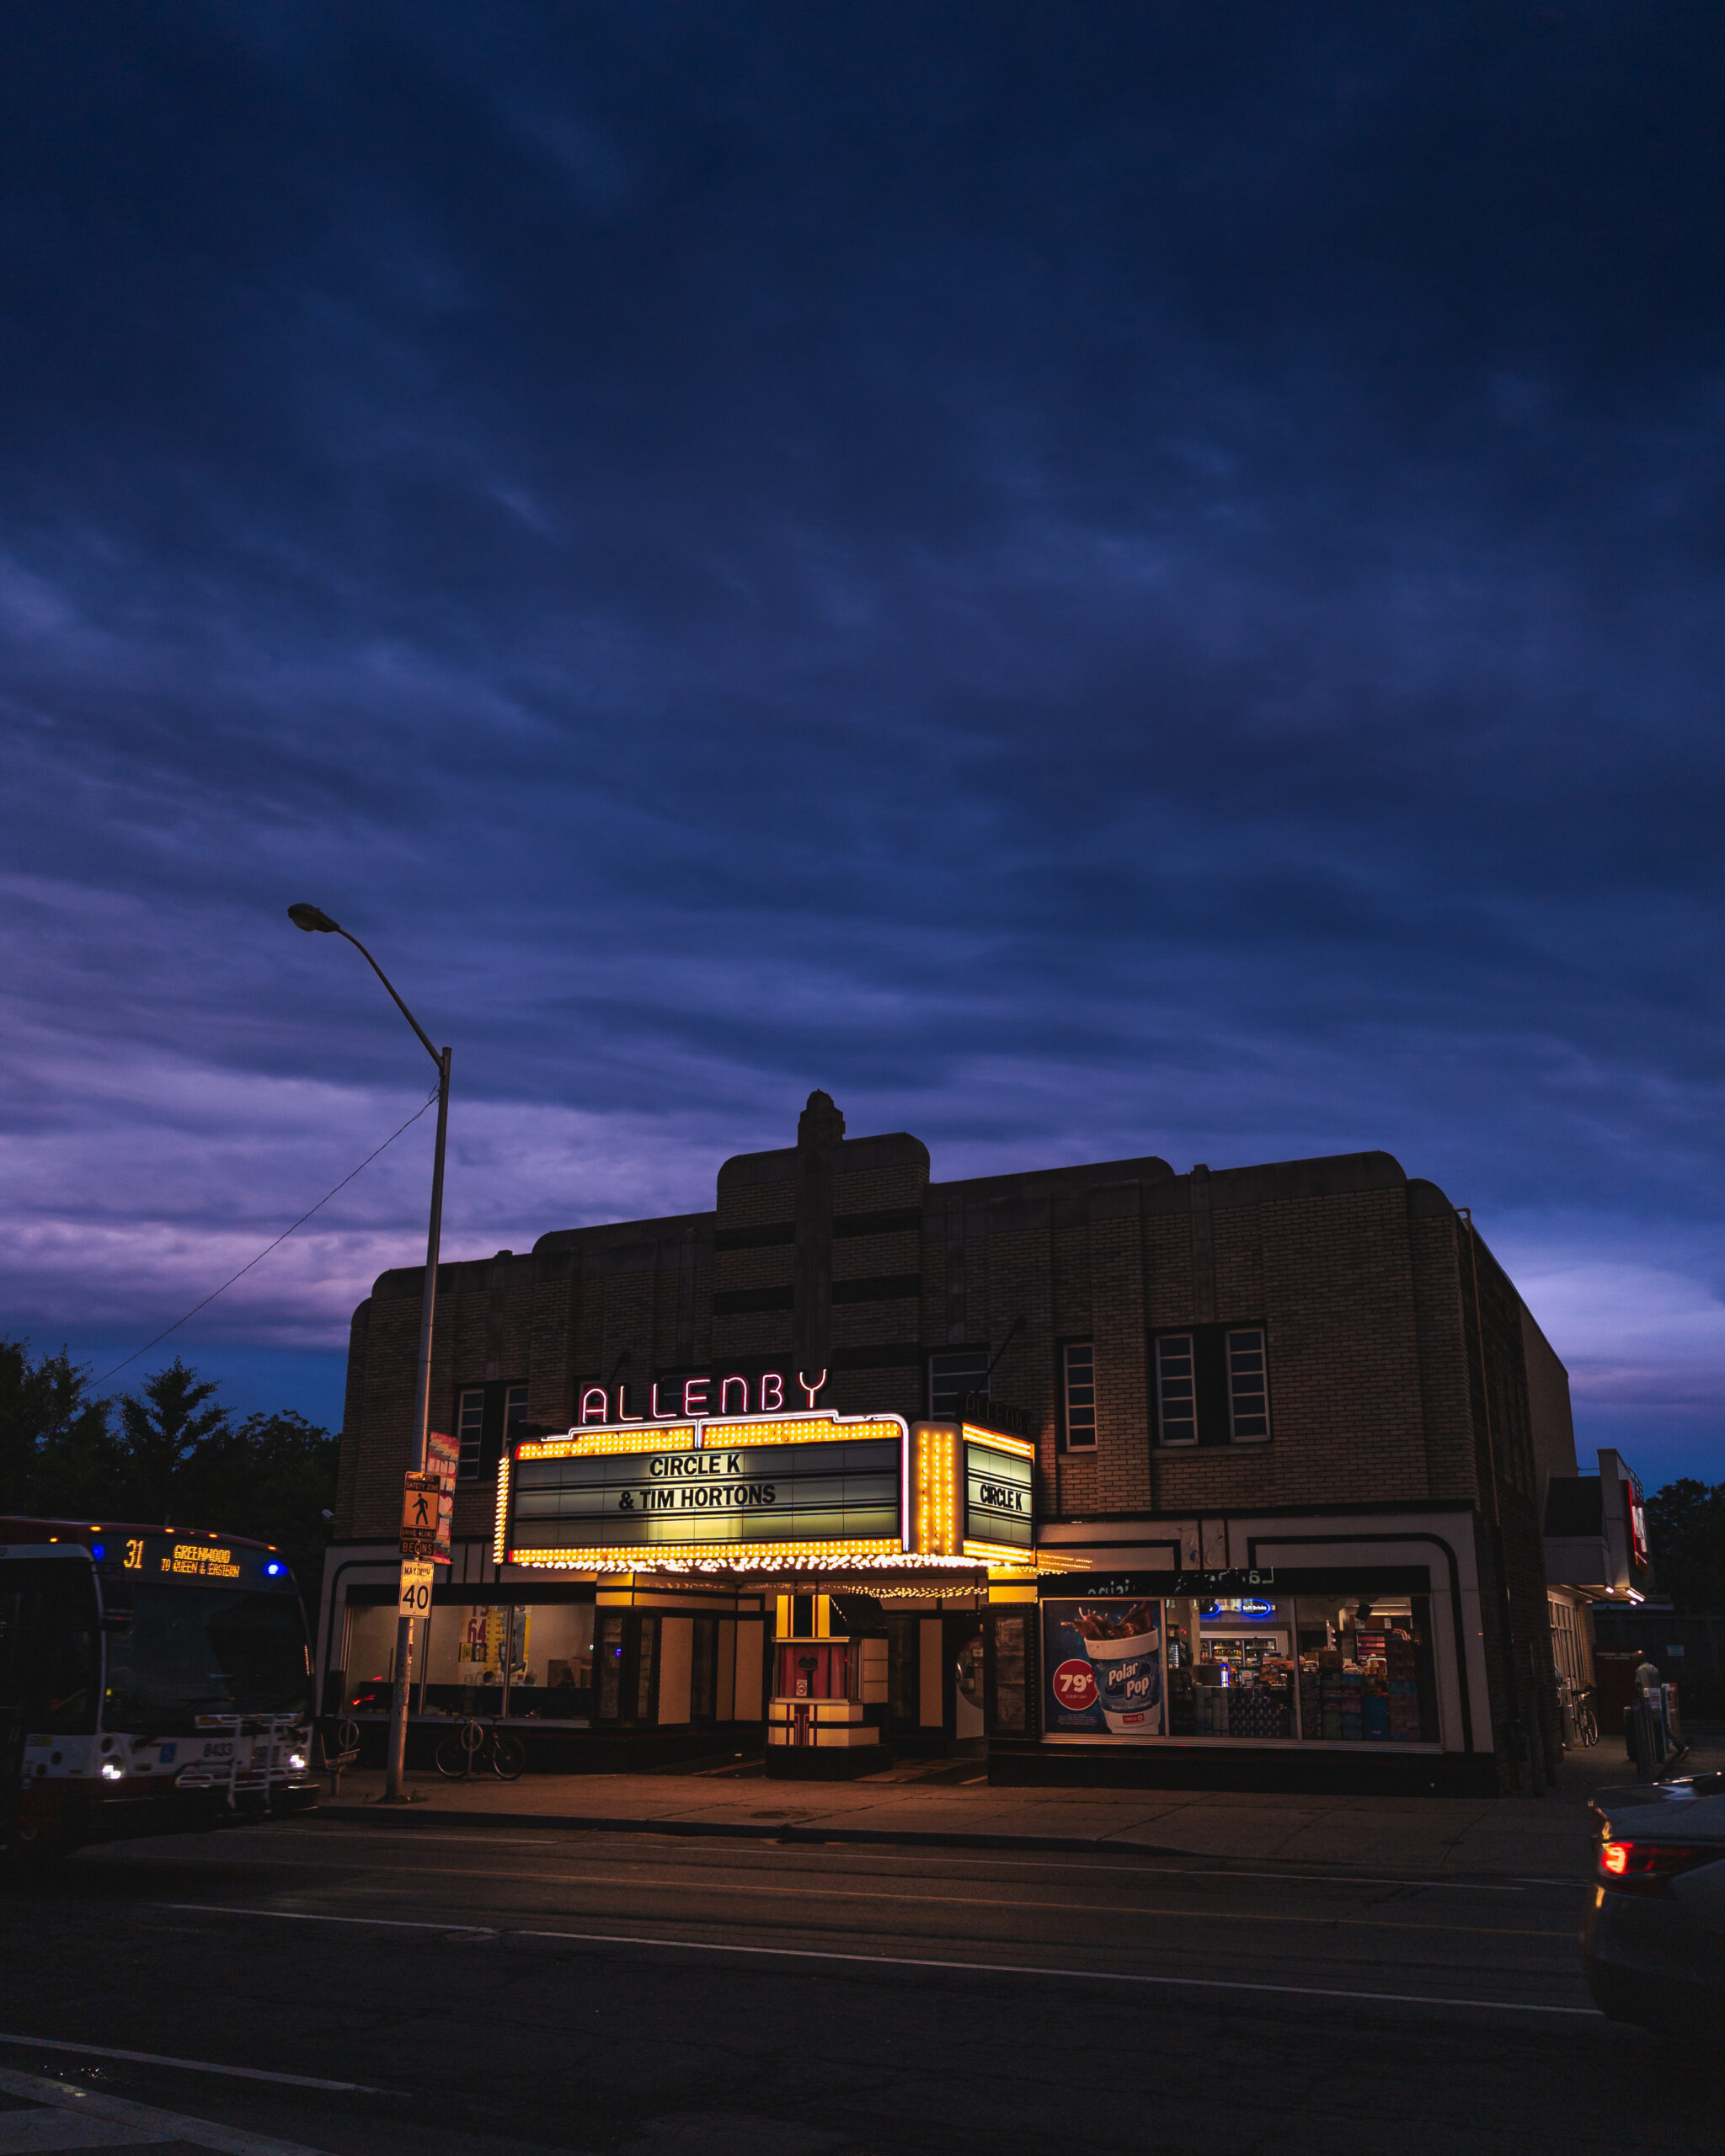
Visited a beautiful and slightly apocalyptic building at the perfect time of day.
2 responses to “glowing concrete”
-
argwggwhd this is so beautiful!
-
god, right? how is brutalism so transcendent sometimes!
-
leave a comment
Leave a Reply
-
-
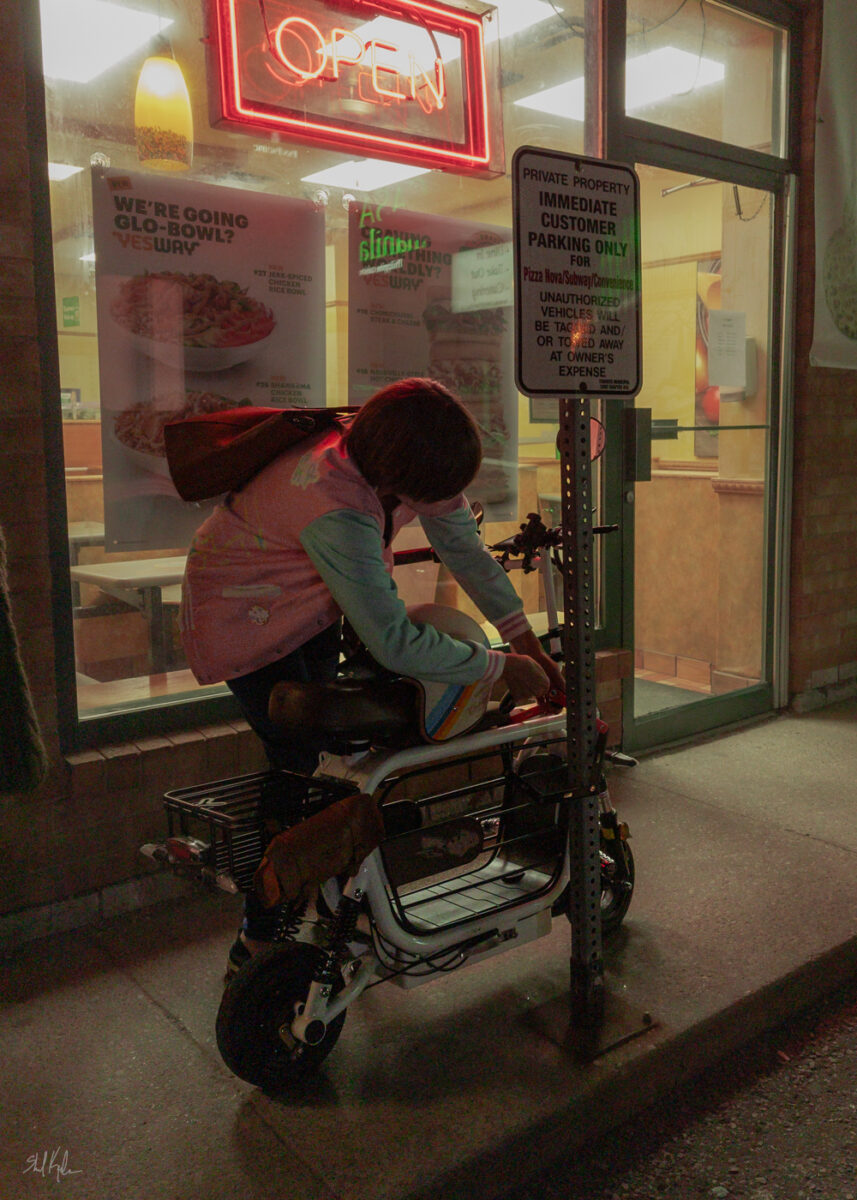
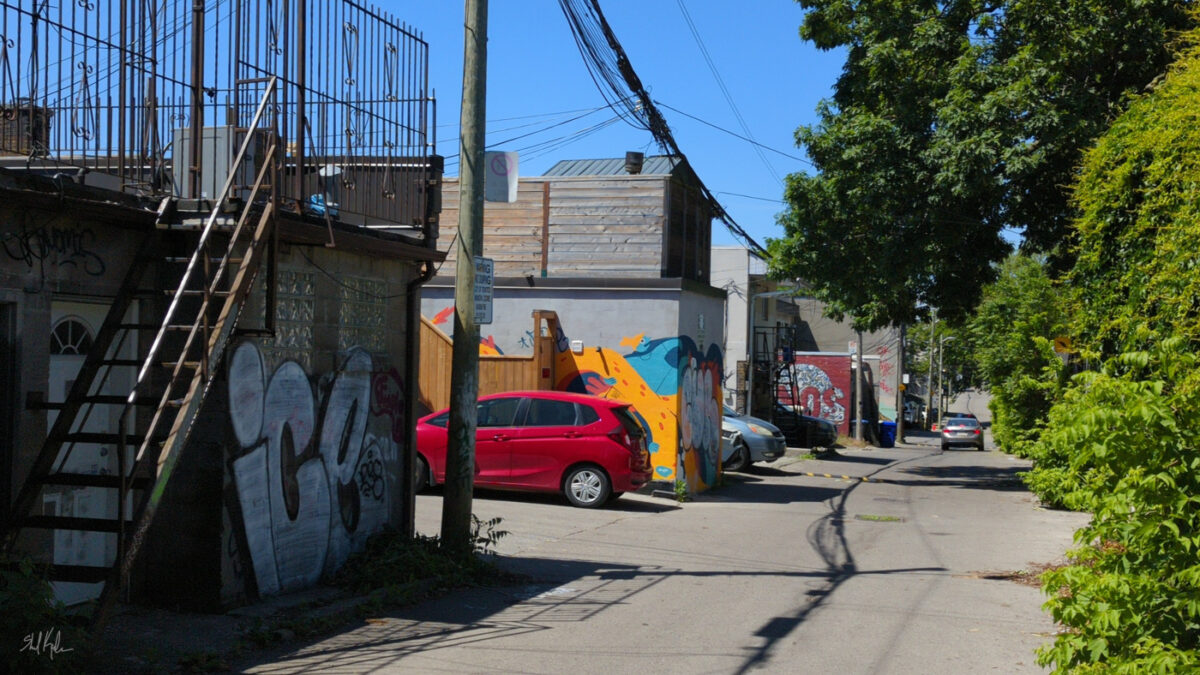
My friend bought the absolute cutest bike and has kindly invited me to photograph it whenever. And I loved the warm light here especially.
leave a comment
Leave a Reply
-
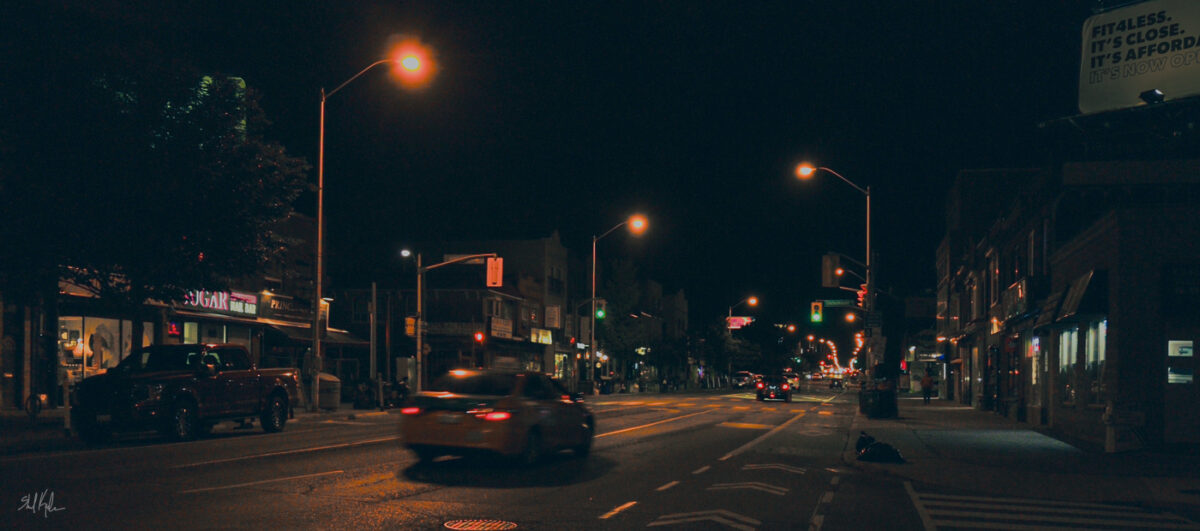
playing with long exposures and wrangling values after to make things feel more nostalgic.
leave a comment
Leave a Reply
-
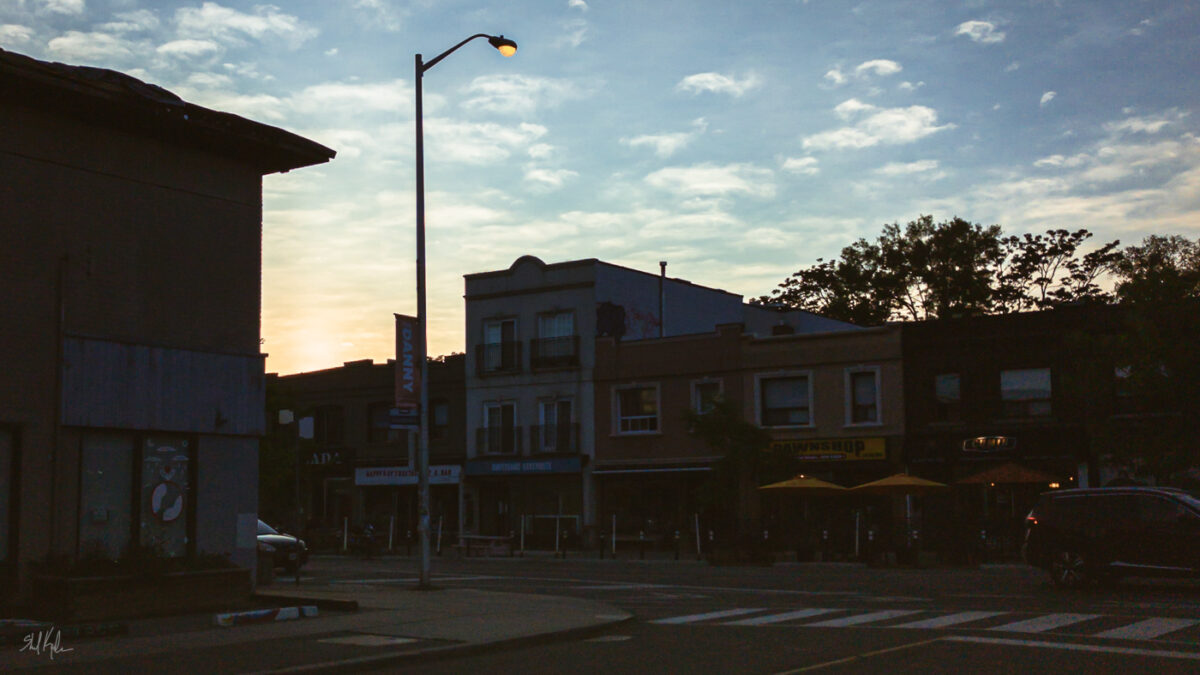
I love a dramatic sky!
leave a comment
Leave a Reply
-
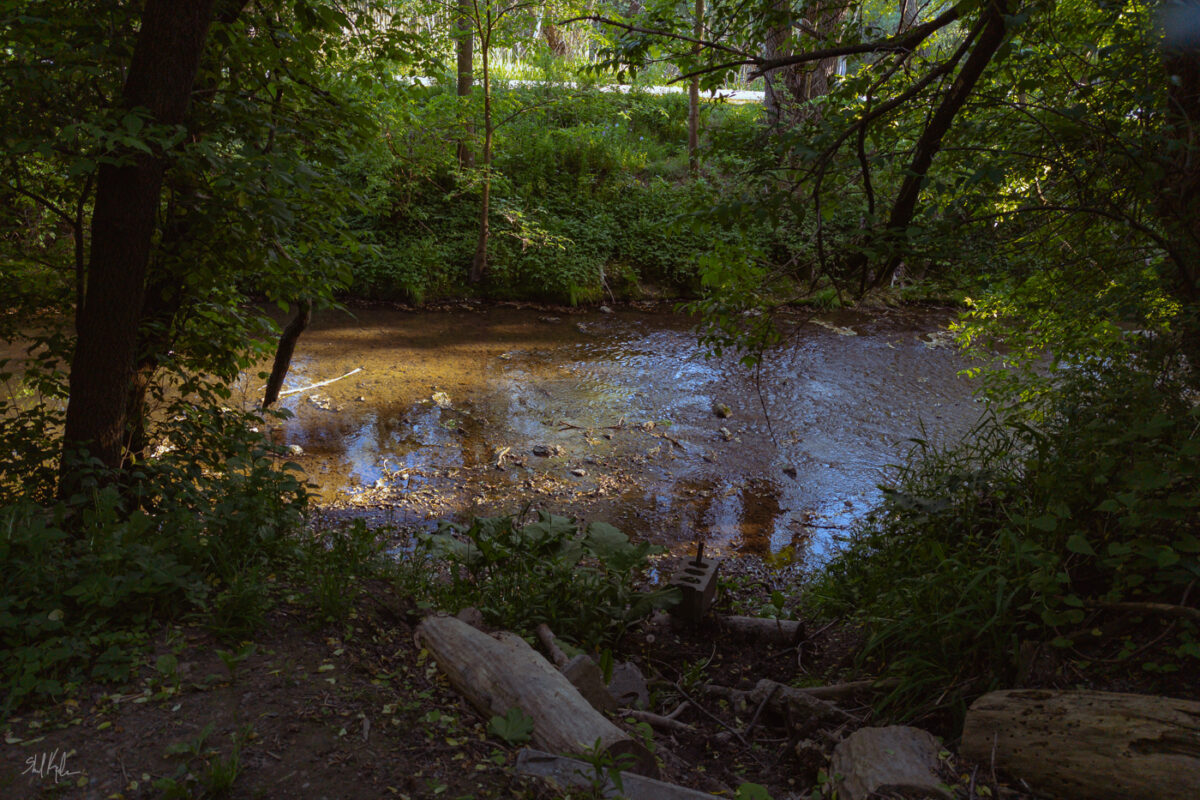
Love this creek at golden hour.
leave a comment
Leave a Reply
-
fucking around with extreme colour grading in lightroom and having a very nice time!
leave a comment
Leave a Reply
-
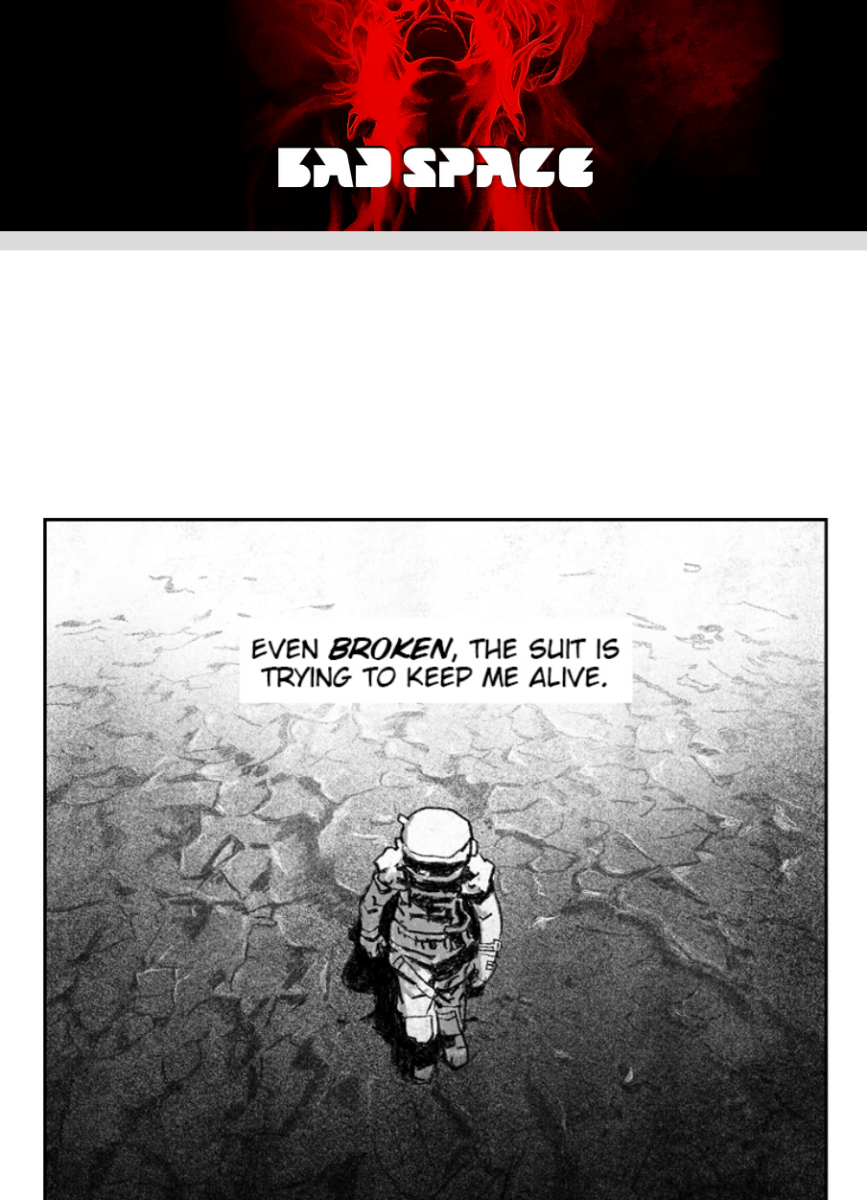
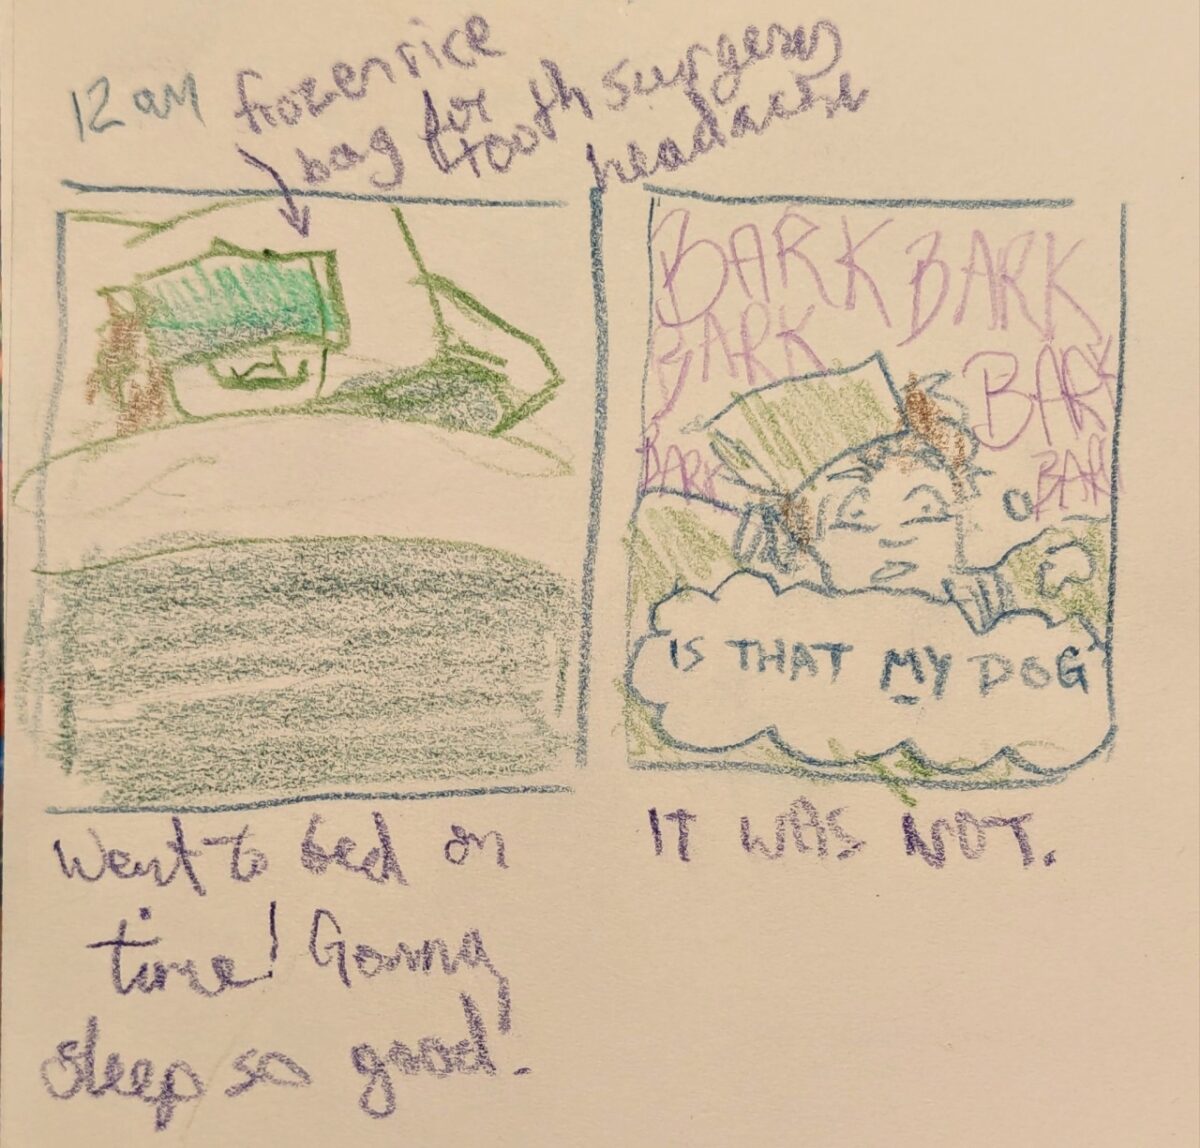
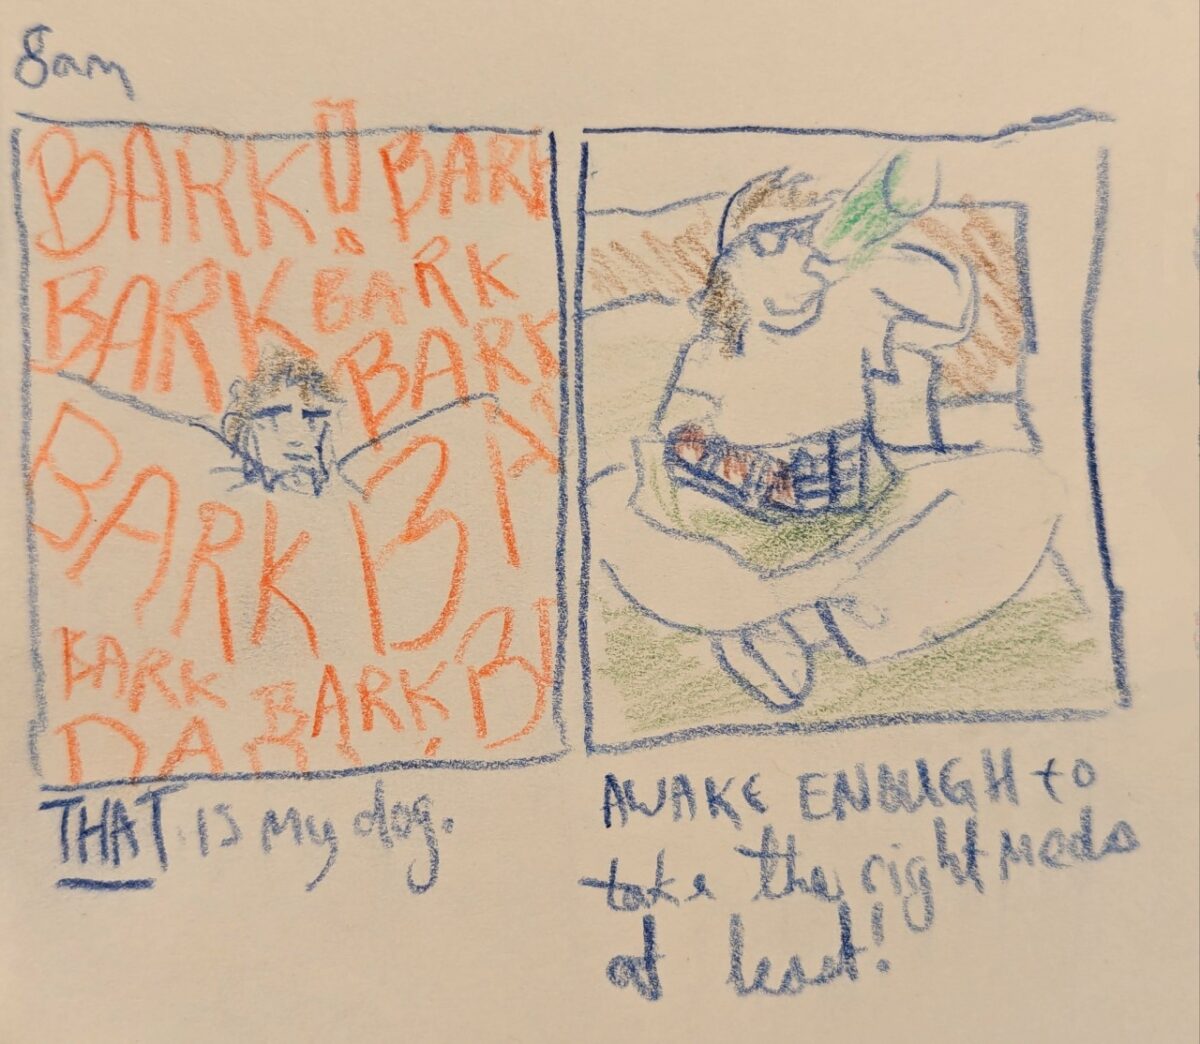
This short horror comic by Scott Base is making the rounds on tumblr again! and as it has haunted me for years, I feel it’s worth sharing:
leave a comment
Leave a Reply
-
Ceramics
posted:
updated:
posted to: arttagged: celadons, ceramics, crystal islands, glazing, learning, palette, sculpture, structure, underglazeI’ve been learning ceramics in a casual ongoing way now, enjoying getting out of my comfort zone, and playing with a new medium. Much like printmaking, kiln fired and glazed ceramics are really a collaboration with chemistry and physics as well as a personal creative act, and I love that aspect so much.
Below I’m sharing my work in reverse chronology – the newest stuff is at the top. I think? you can see some real progress, but it’s amazing how much more I have to learn! I really love the feeling of being at the start of a long journey into a medium — it’s gotta be one of the most inspiring feelings I encounter as an artist.

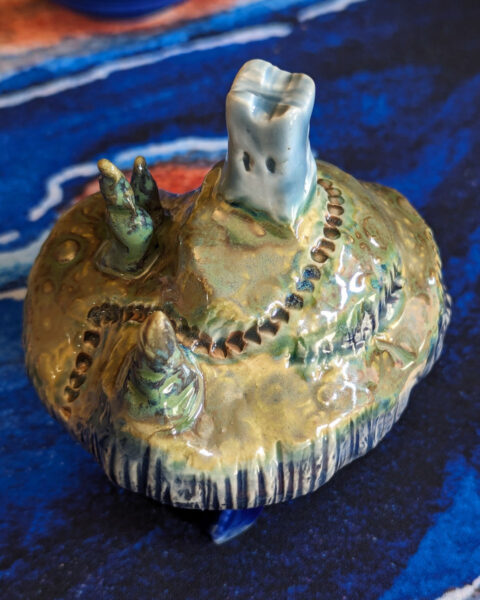

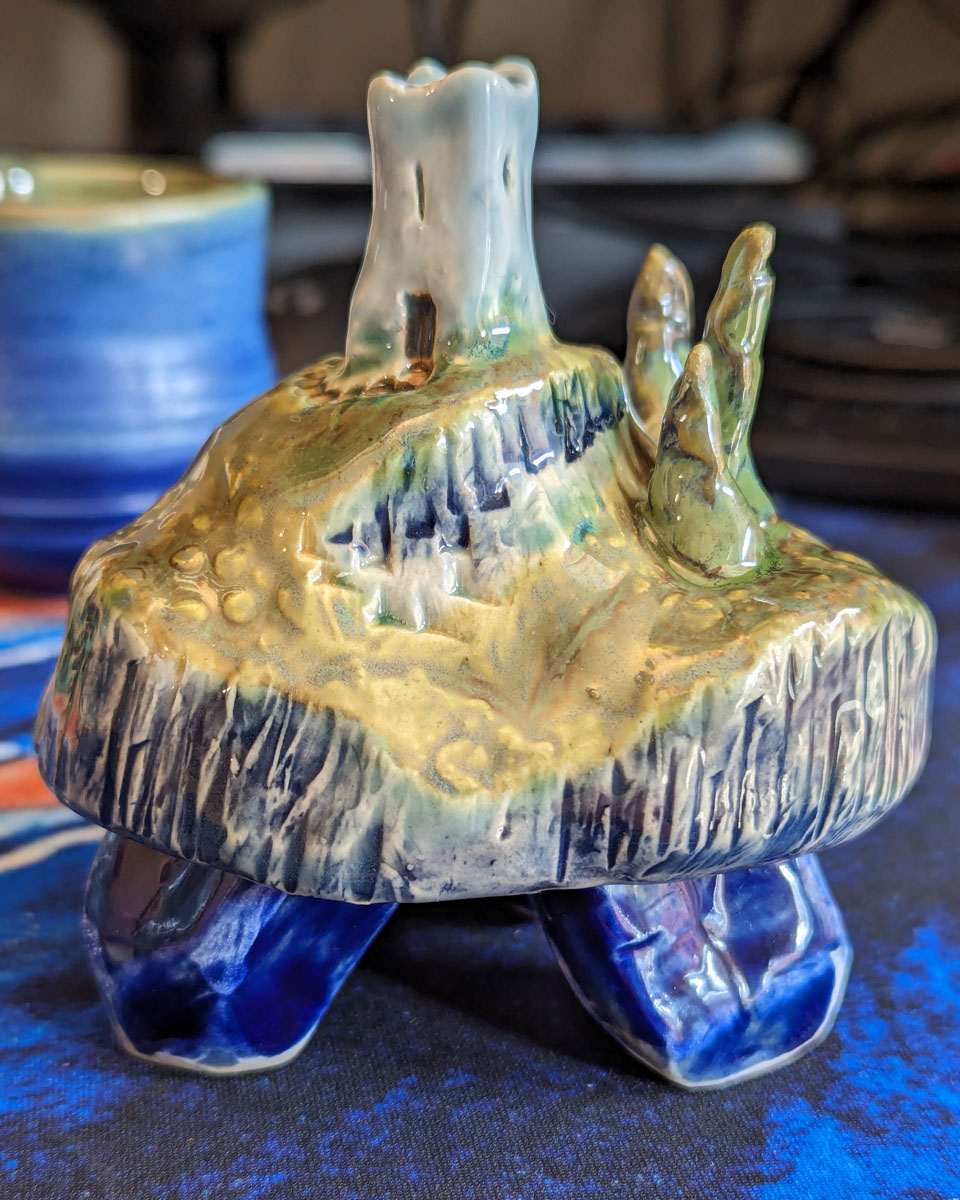
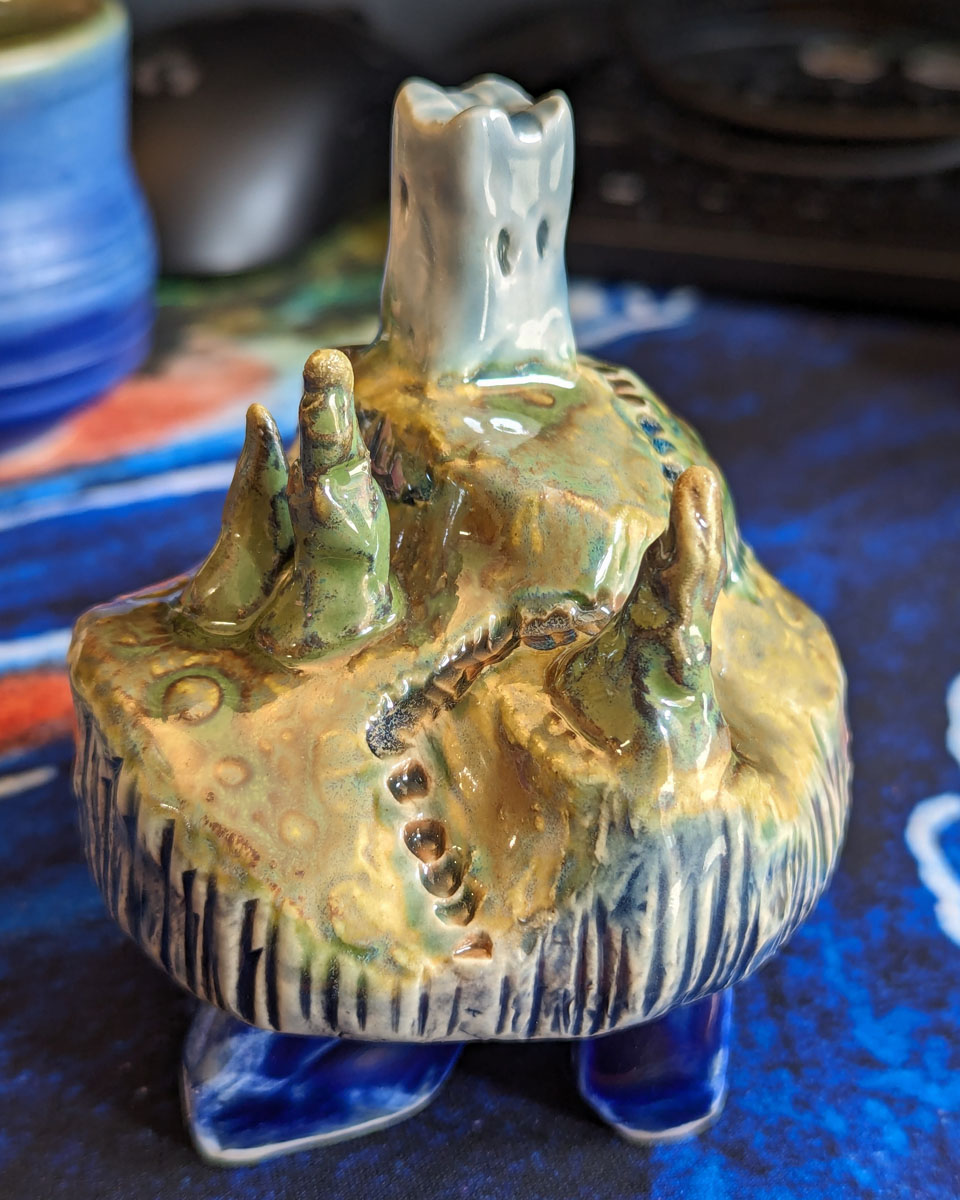
In January 2024, I took a local intro class that included both wheel and handbuilding – I had to relearn everything left-handed and, in the case of the wheel, one-handed, so I set my expectations low, but I really feel like I was able to push myself and make things I am very proud of! The crystal island above was not planned — the instructor simply inspired me after he demonstrated his own whimsical sculpture approach, and I couldn’t resist trying! It feels like a miracle that it stayed together, stands up on its own, and looks this good, and it’s left me starving for the chance to make infinitely more islands!
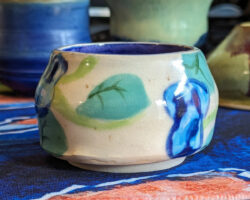


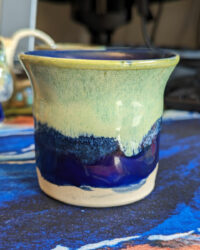

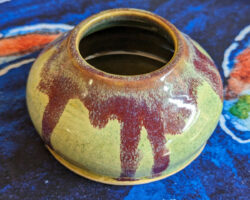
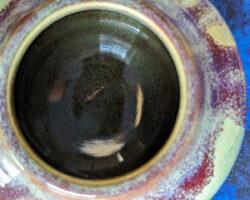
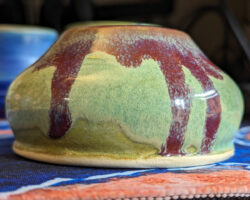

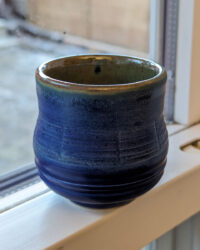
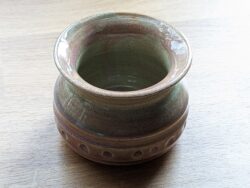
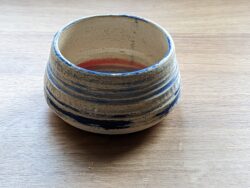
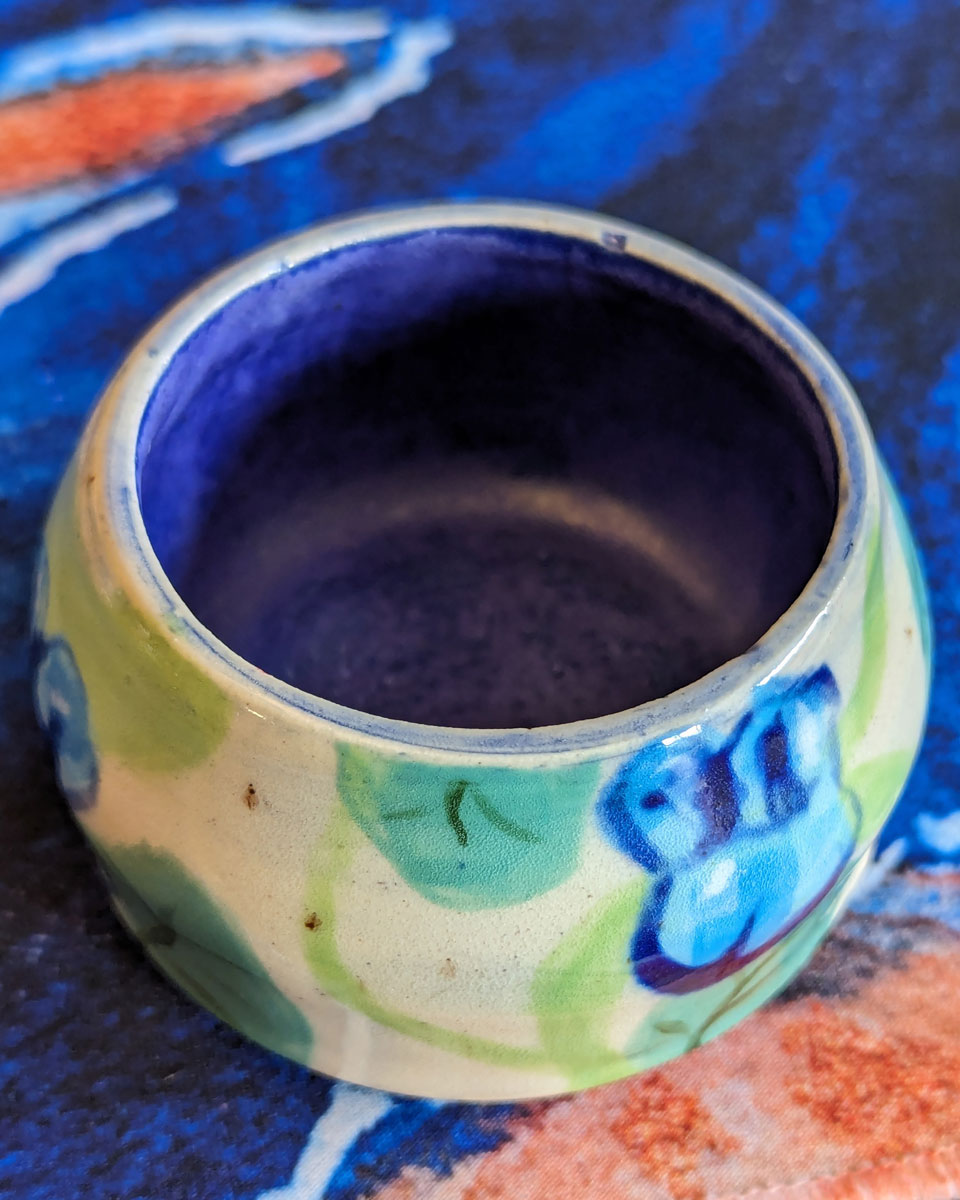
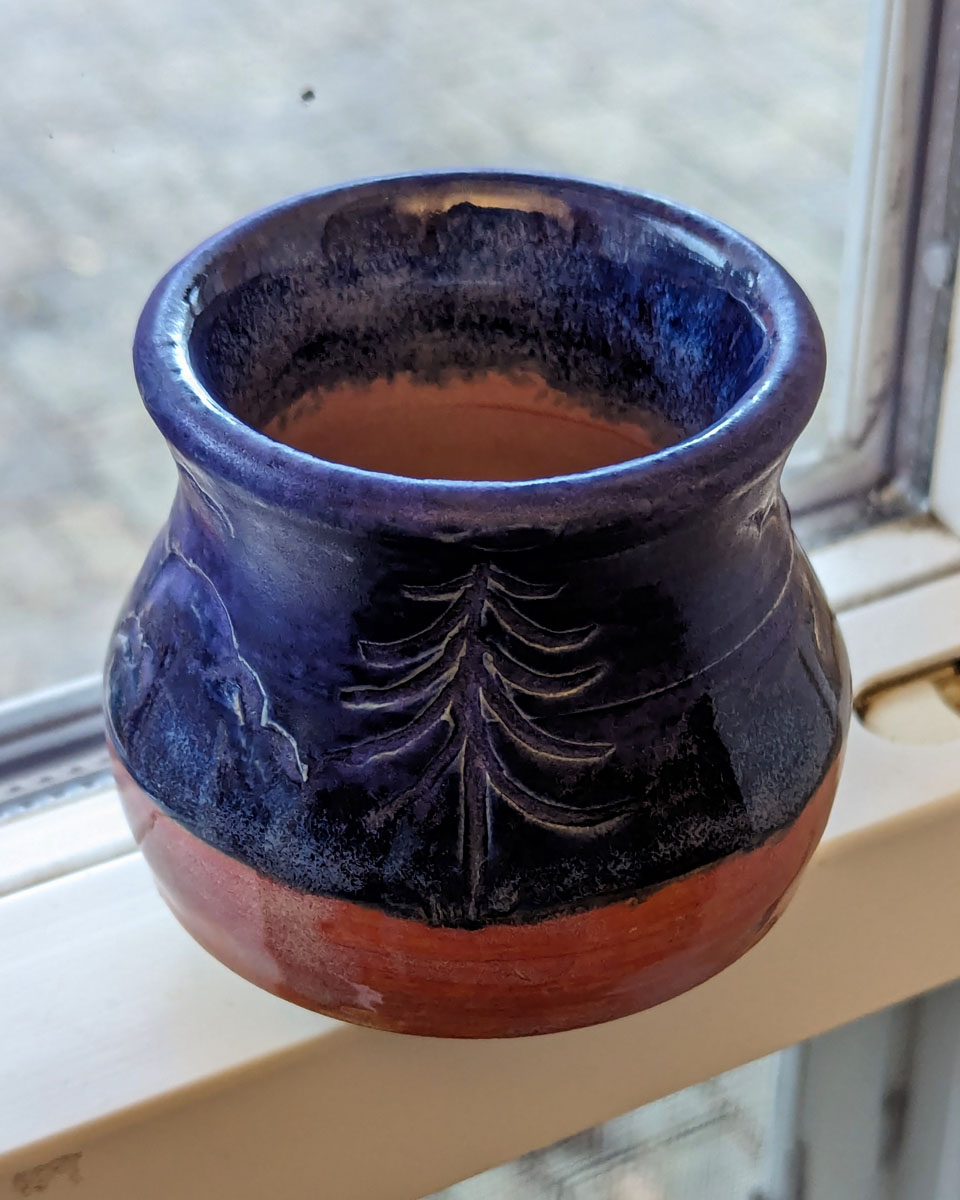
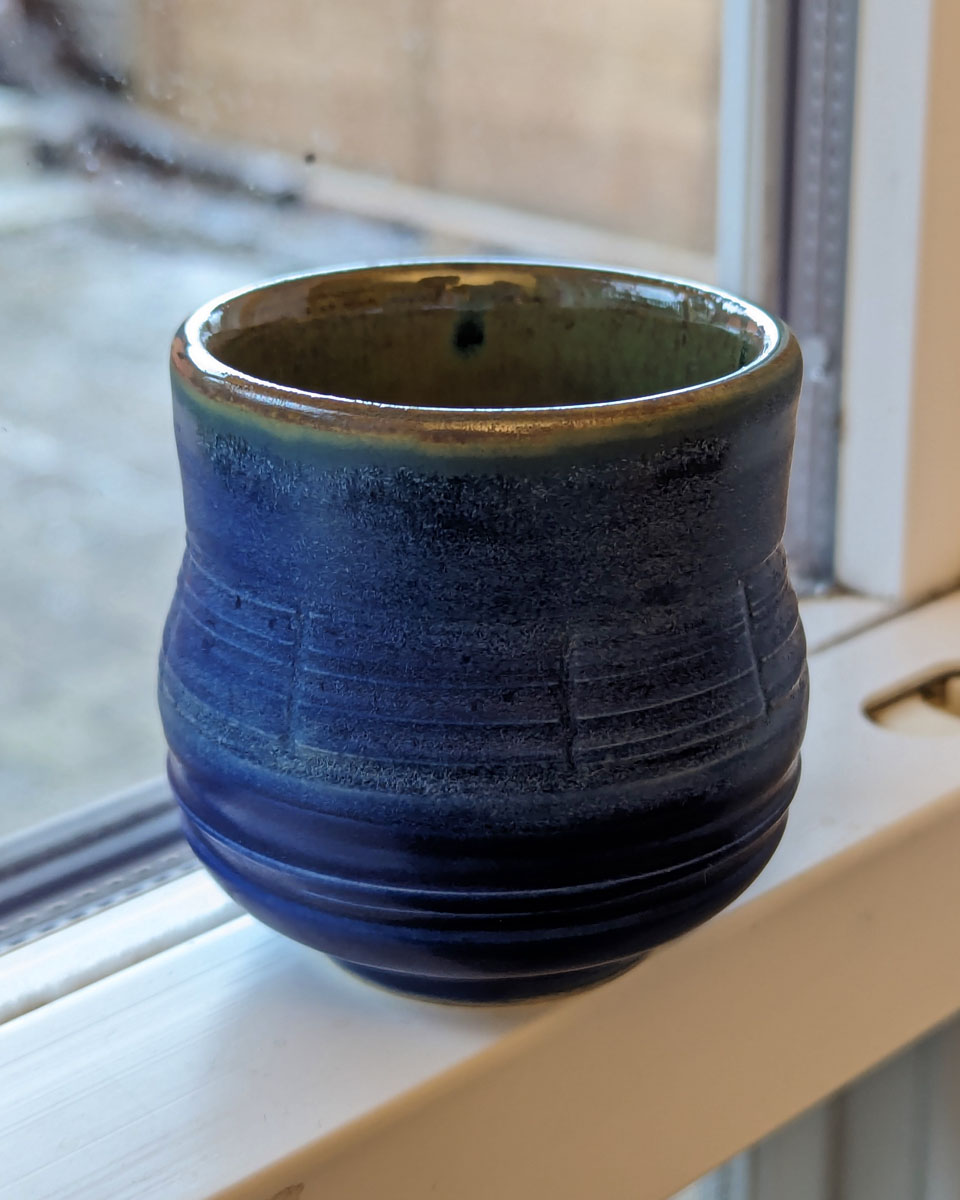
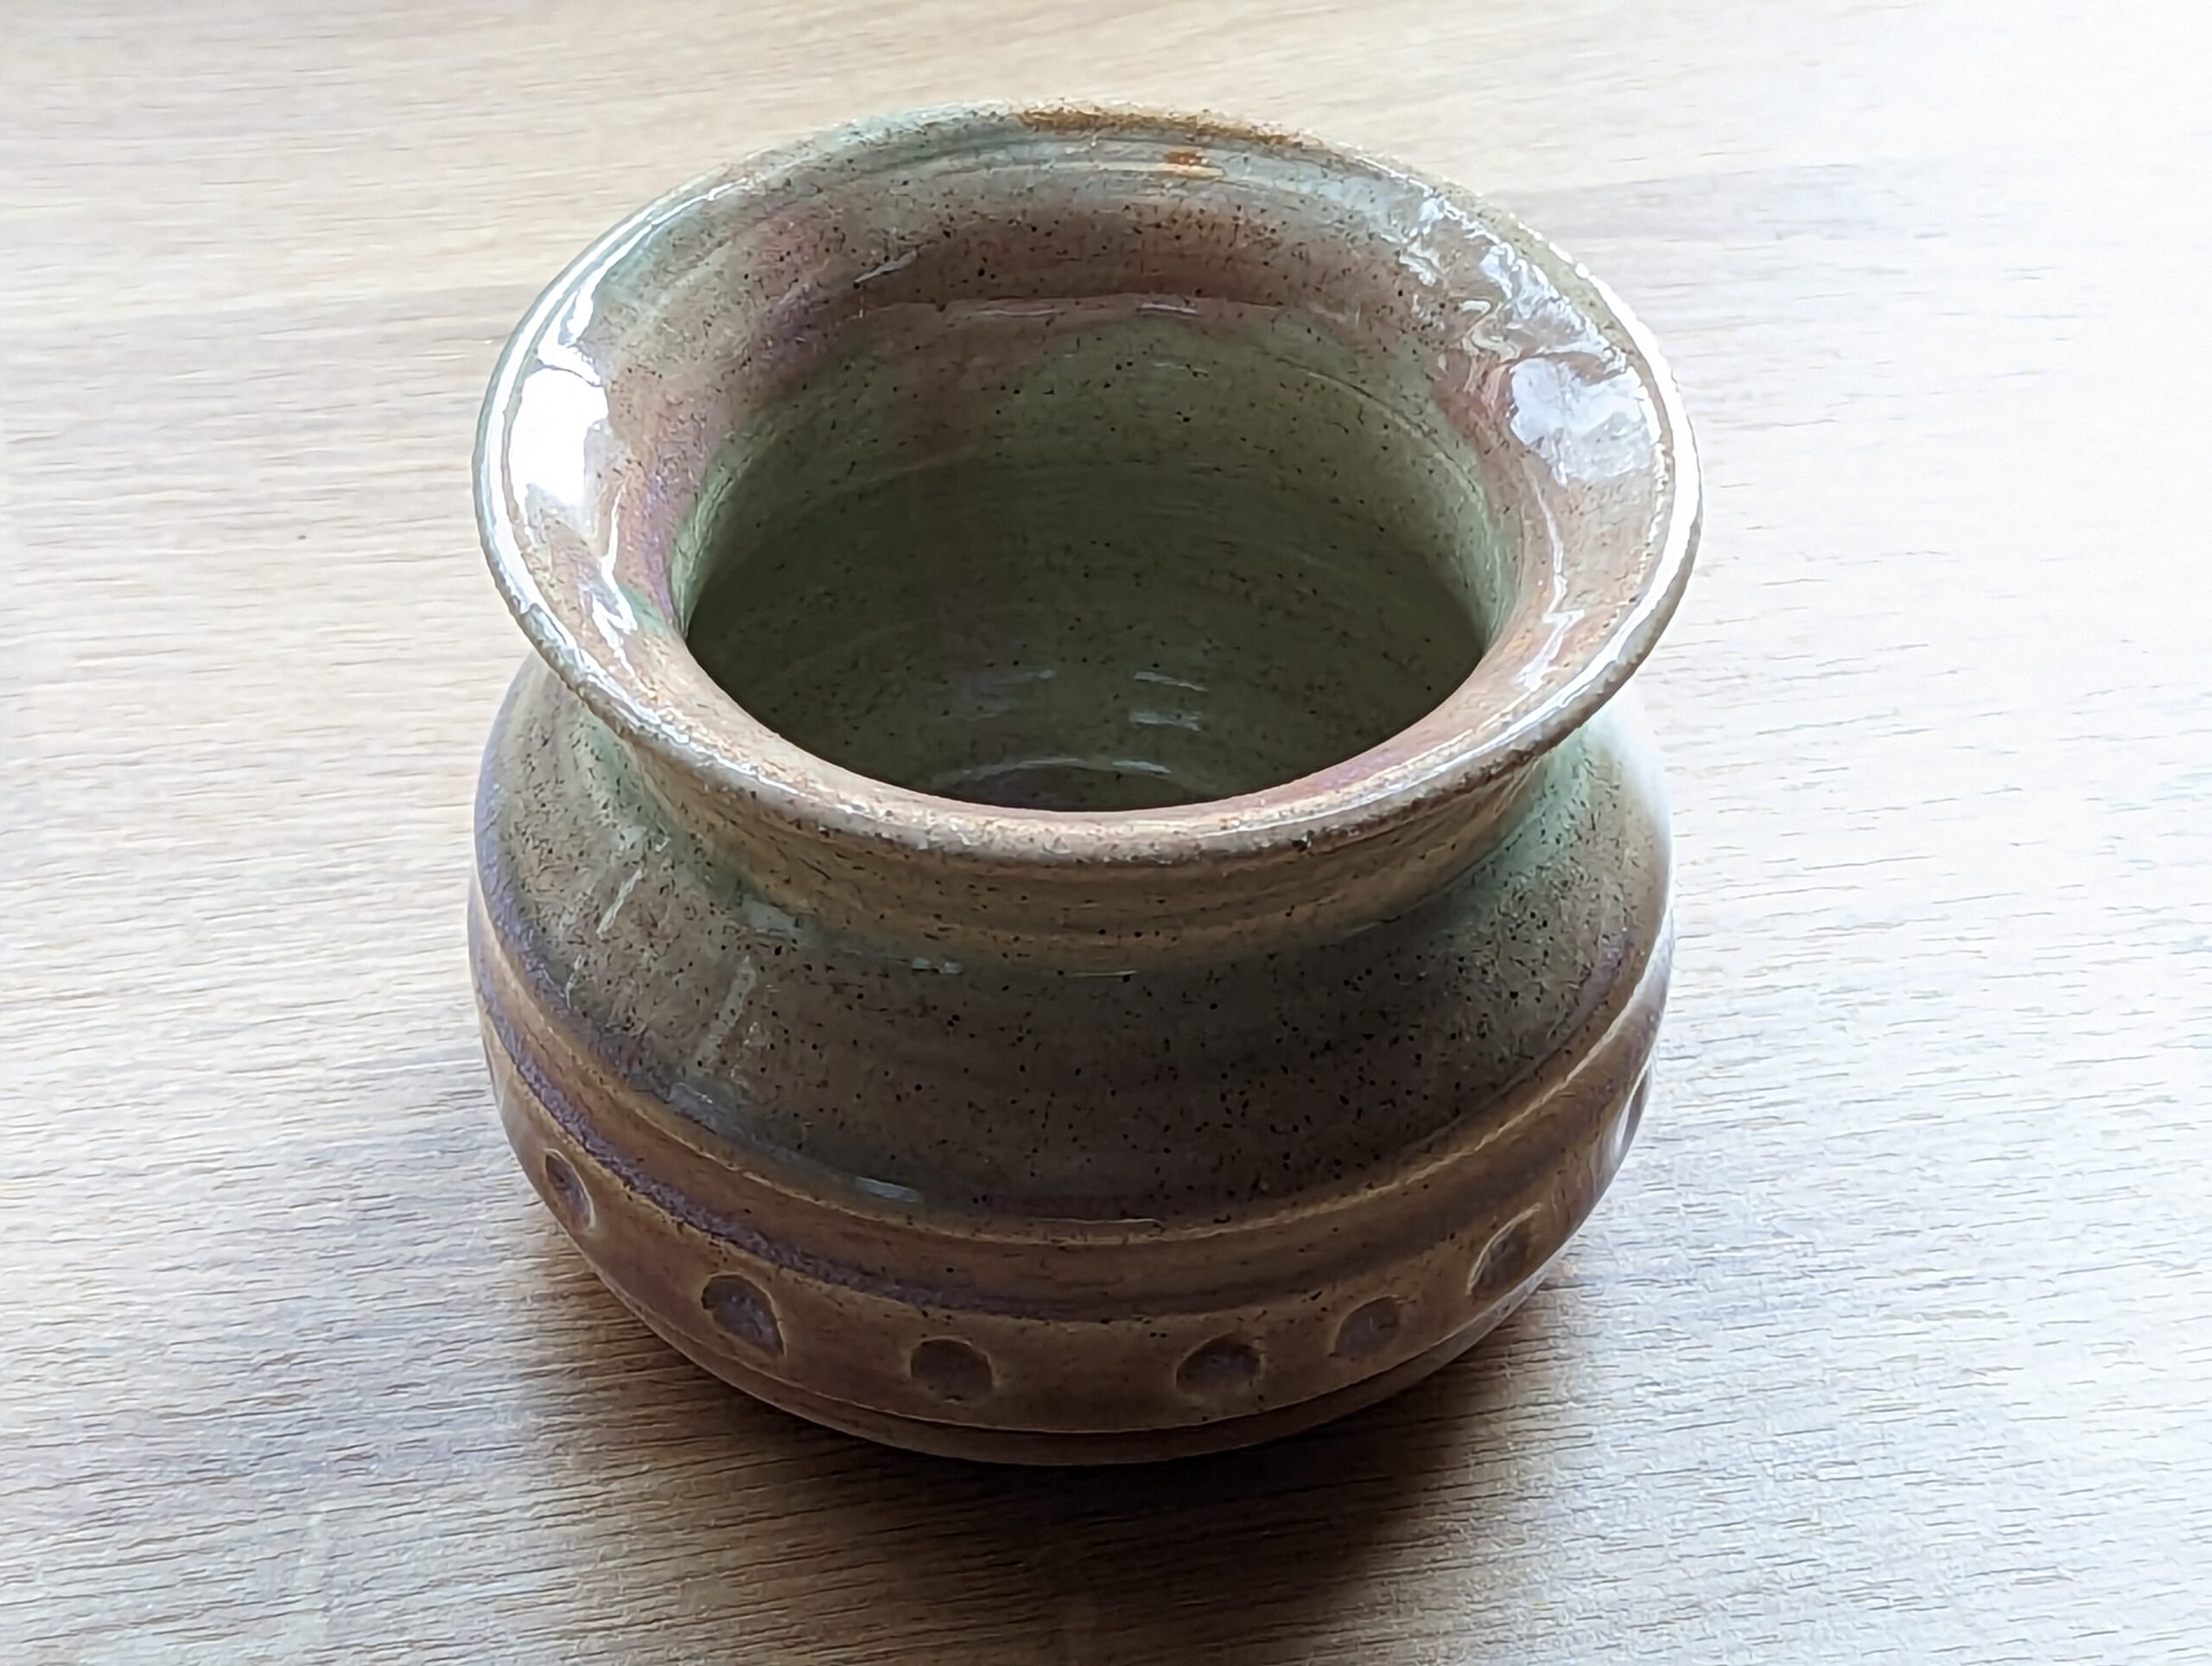
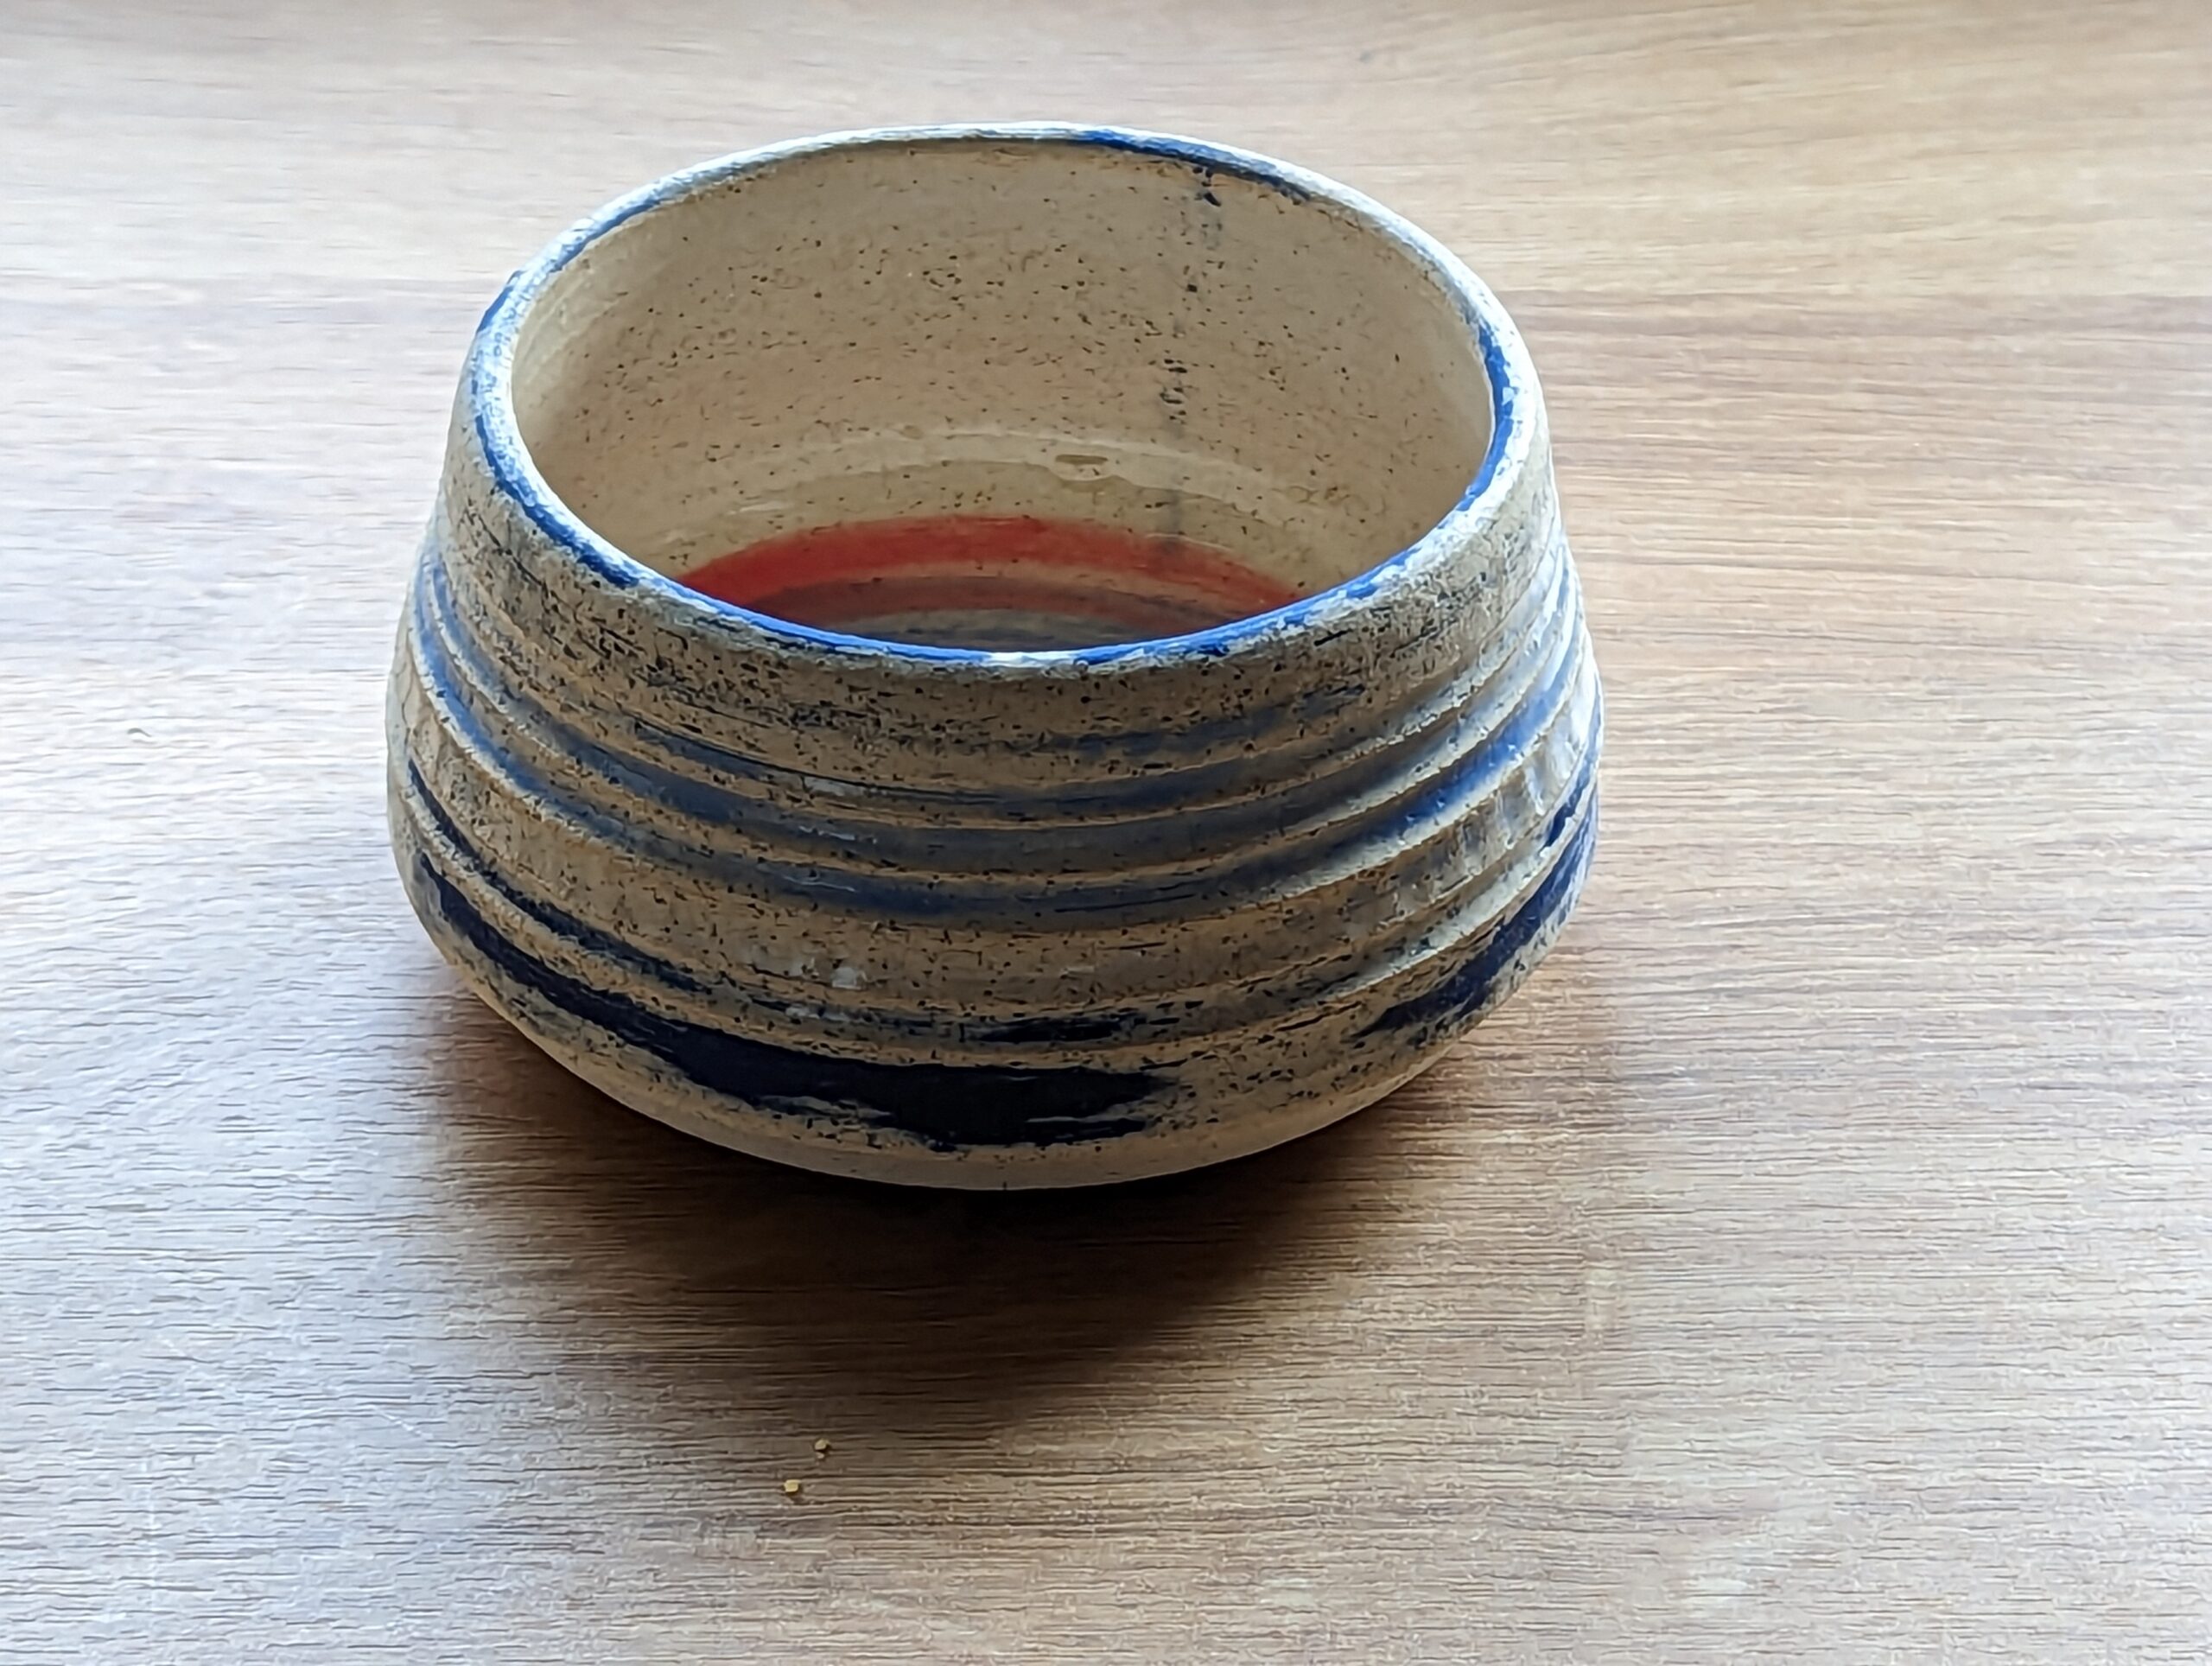
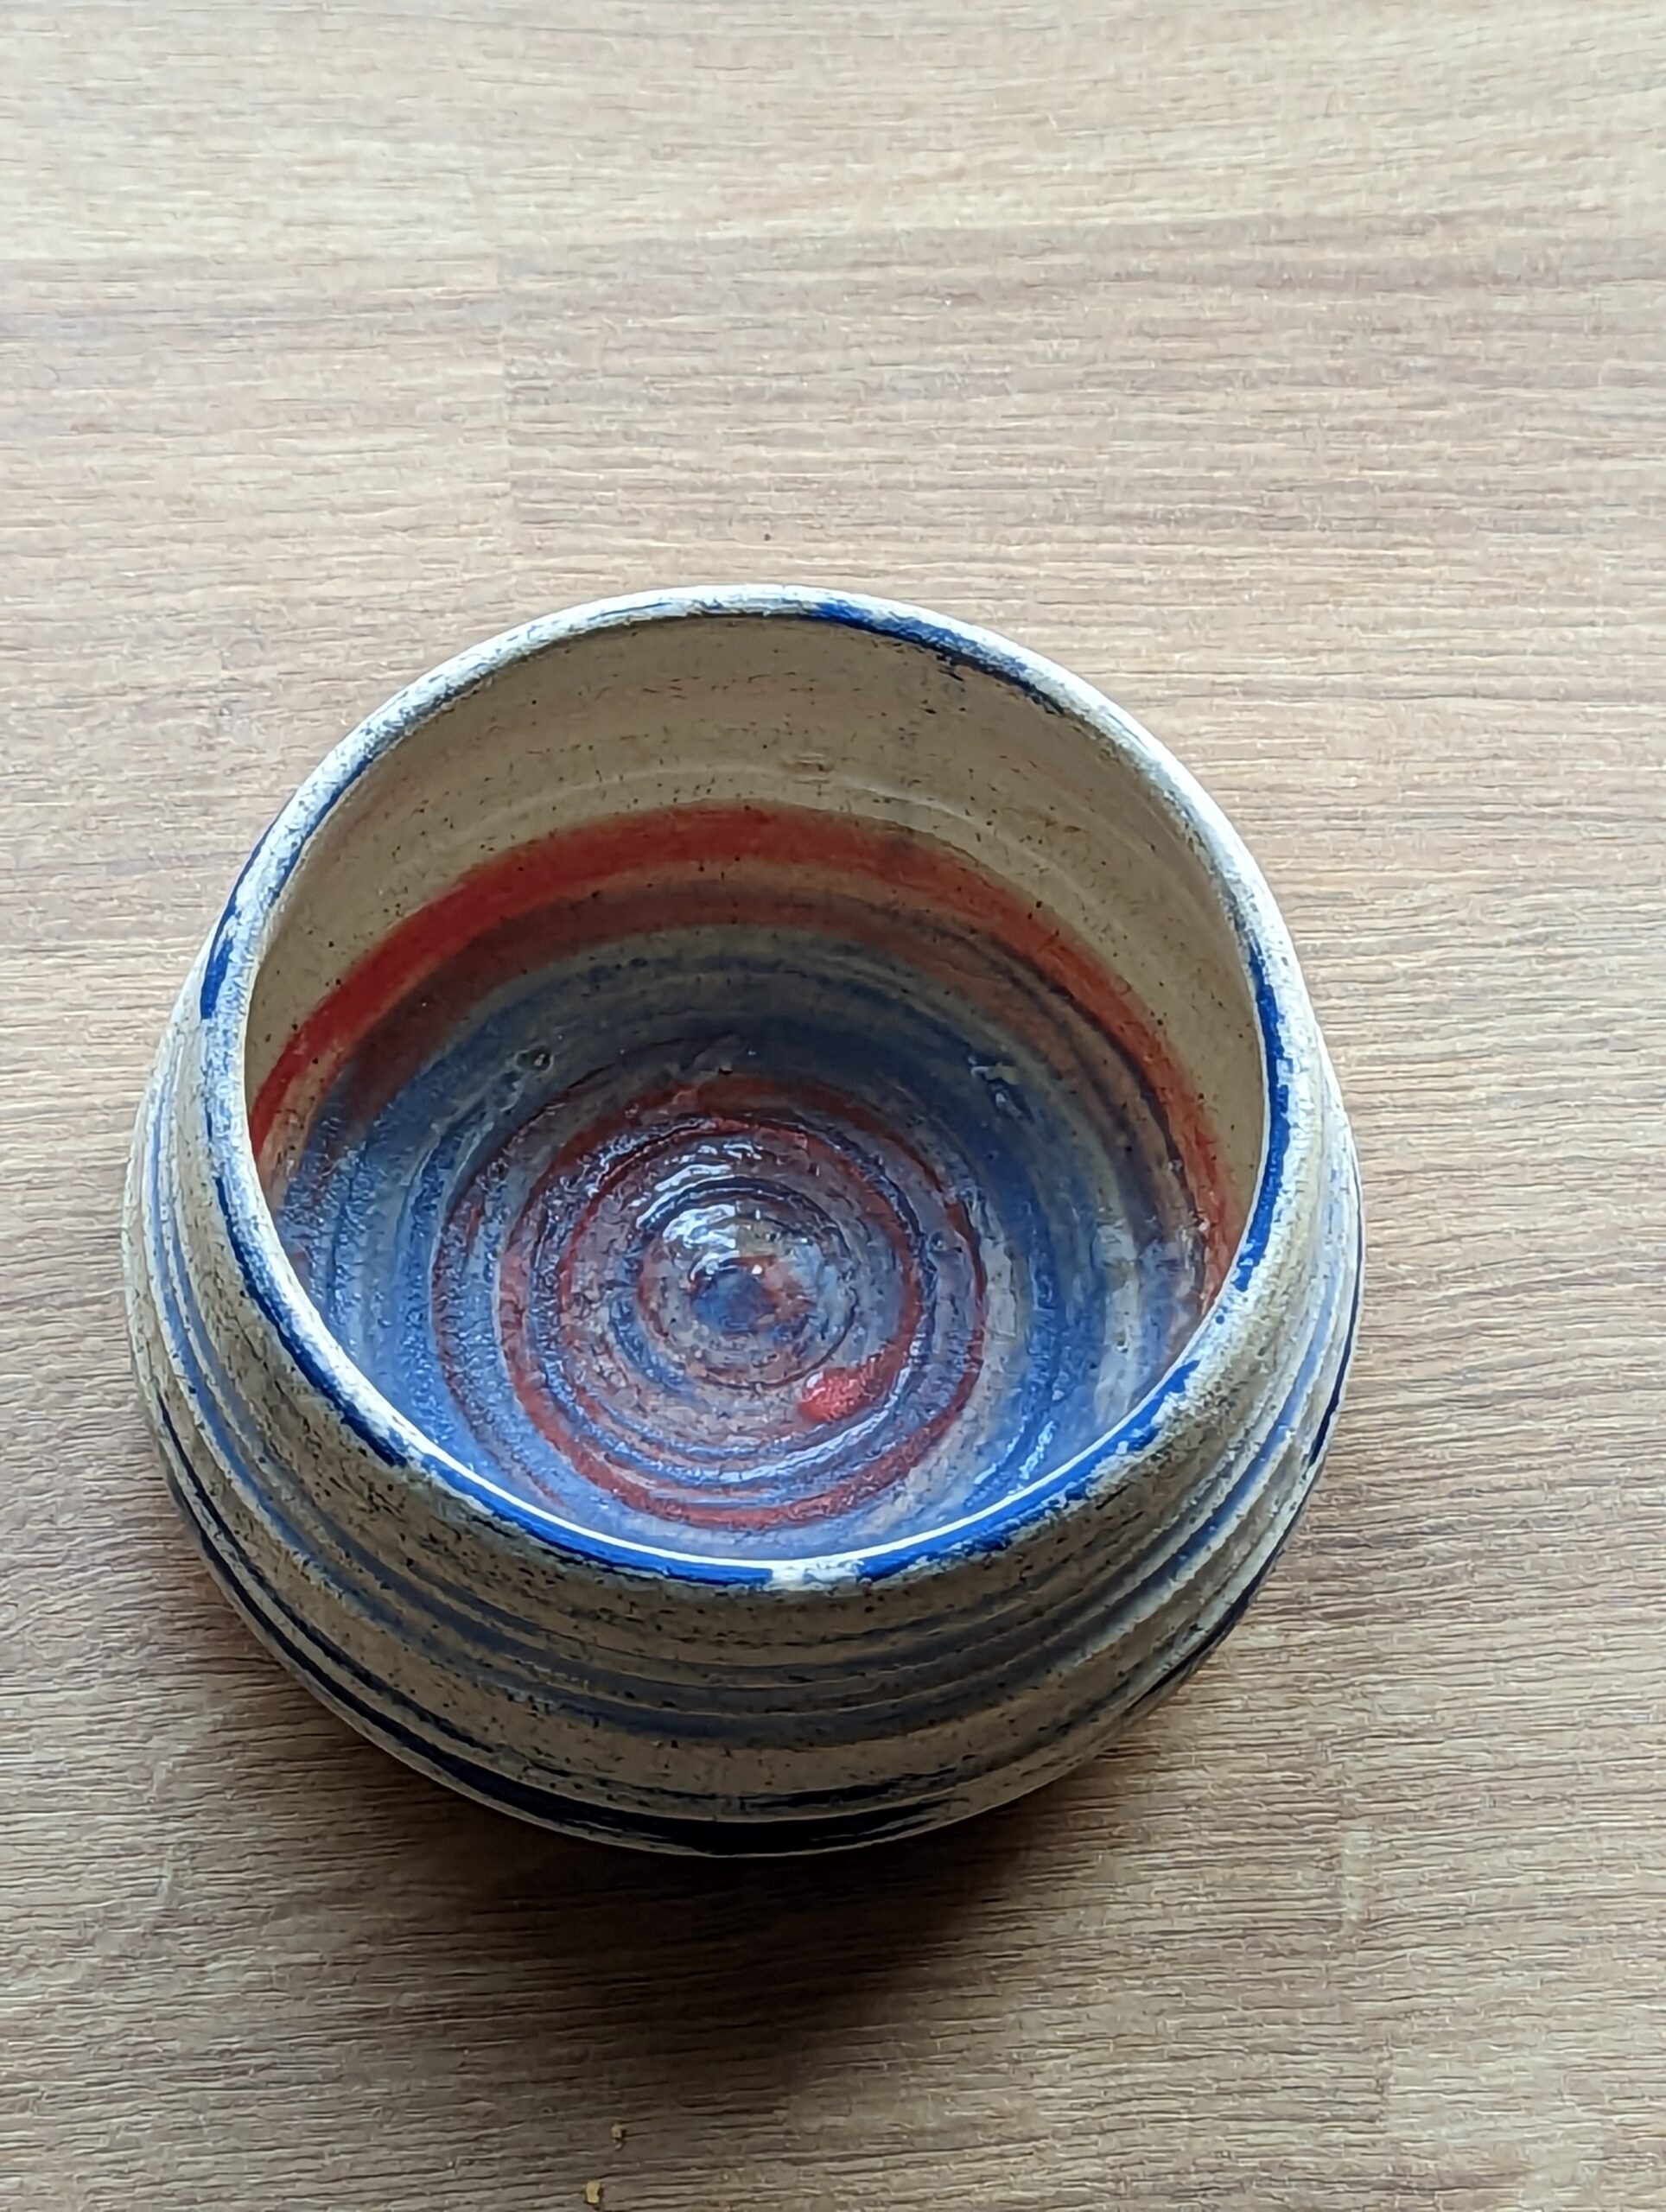
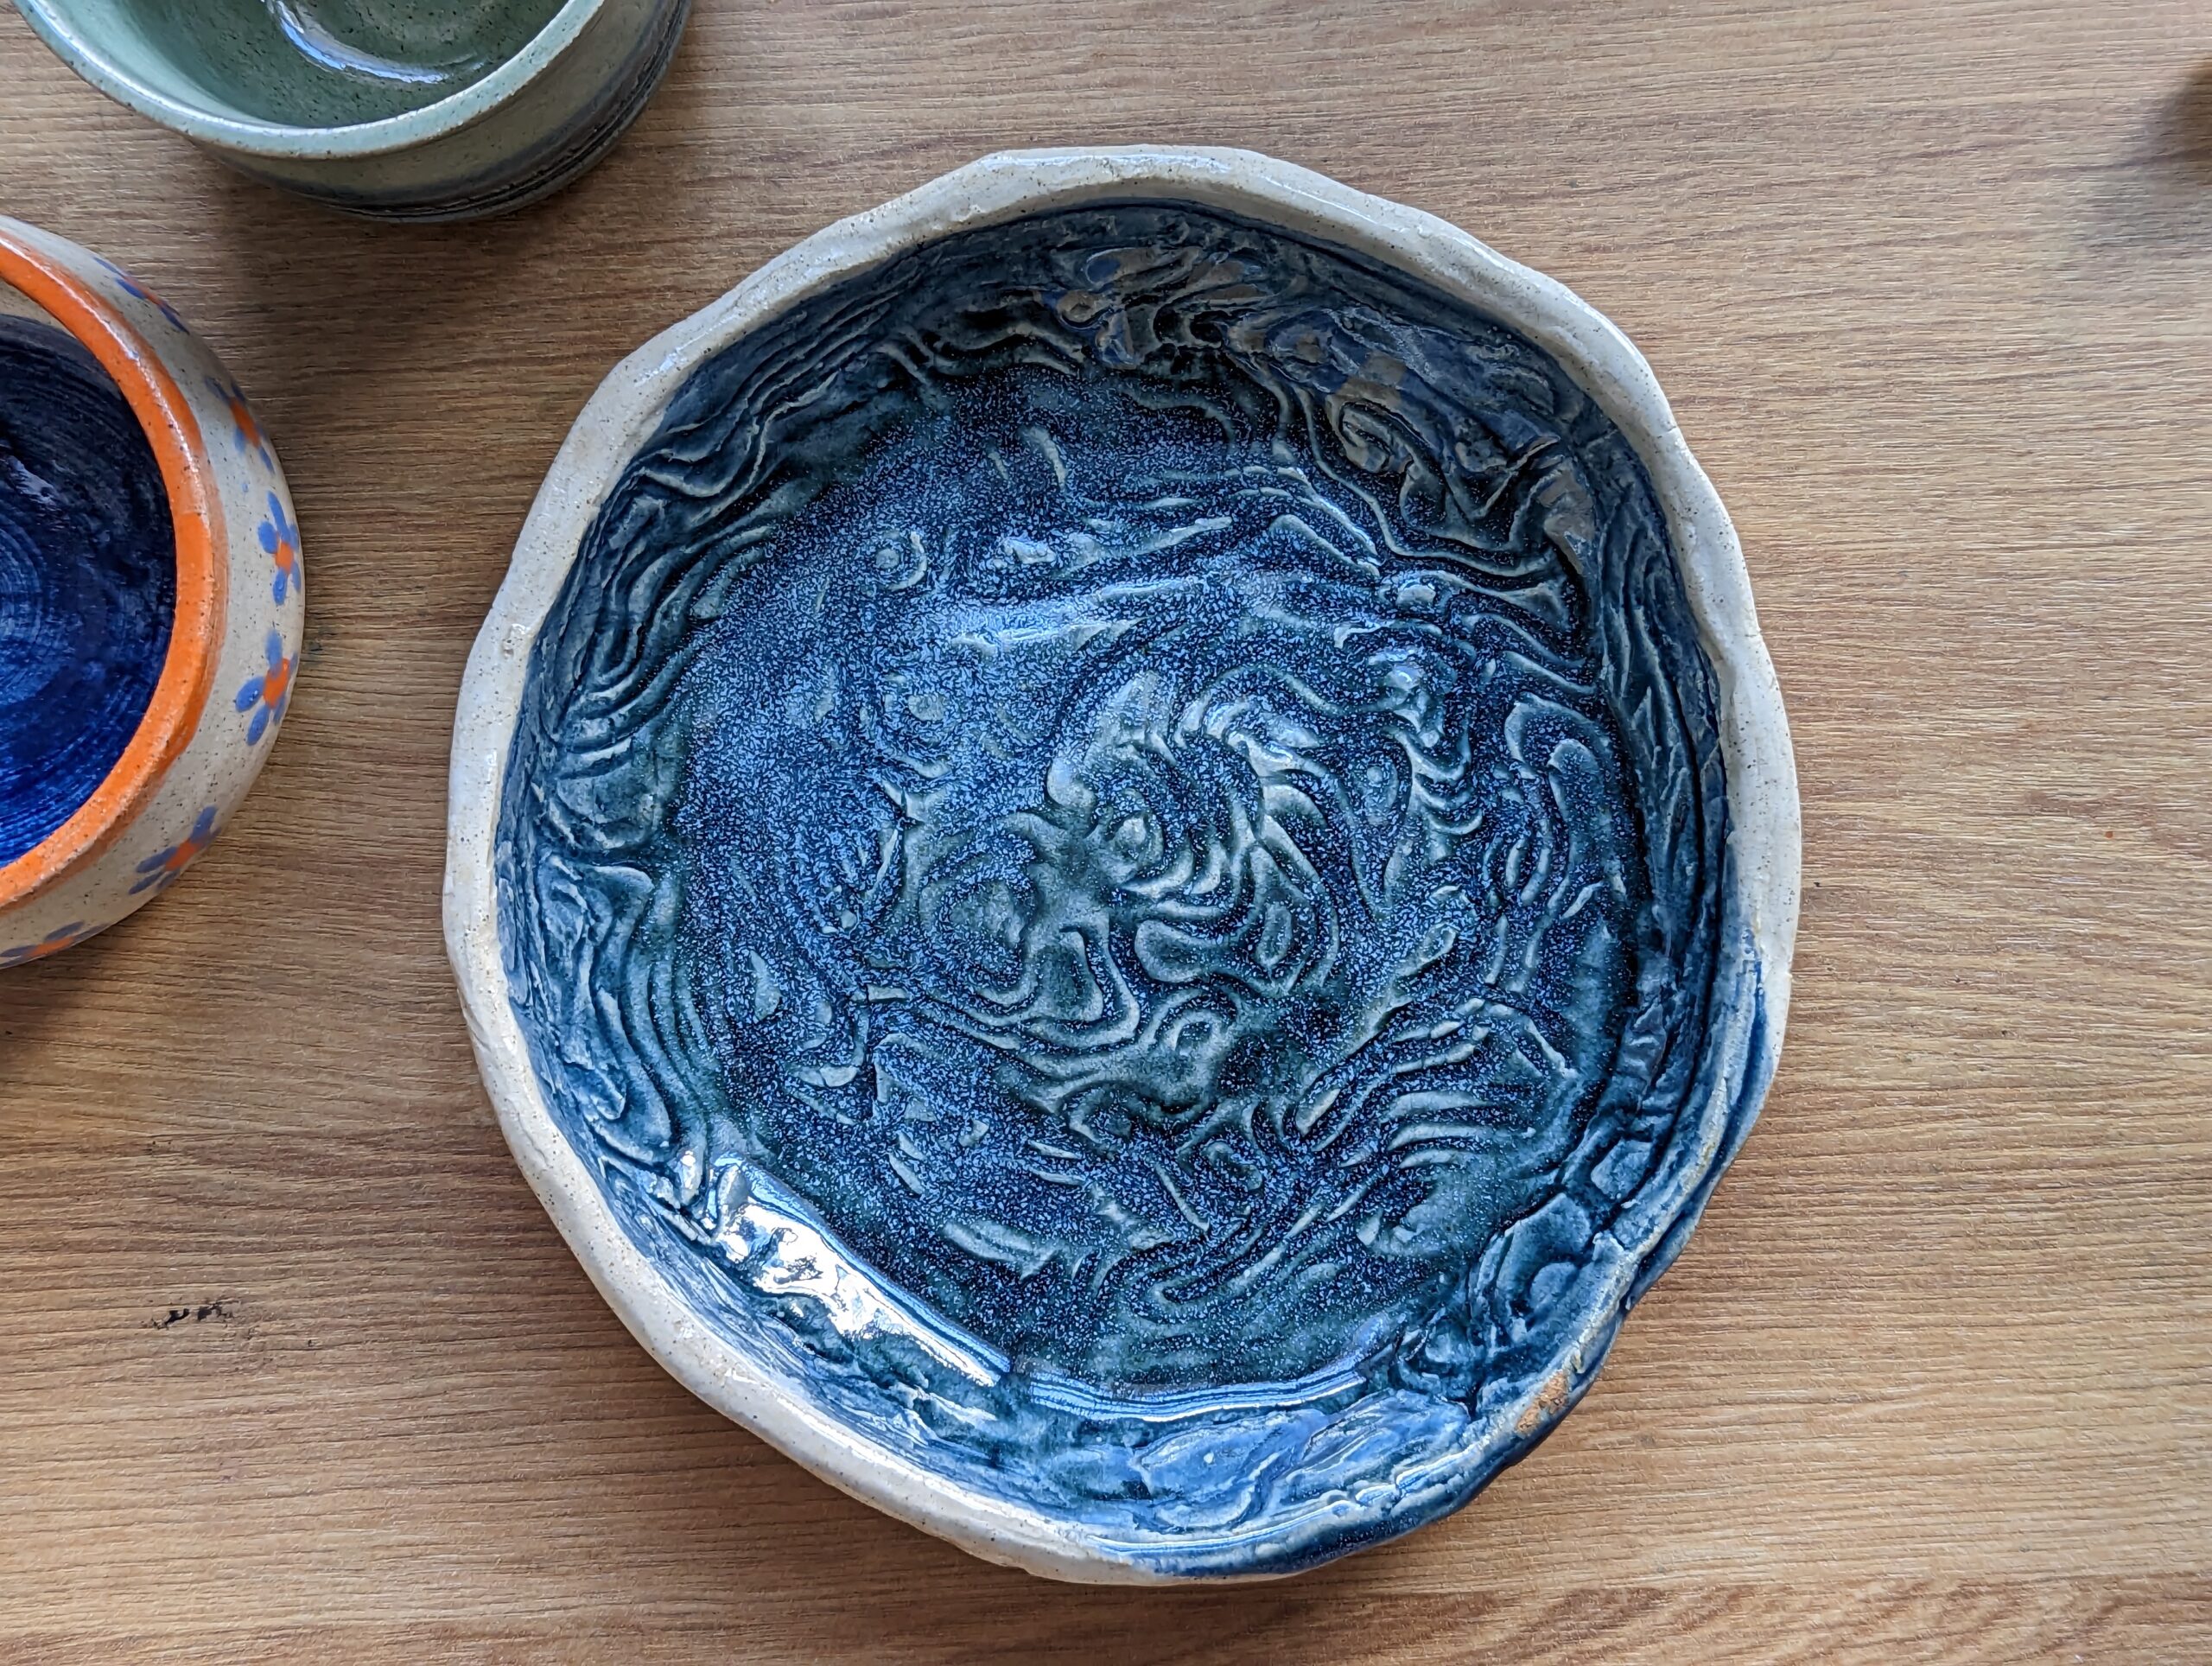
Wheel throwing single (left) handed (above) was certainly a new challenge, and while I didn’t manage to work things as thin and delicate as I had earlier with my right hand, as you can see below. But they had such a wonderful range of glazes; and that small-mouthed shallow bowl is, it turns out, my dream water cup for painting – impossible to splash, easy to reach the bottom to wipe the paint off. And despite an s-crack in the base, it holds water fine! A miracle.
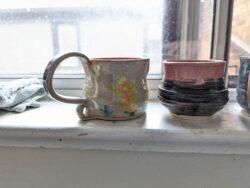
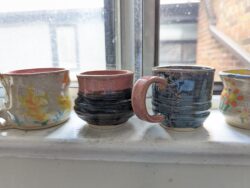
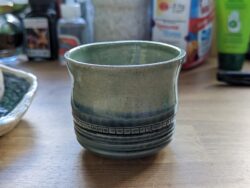
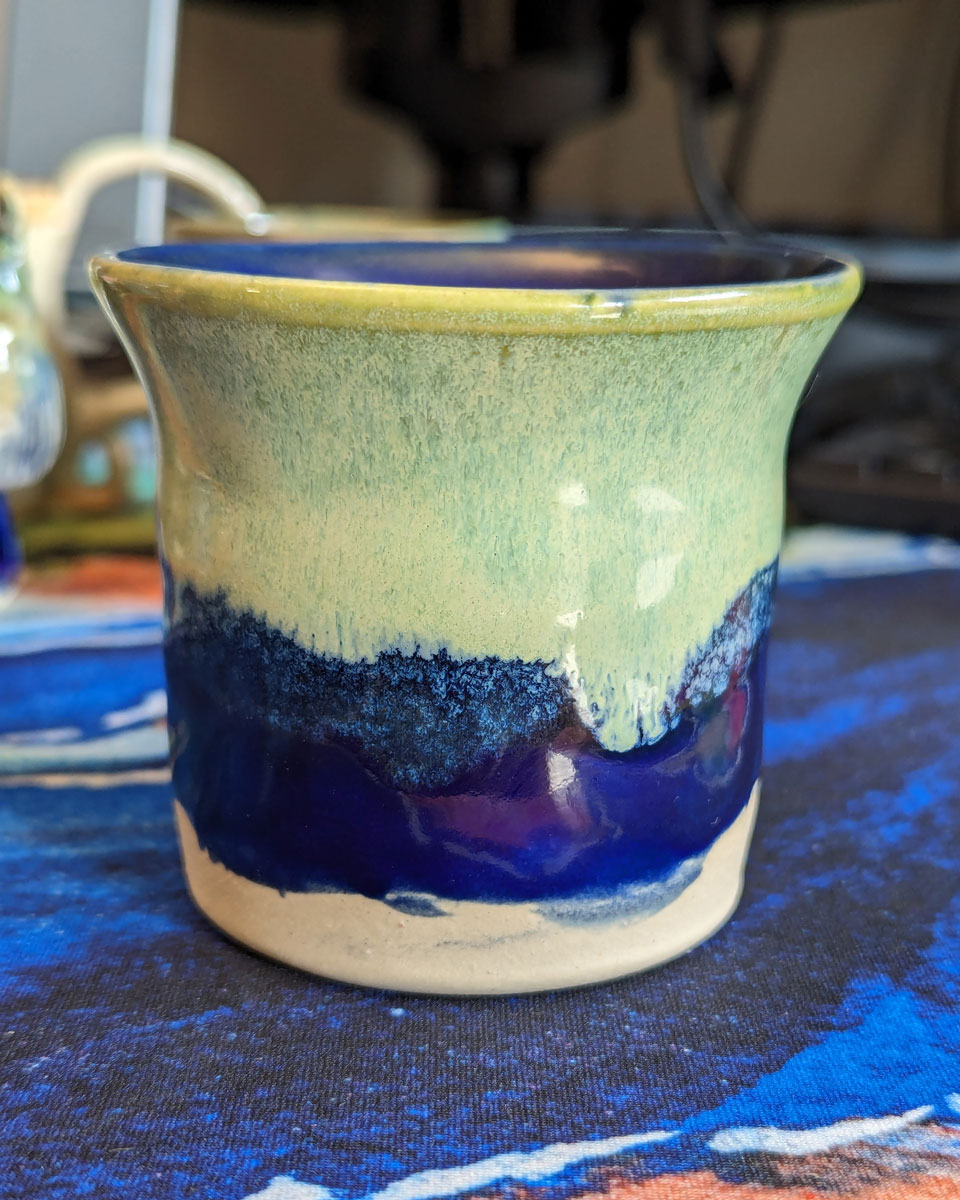
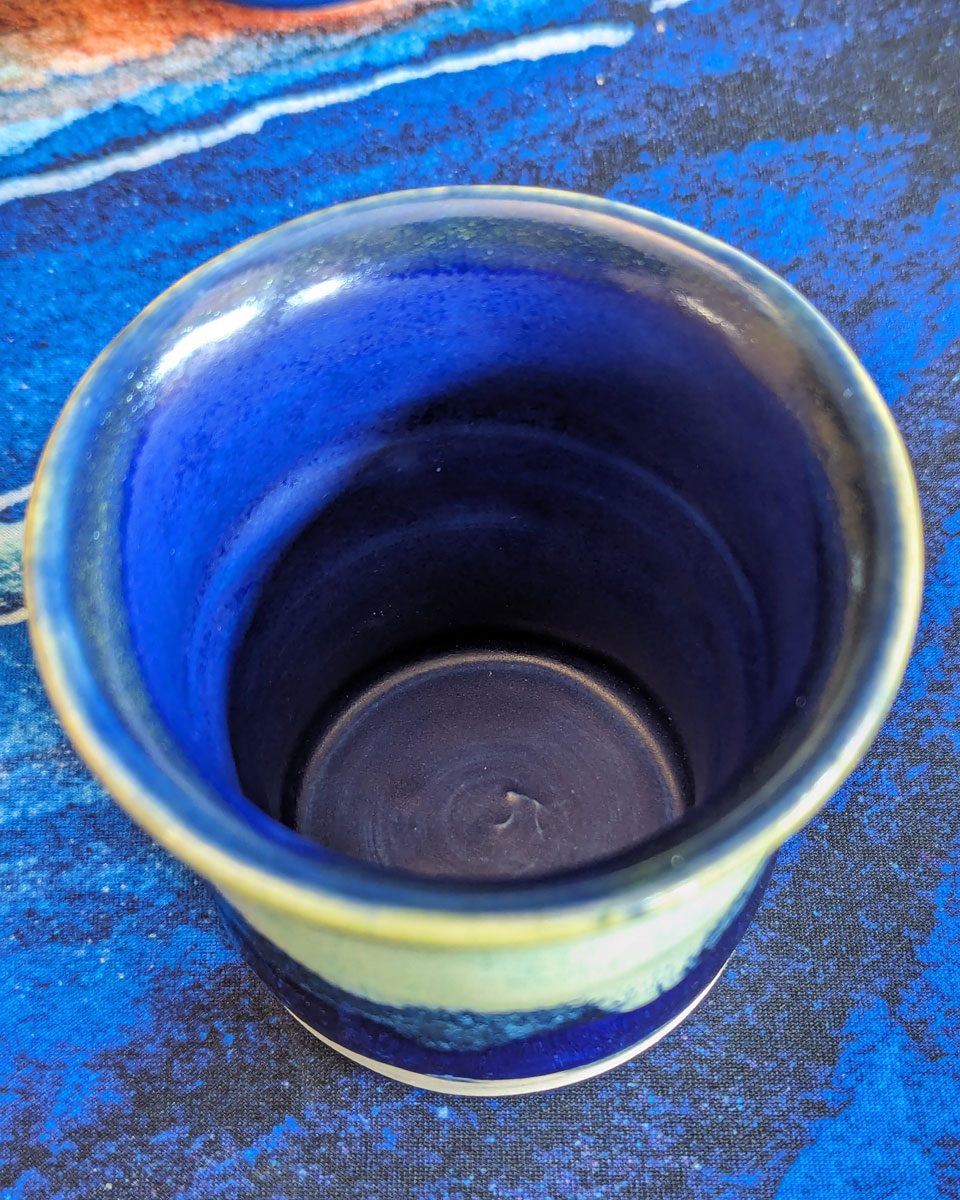
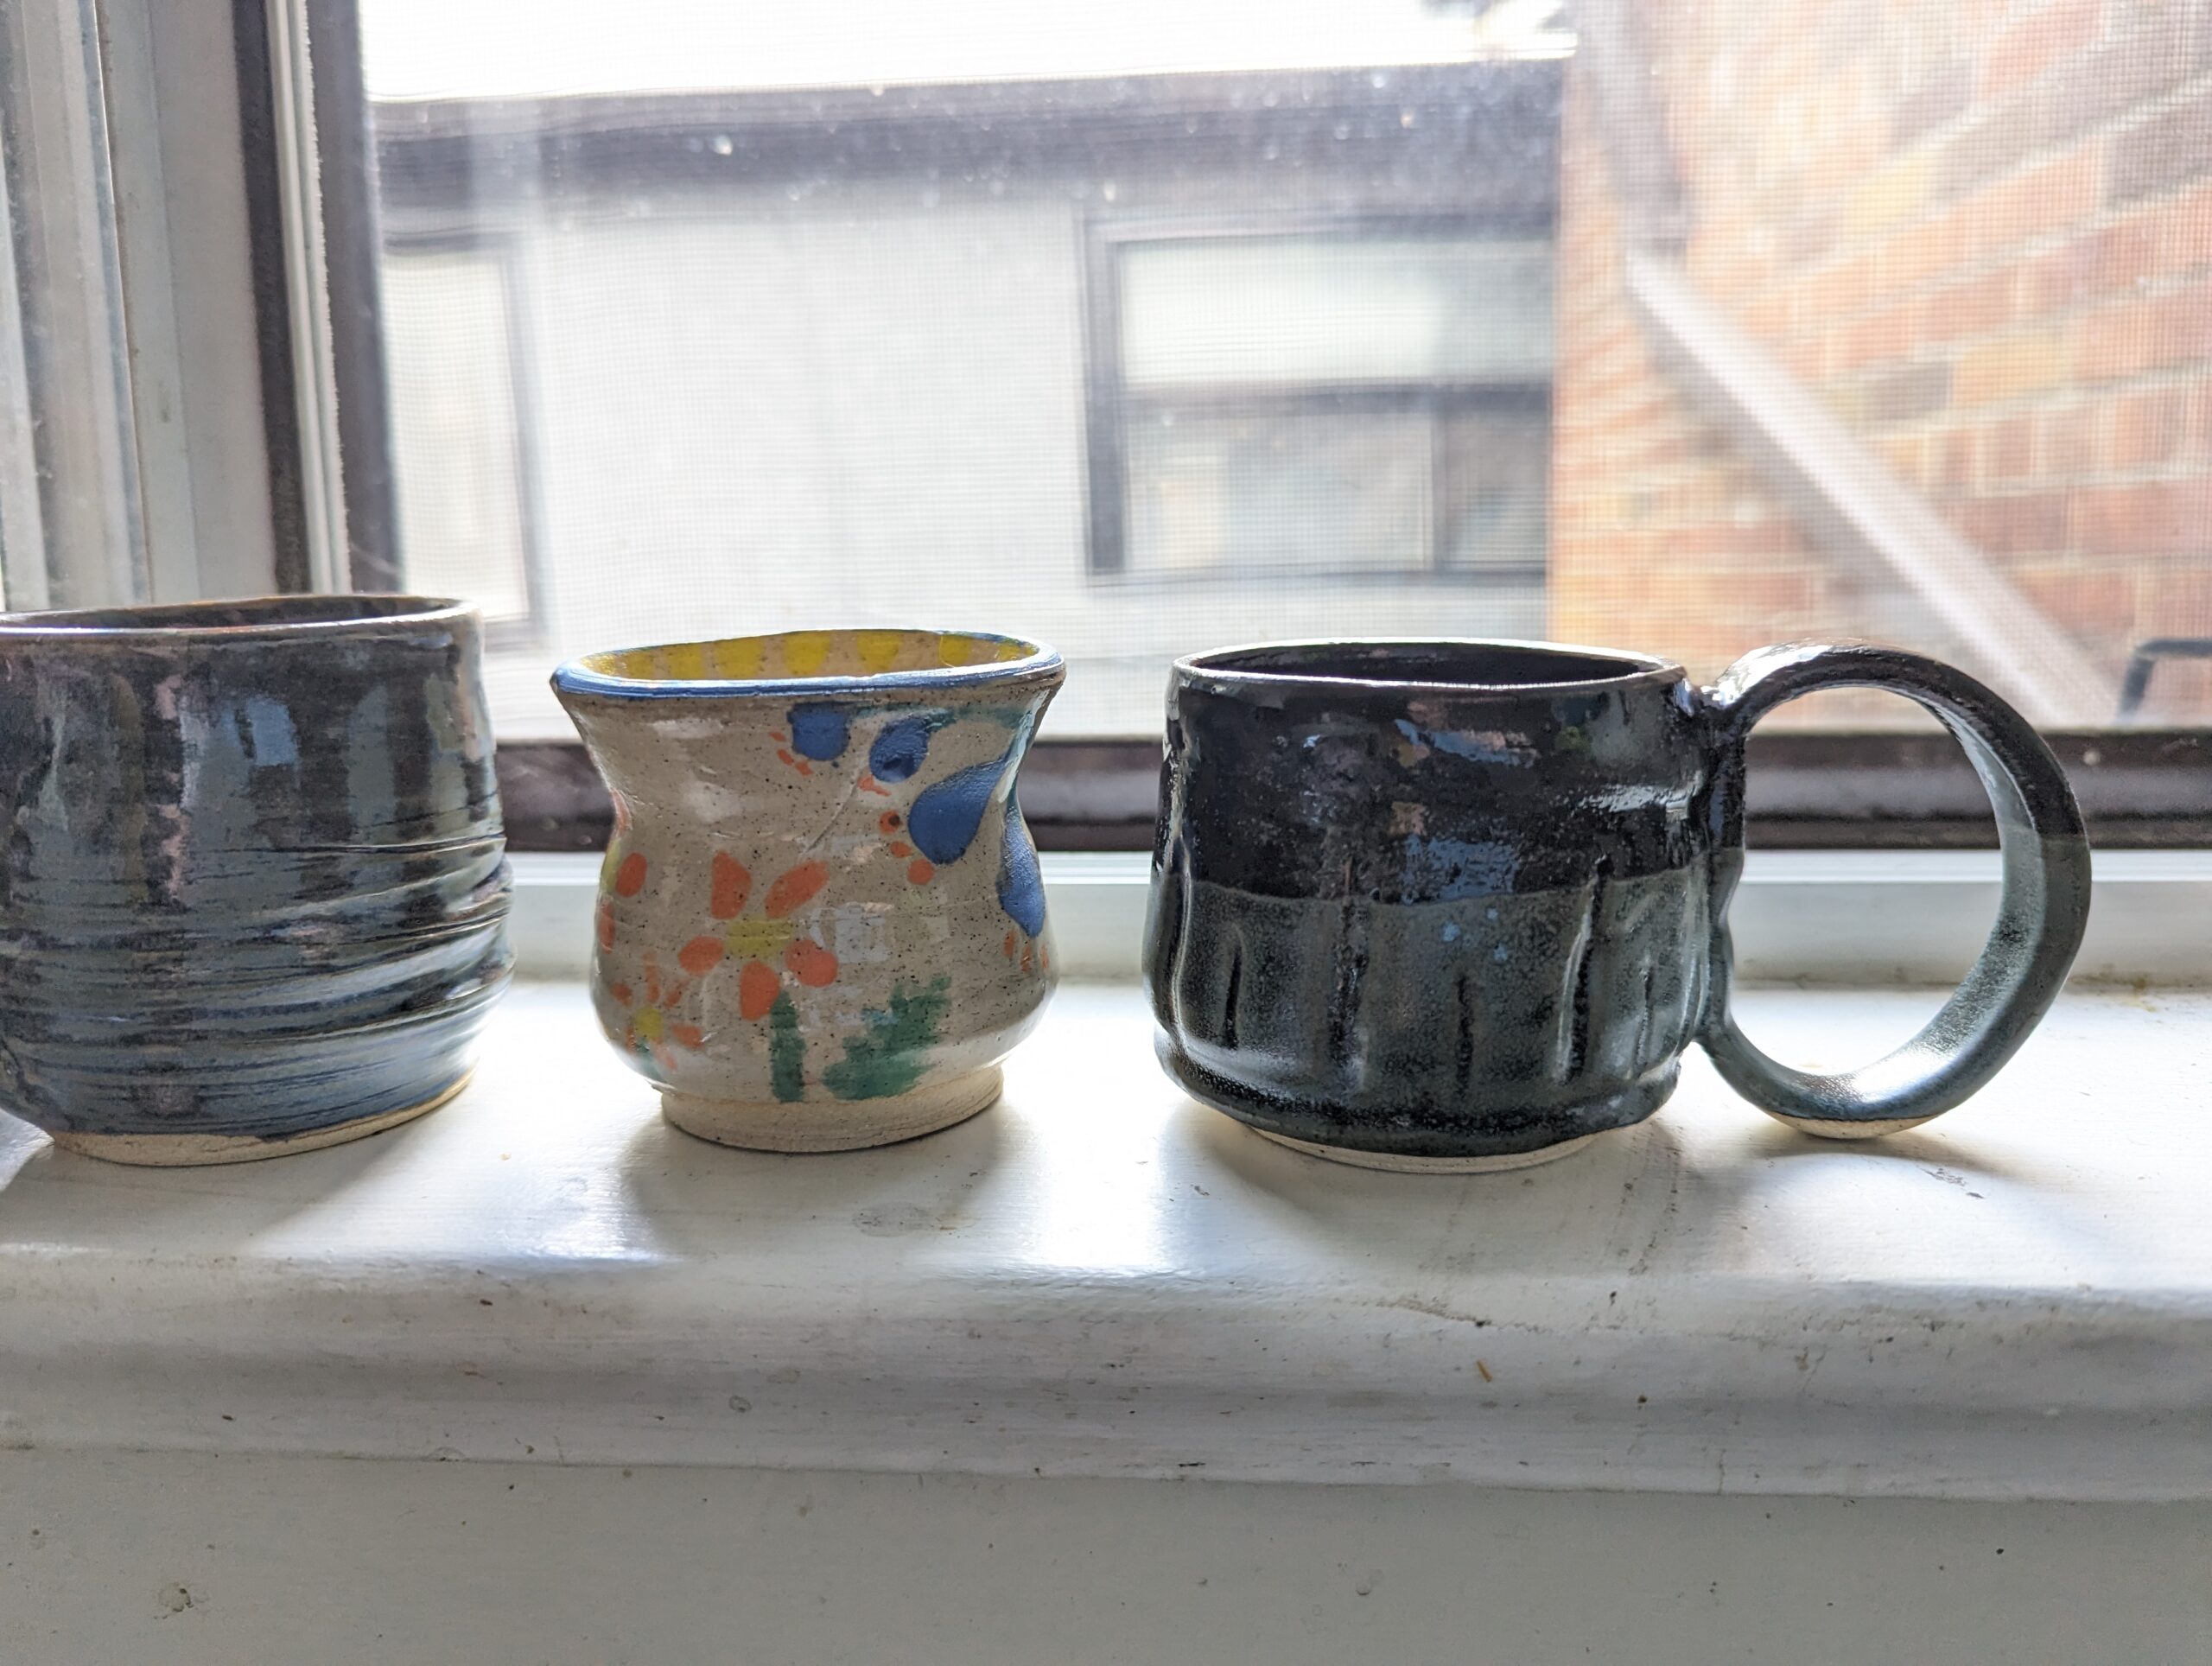
Below are five little cups I made over a three day workshop. First time making handles! As is traditional, none of these hold over 200ml of liquid due to shrinkage when firing – they’re so little! But I do still use them – the handles actually turned out lovely to hold, even if hilariously out of proportion with the little mugs themselves.

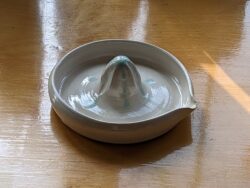
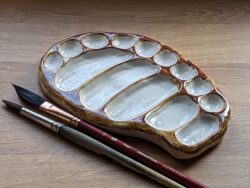
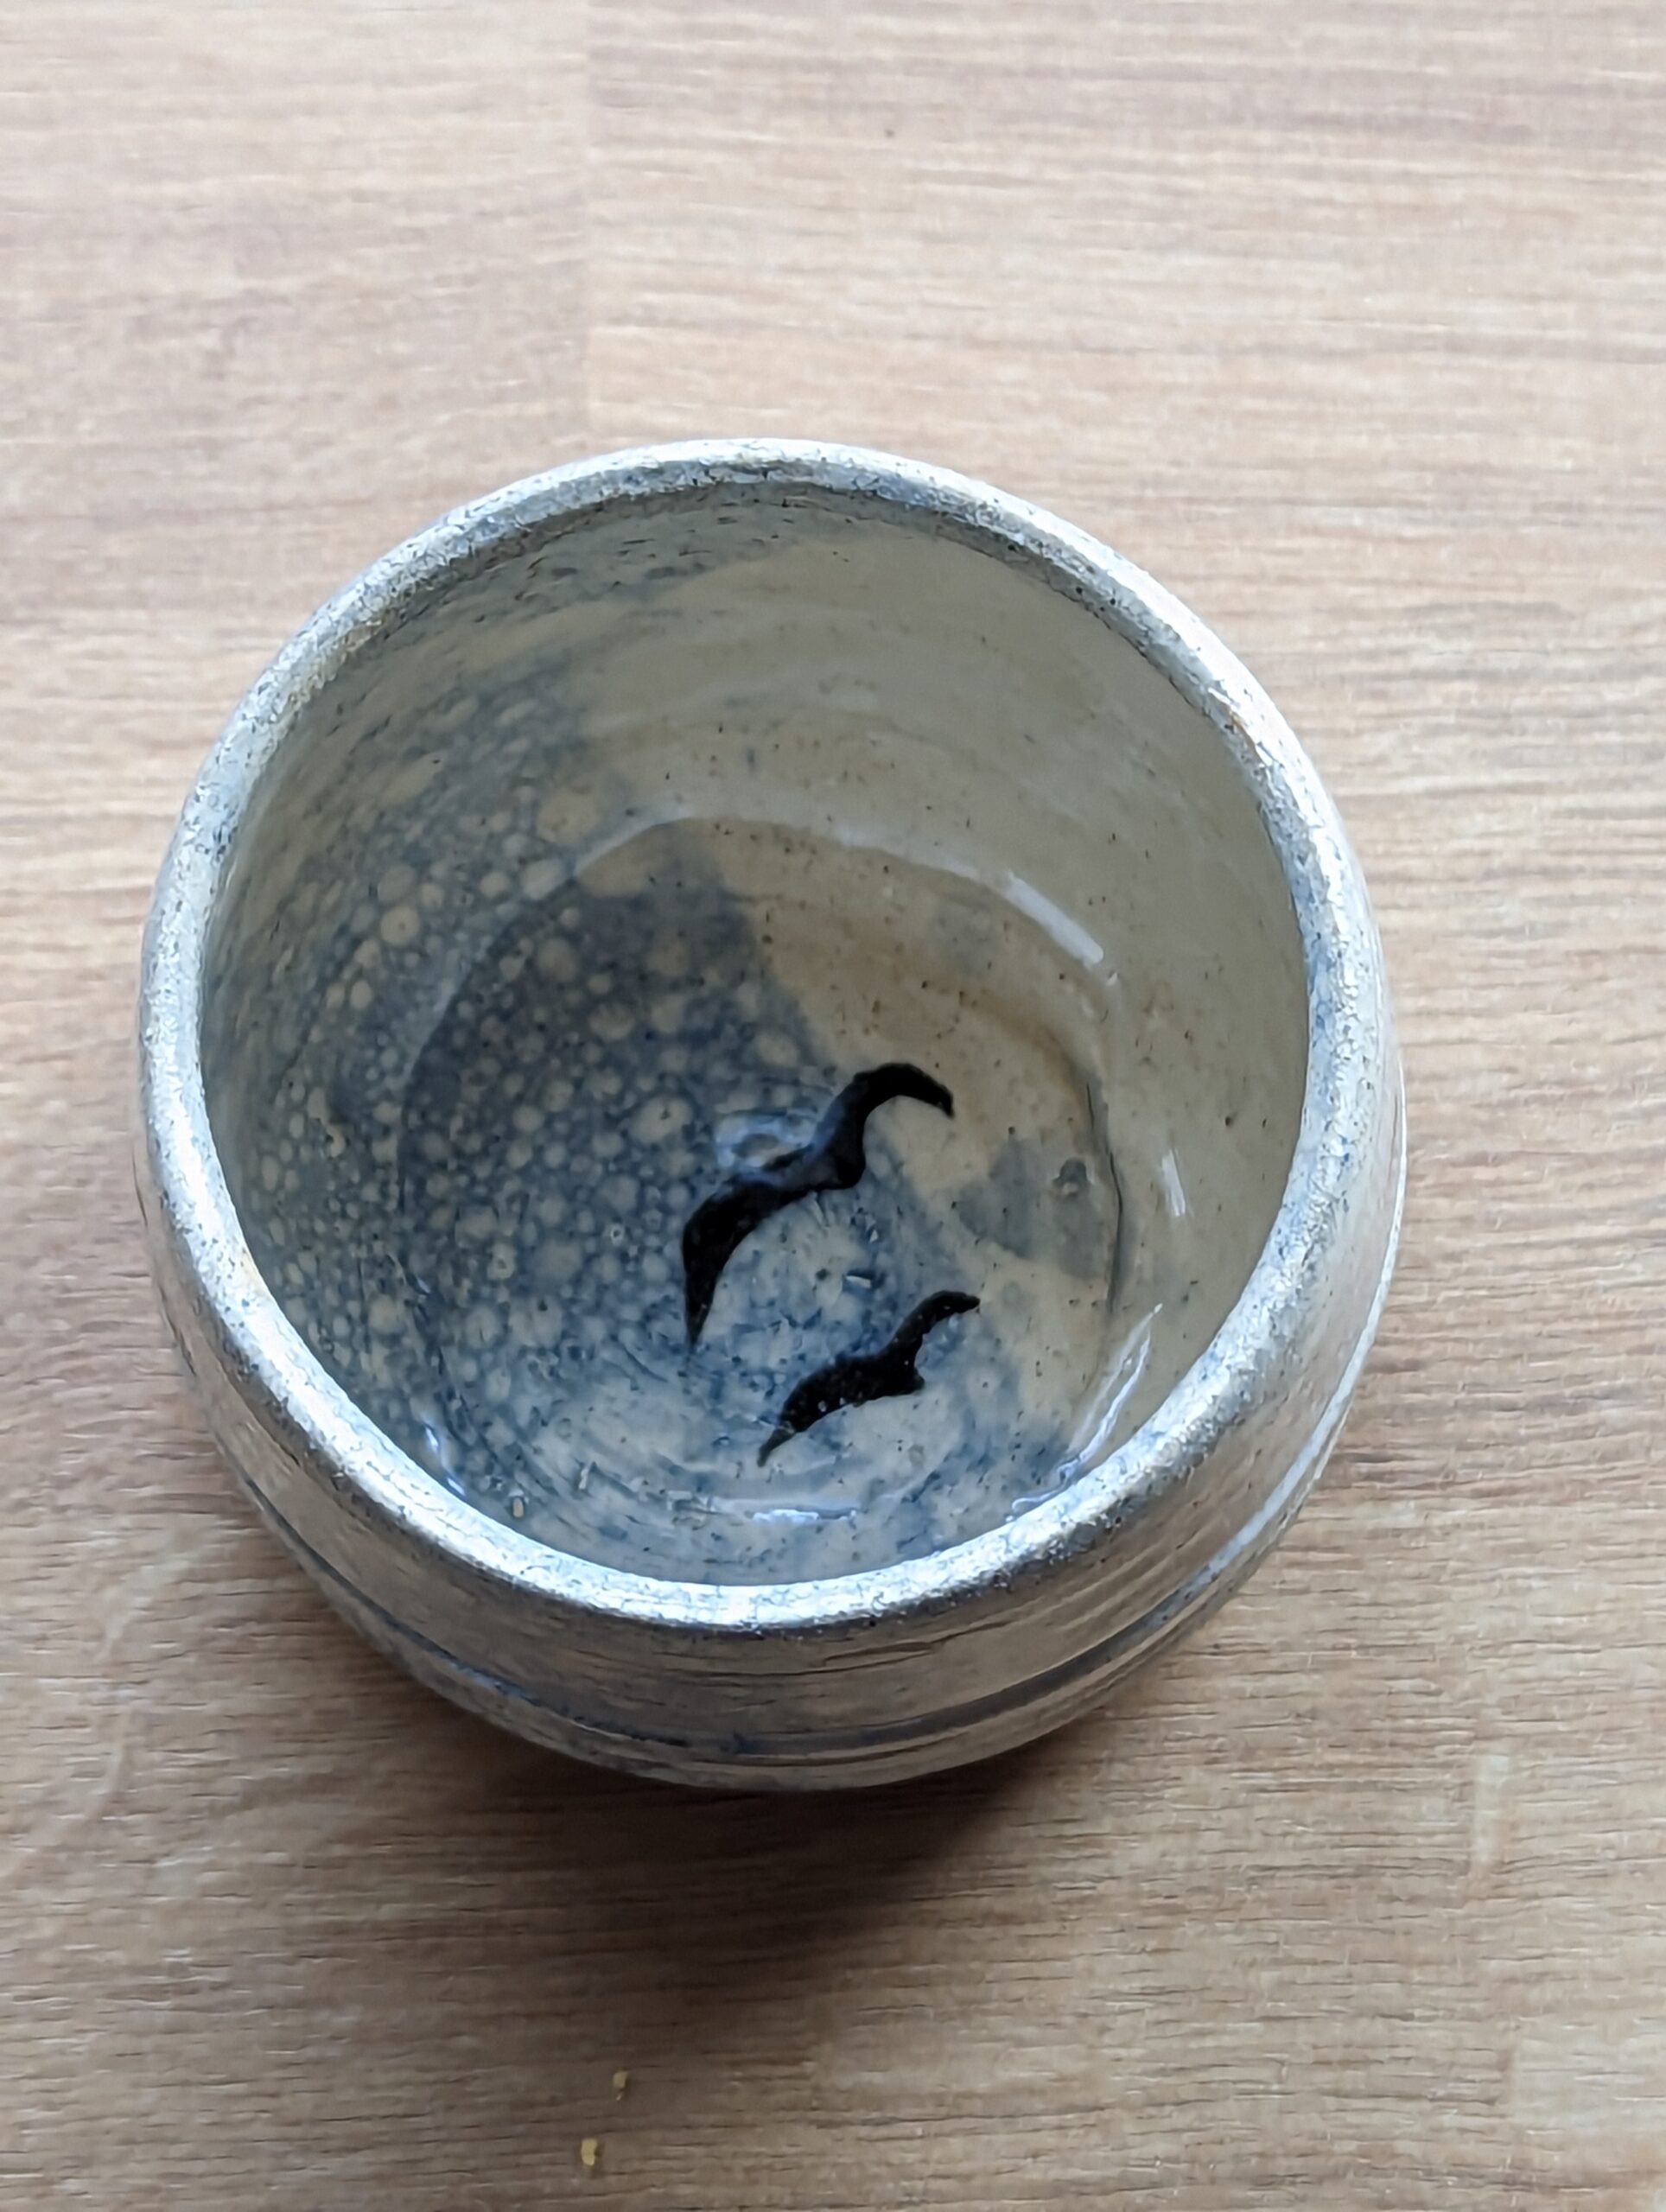
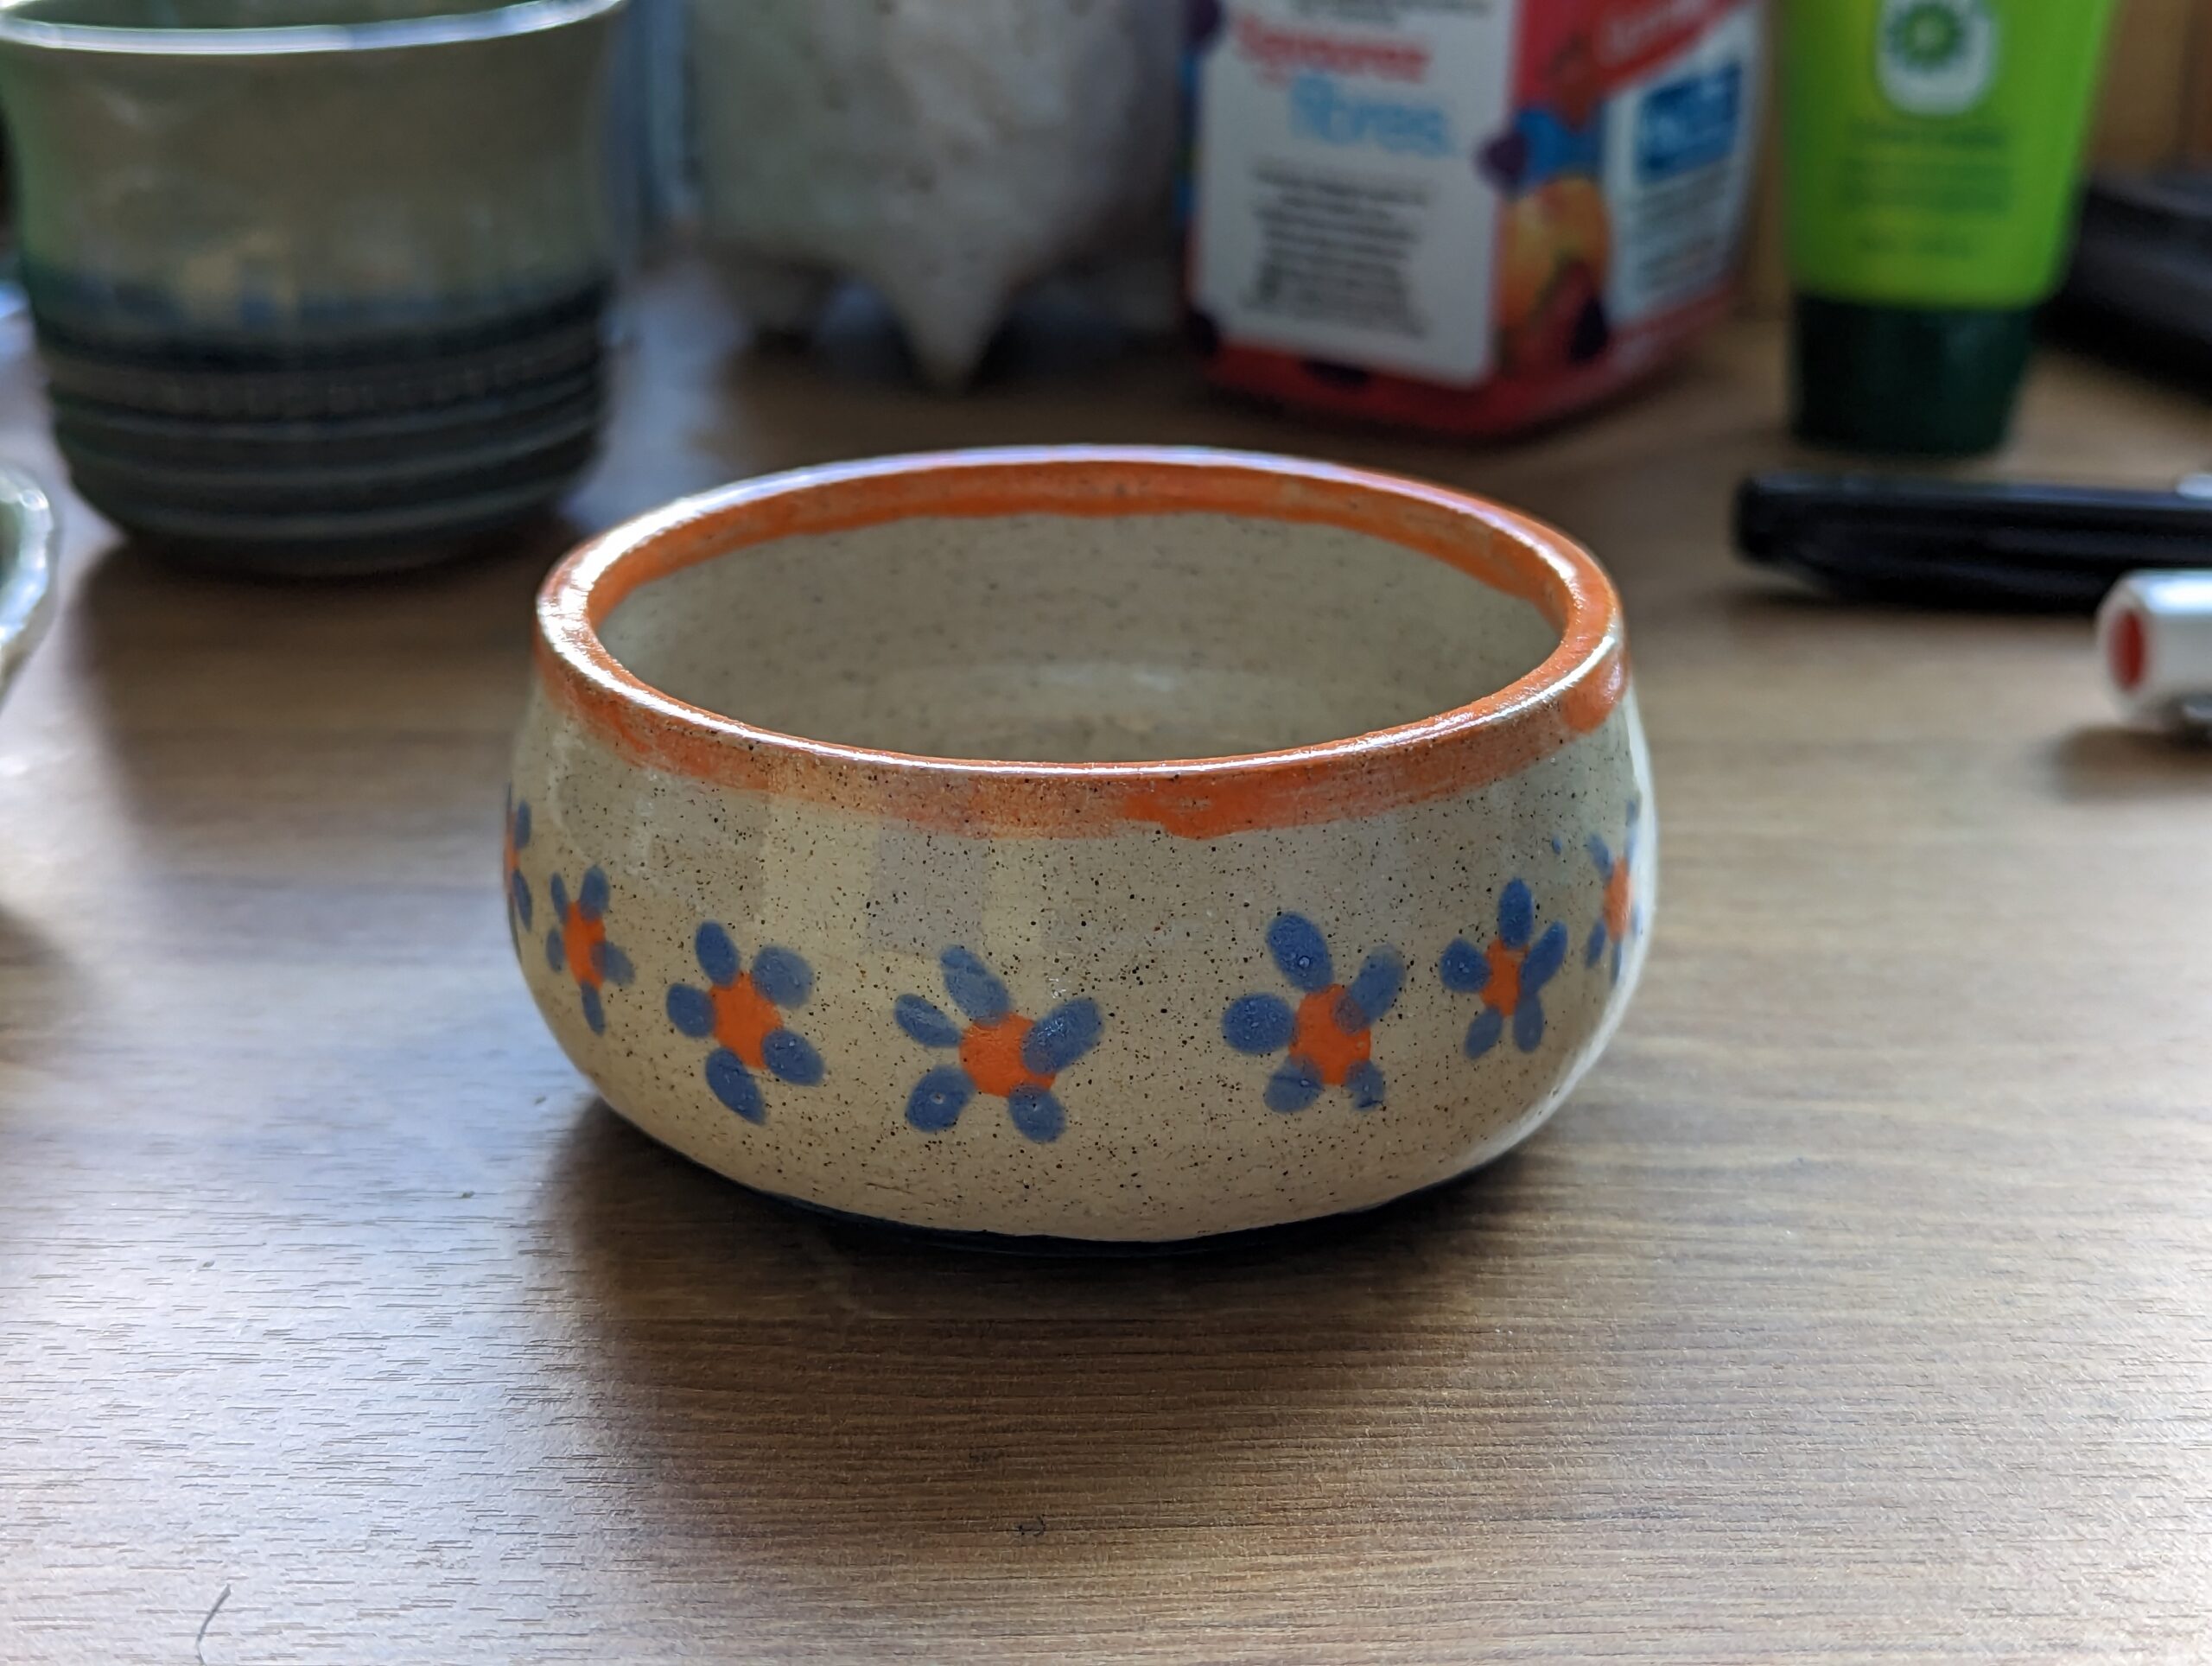
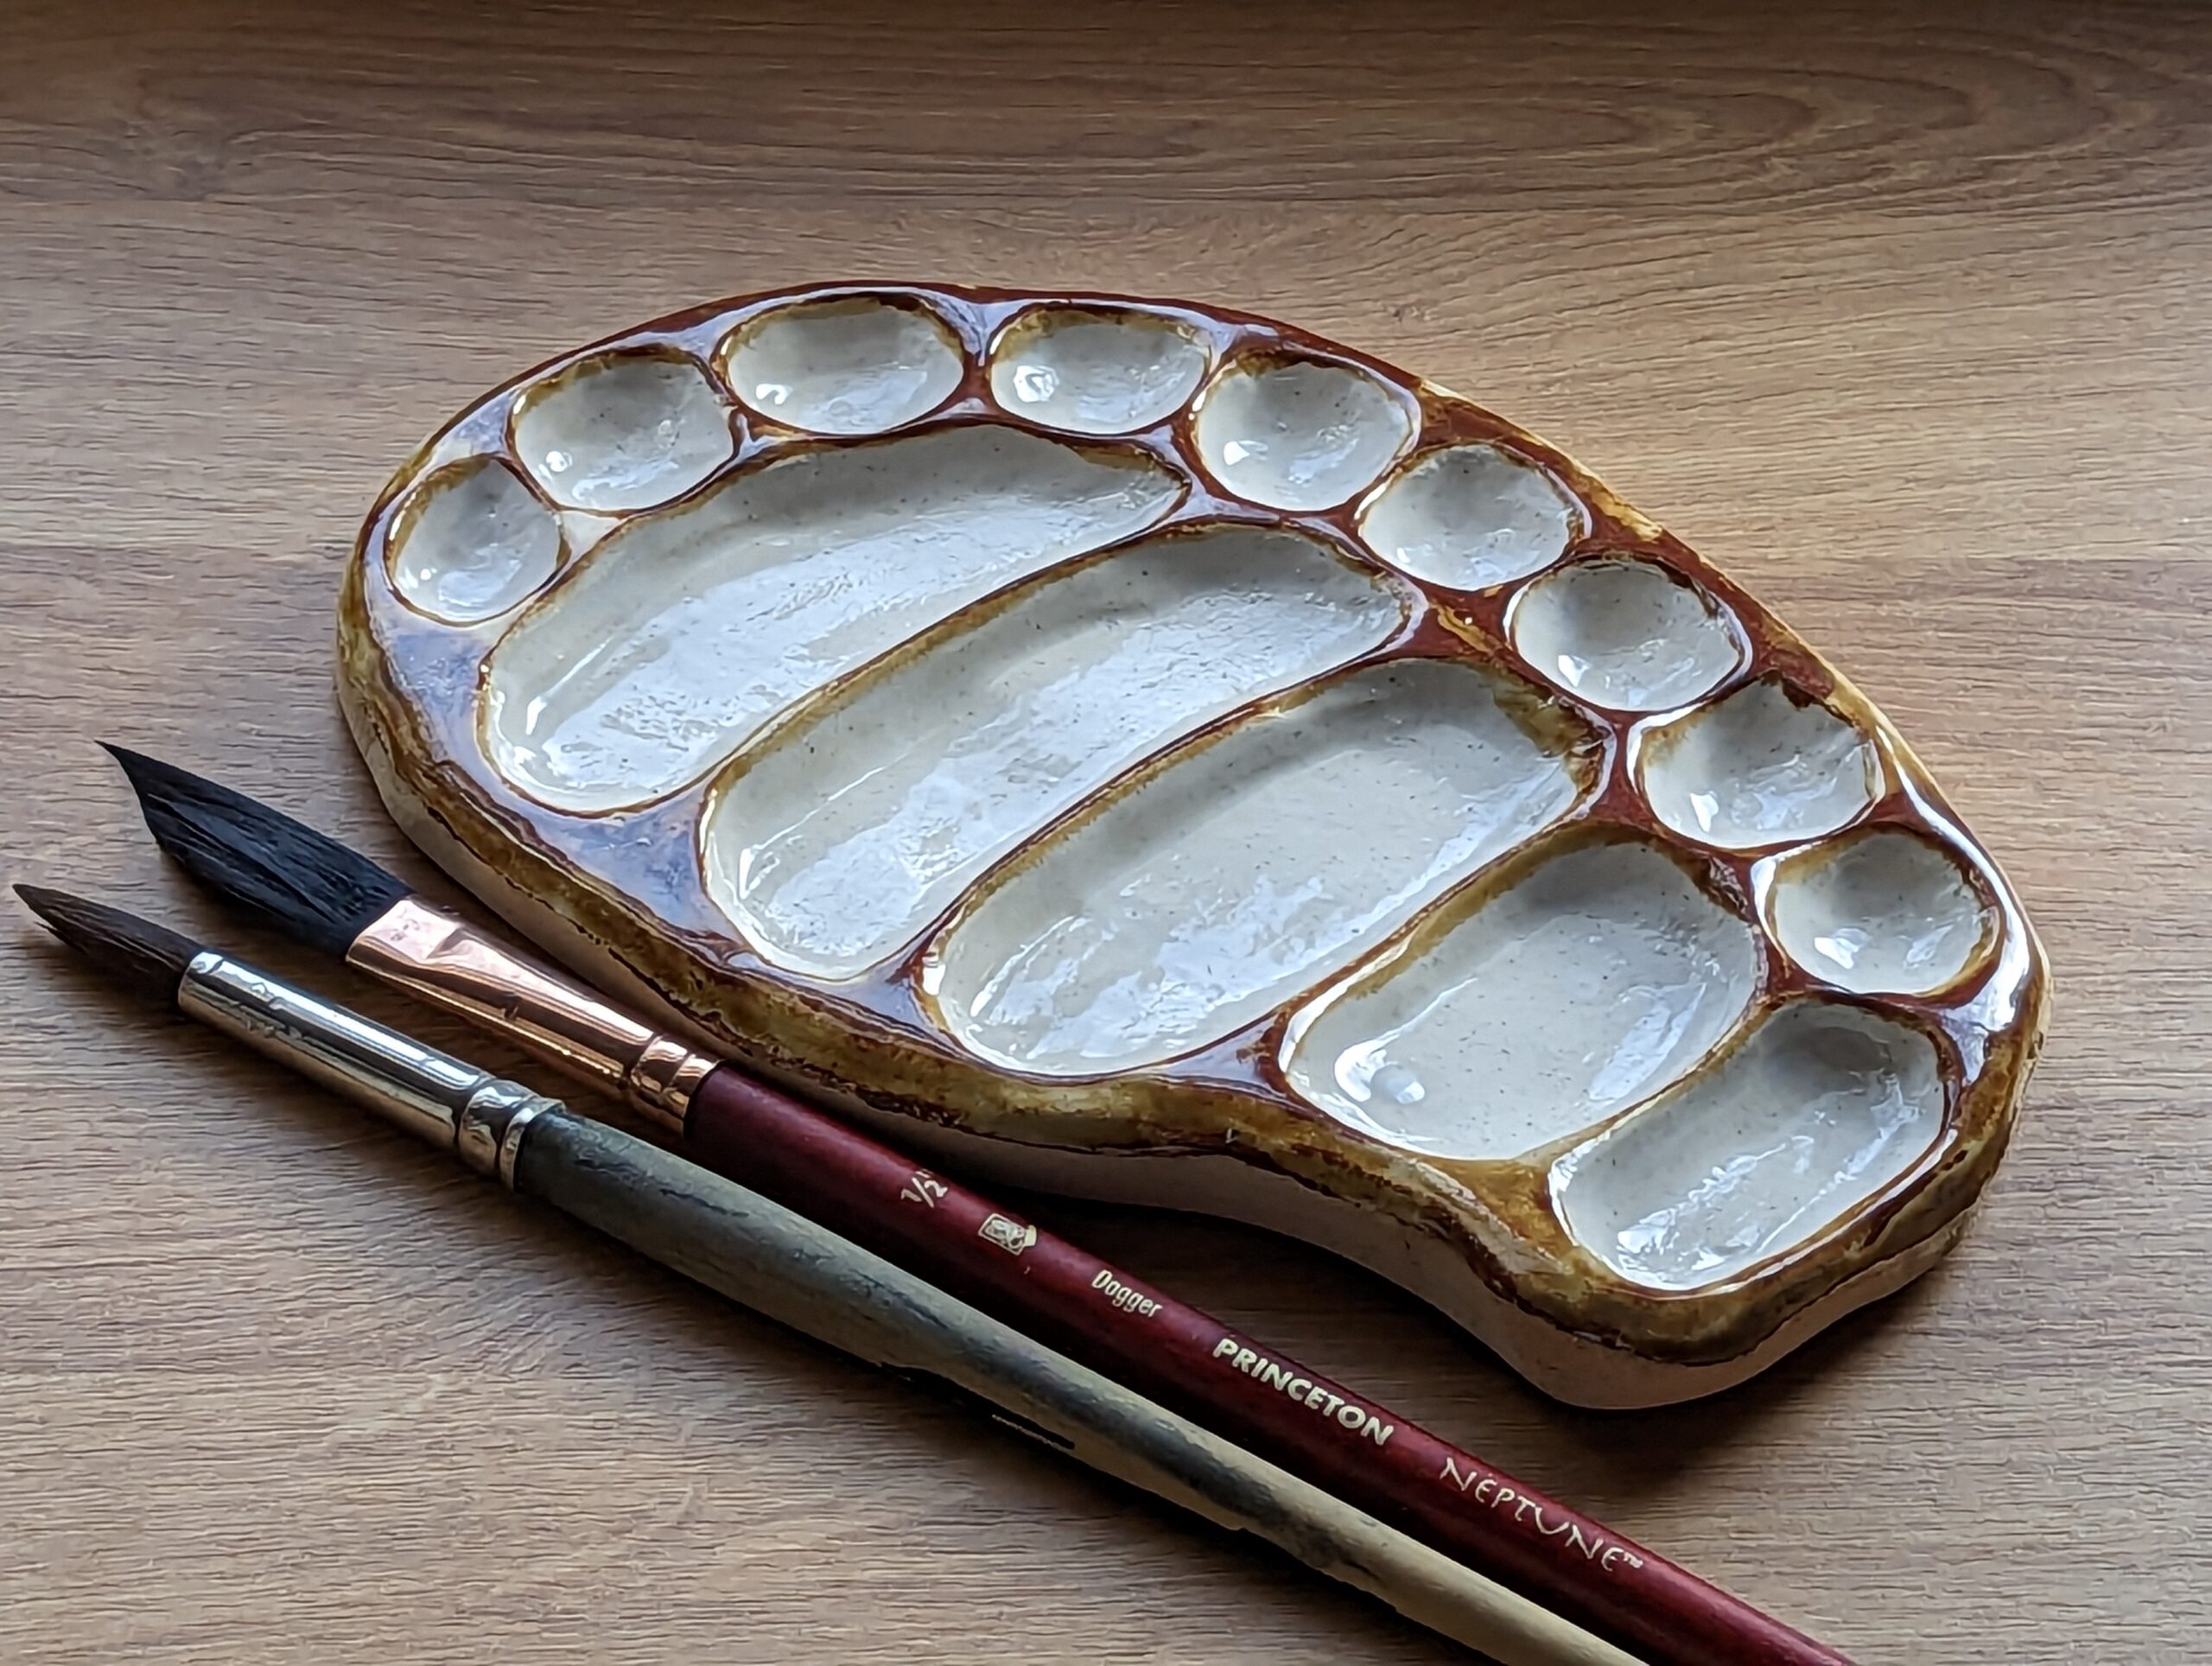
My first ceramics class, back in January 2023! Two functioning hands made learning the wheel a fun and exciting challenge, though at the time my handbuilding was frustratingly clumsy. Regardless, I got a functional (tiny) lemon juicer and a functional paint palette out of it, and I learned so much about throwing and glazing.
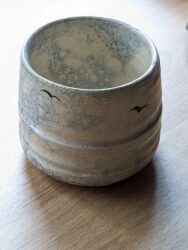
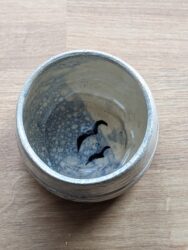
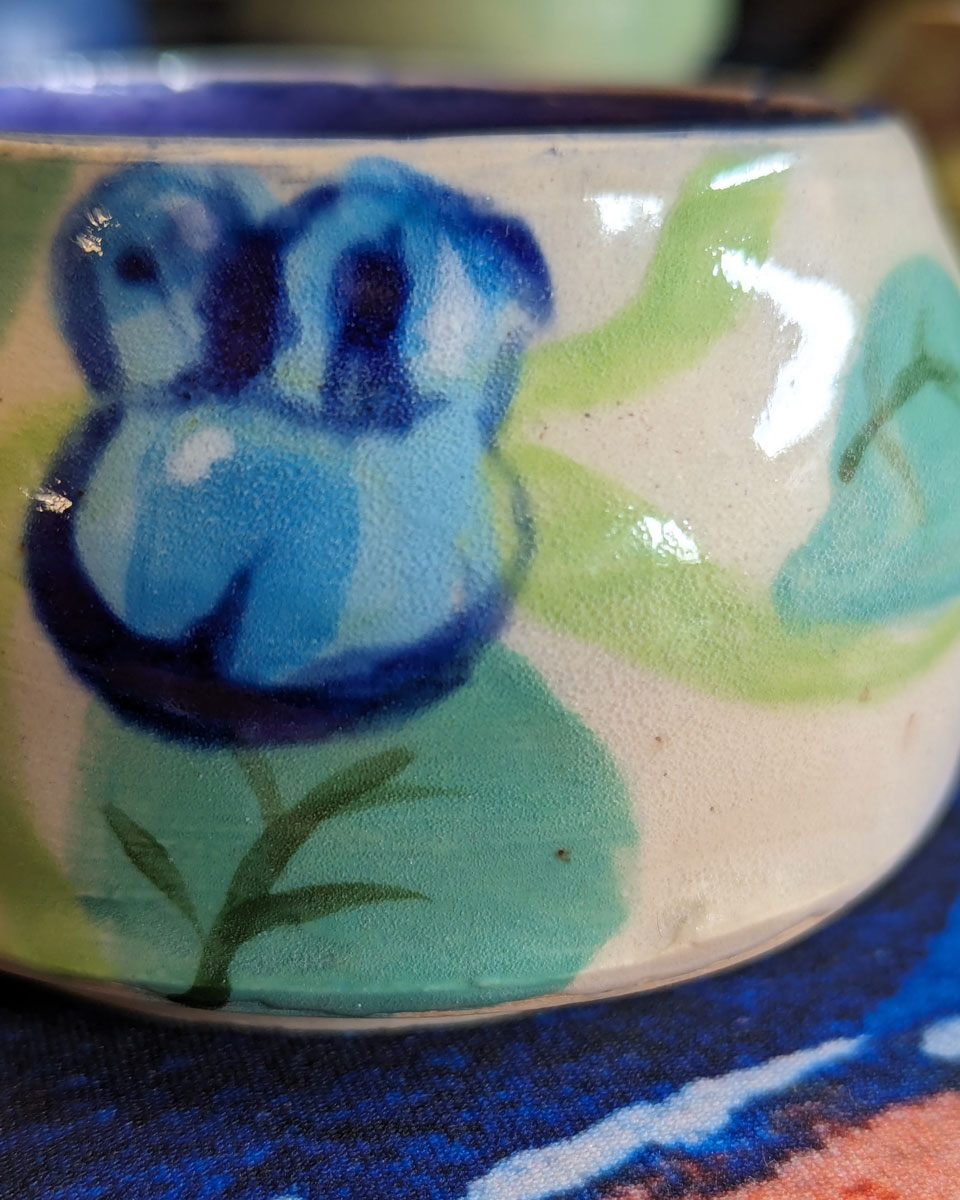
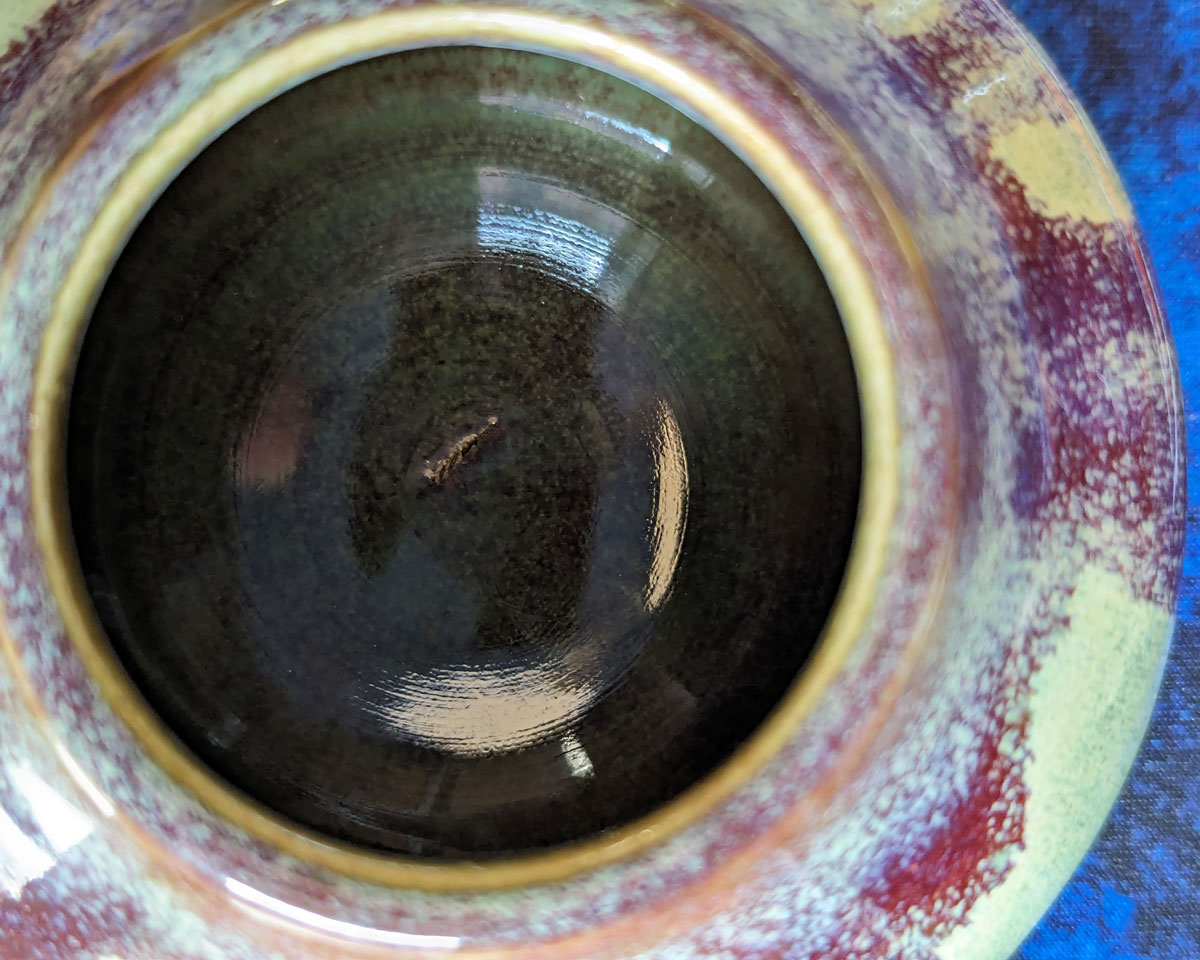
My favourite of all of this first batch is definitely the bubble glazed cup with the seagull silhouettes. Sadly the clear glaze on top crawled, but it’s a visual design idea I’d really love to try again soon.


leave a comment
Leave a Reply
-
So my day job at Bloom Digital has kept a lot of my life under NDA, and it’s a real treat to get to tell you about LongStory 2 and all the hard work we’ve been doing to make this game a reality!
LongStory was originally created in 2014 as an alternative to shallow “insert coins for romance” sims on the market. LongStory was one of the first dating sims that supported young people in exploring their gender, sexuality and identity in a safe supportive space, and we’ve had a devoted fan base since the first game launched.

And now, the LongStory 2 Kickstarter is live! We need games like LongStory now more than ever. We are looking to raise CAD $25,000 in finishing funds: https://bit.ly/4a8p7Jm
Your support will help us make a full new season of a diverse and LGBTQ+ game that our players have already fallen in love with. At Bloom we believe the world needs games that create that hopeful and loving future: You can help us continue this story with our signature compassion, curiosity, conversation and, occasionally, sarcasm.


Backing this project gets you access to the sequel, the original game and some sweet LongStory swag! Not to mention the satisfaction of knowing more inclusive, safe, consent-based emotional gaming content will be available for players new and old.
Also, did we mention, we’re live on Steam with a demo for Steam NextFest? You can take a good look at LongStory 2 for free right here:

It’s a gorgeous, heartfelt, funny game and it has the potential to really mean something, especially to any queer kids in your life; getting to be a small part of making it a reality has really meant a lot to me!
leave a comment
Leave a Reply
-

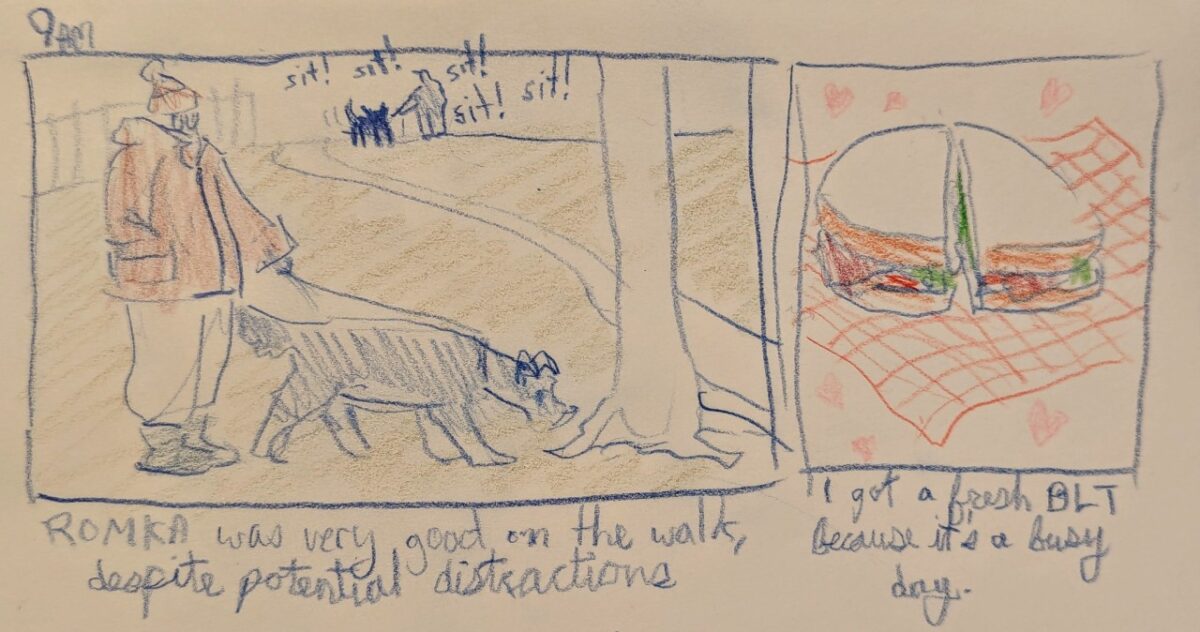
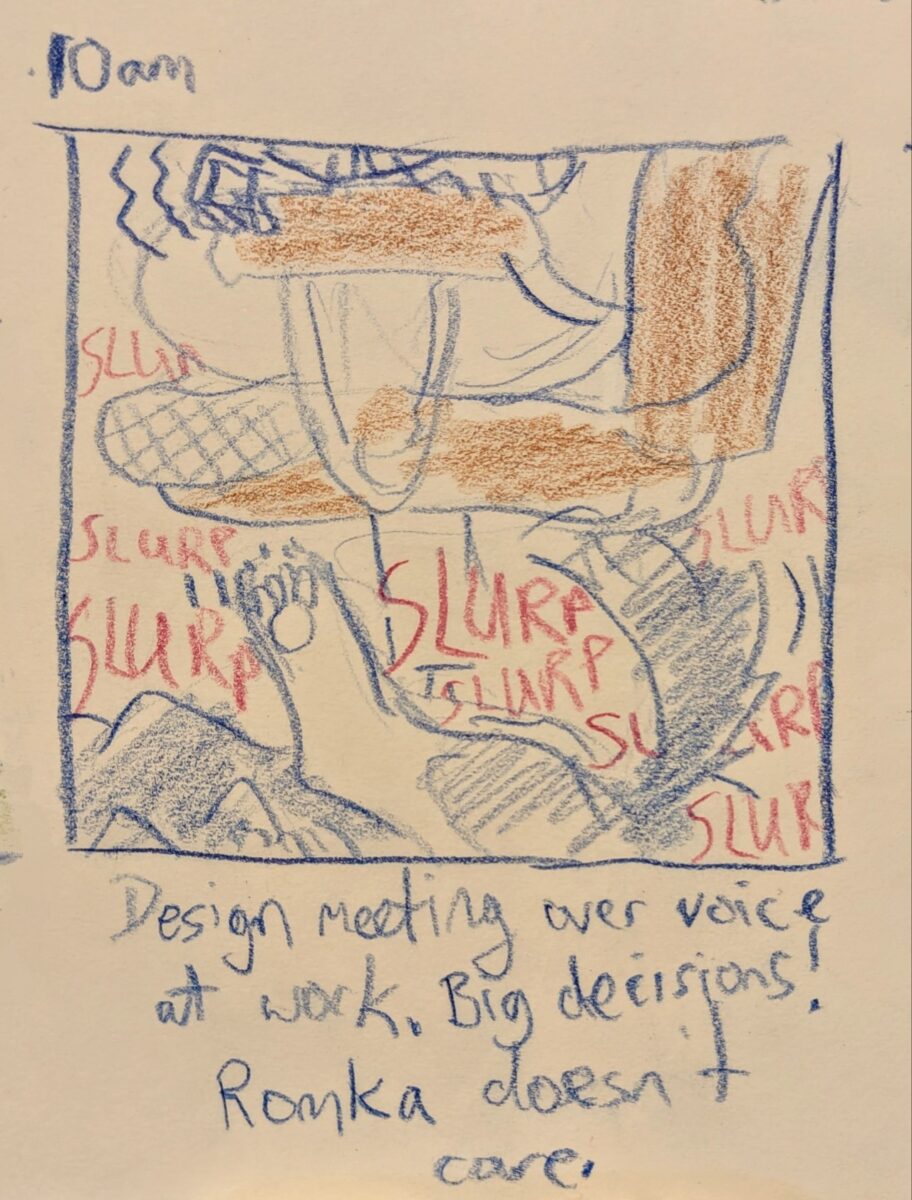
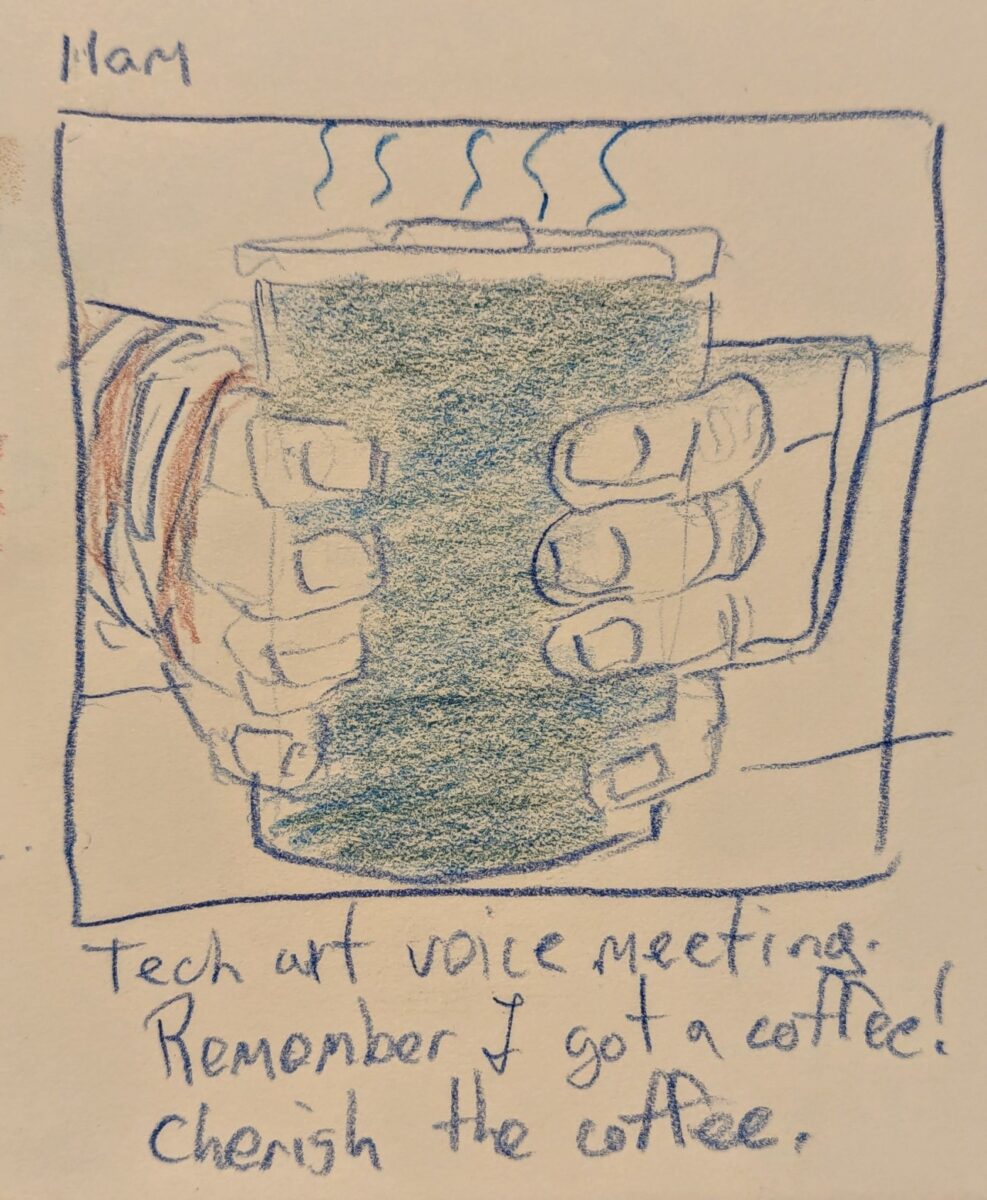
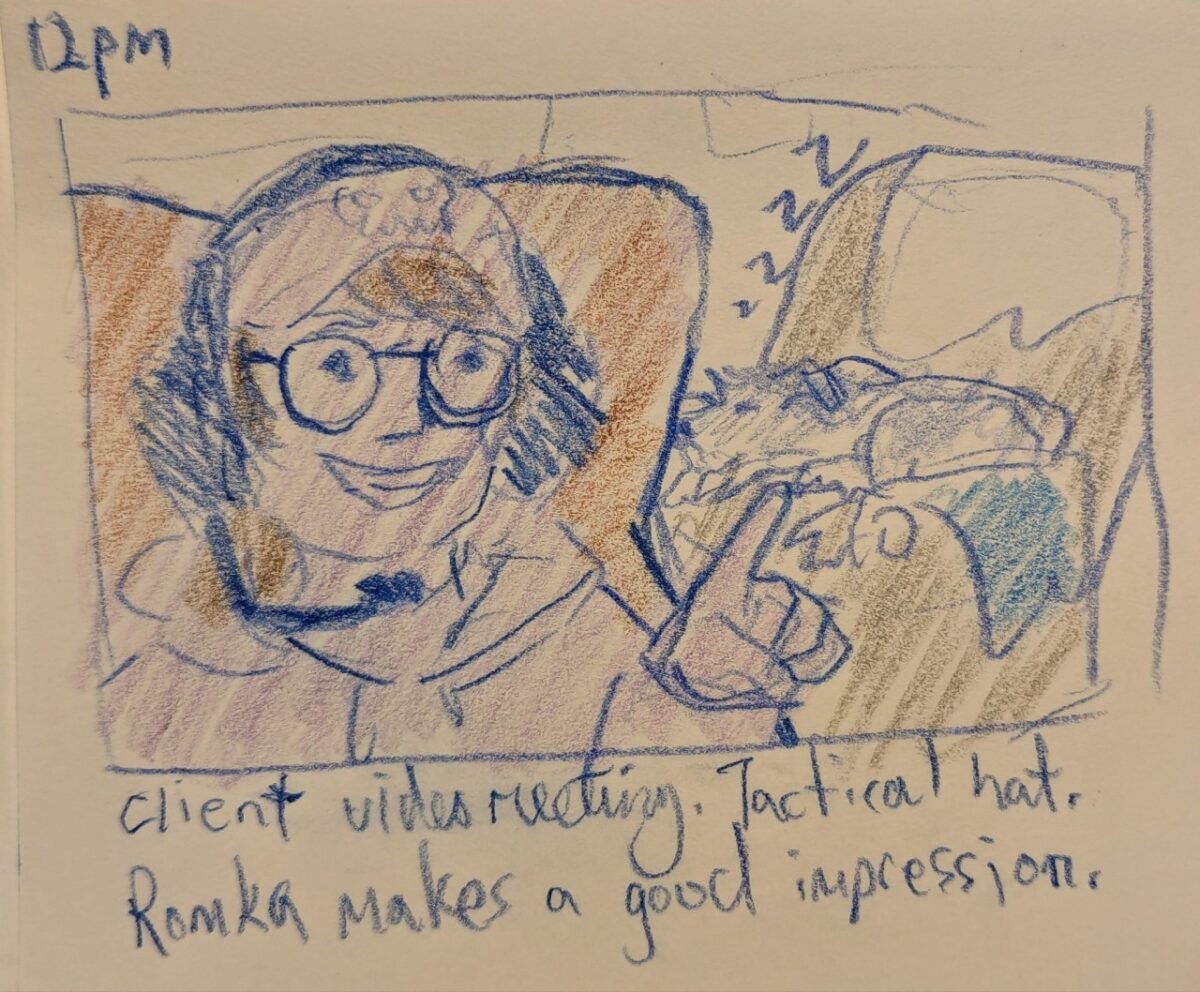
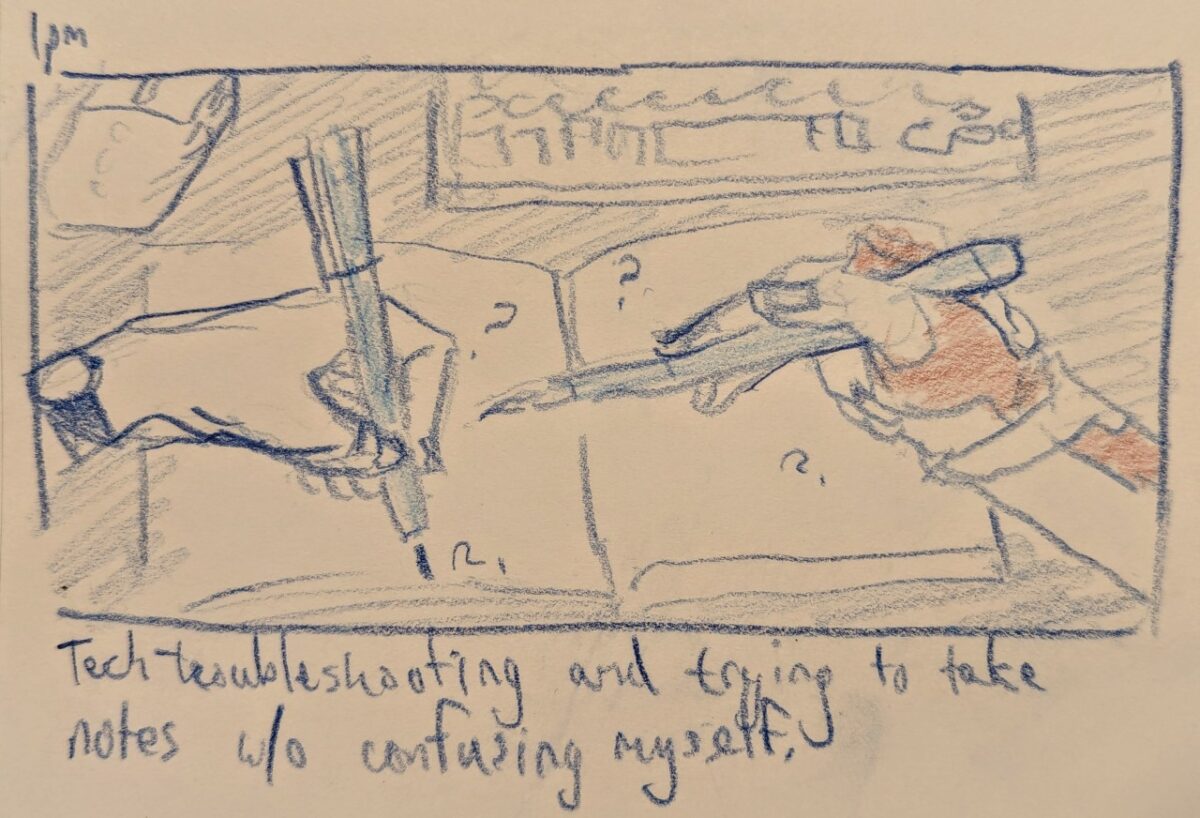
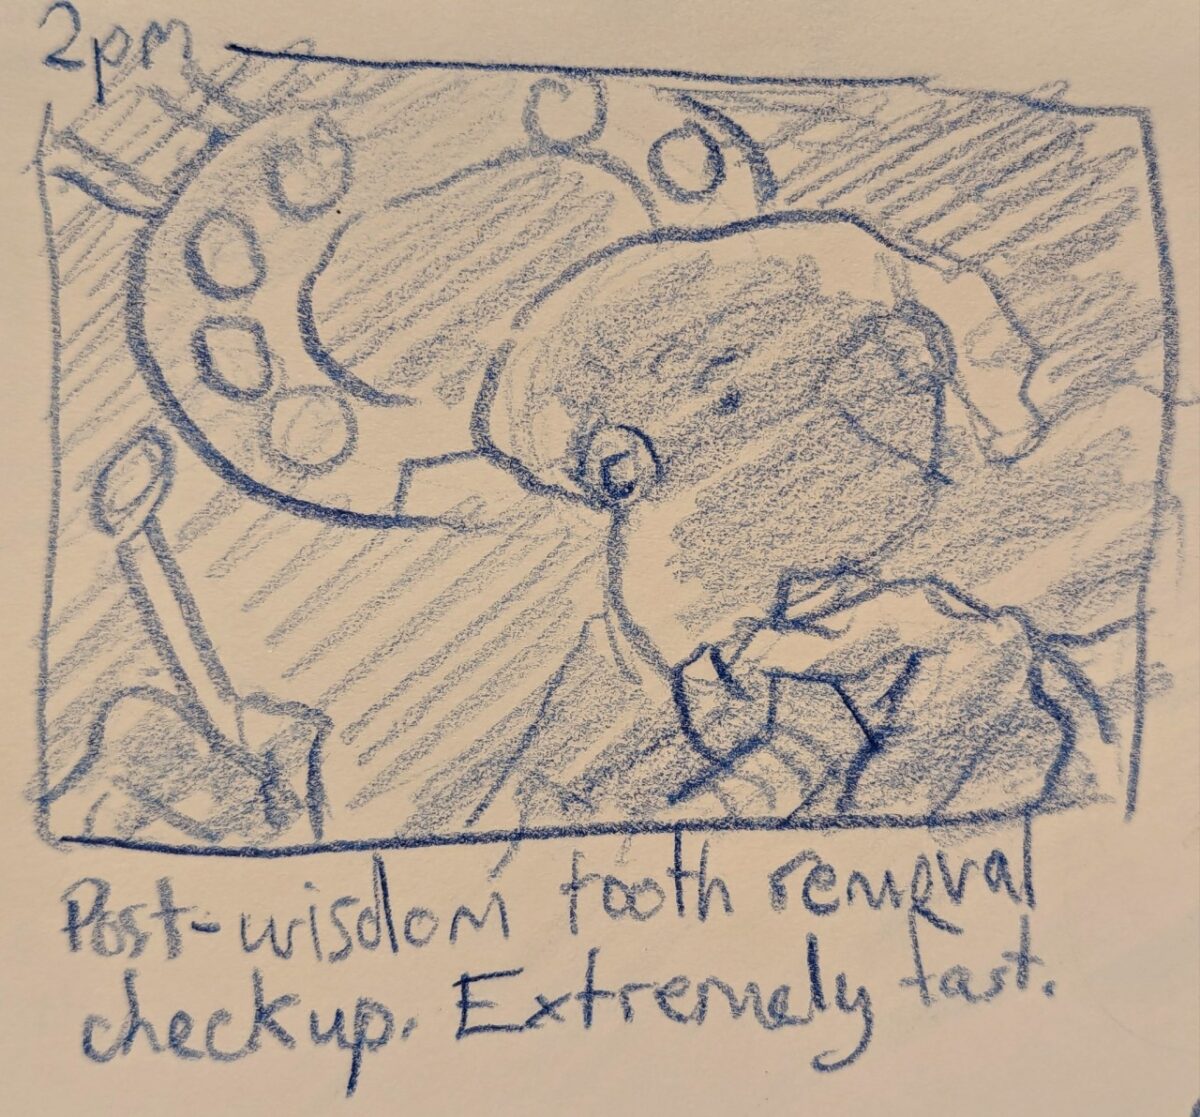
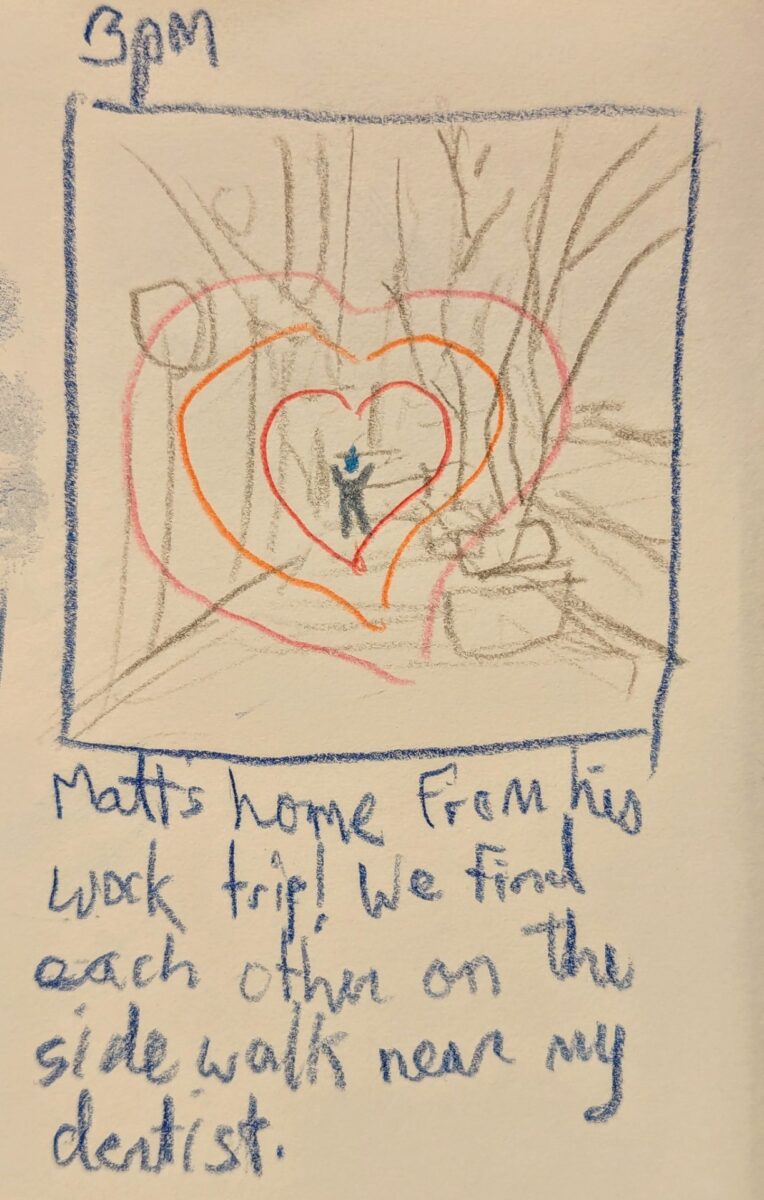
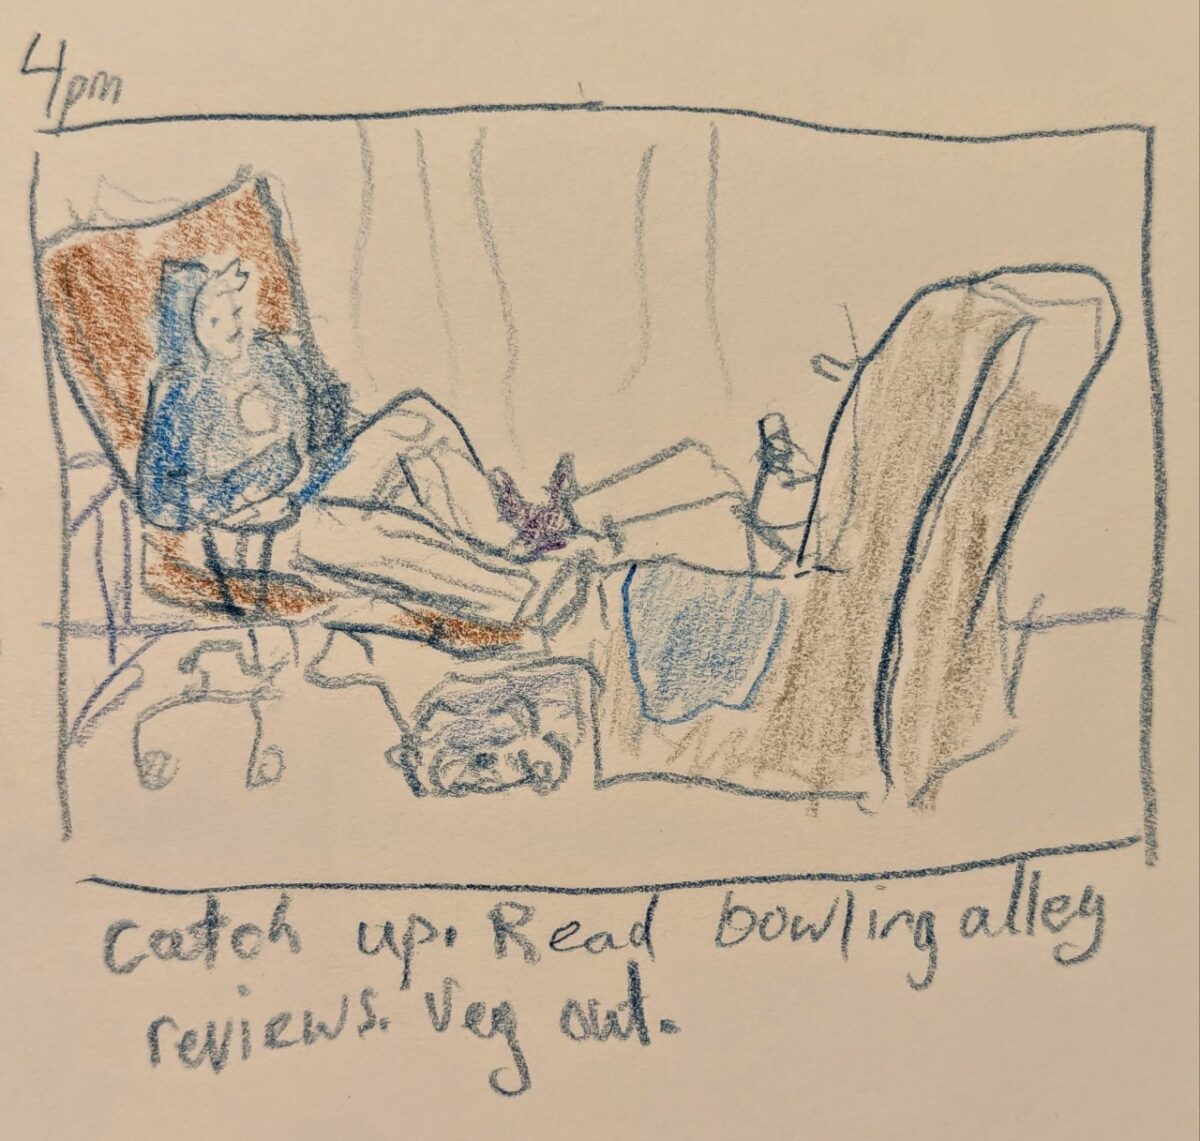
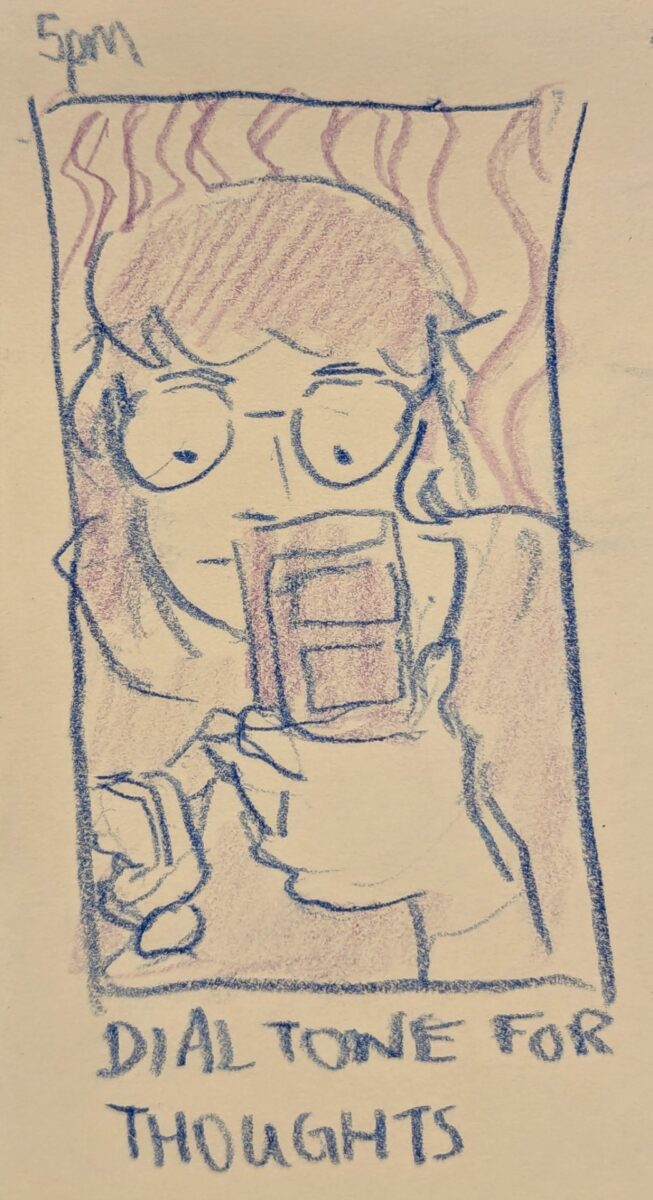
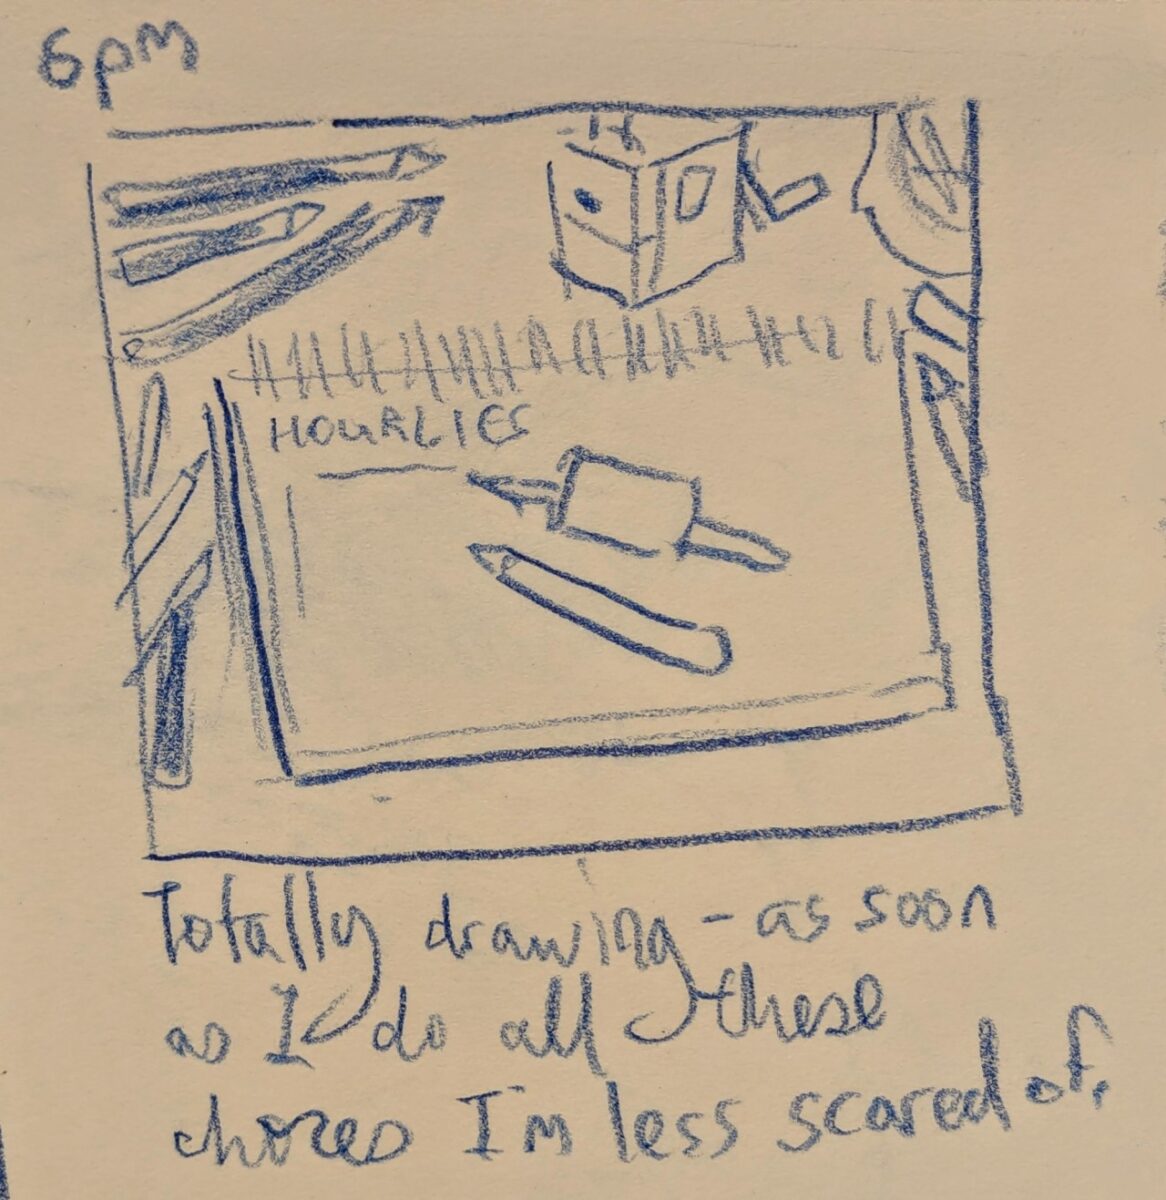
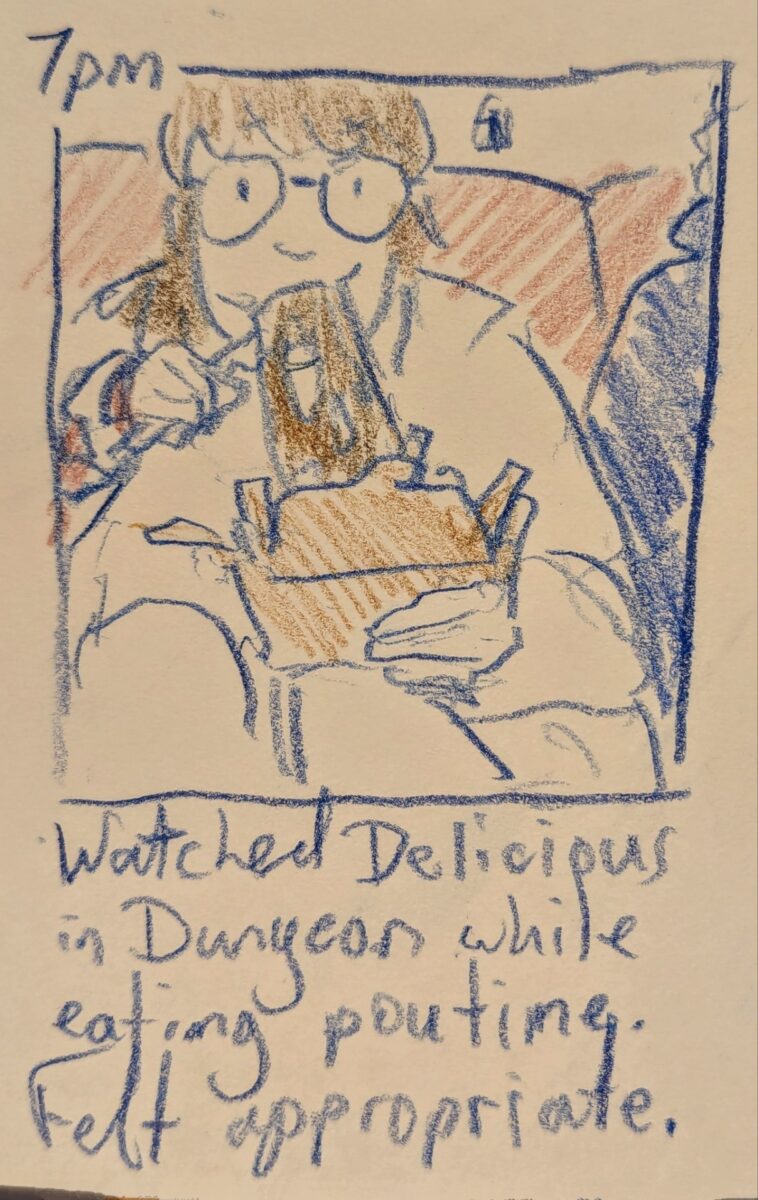
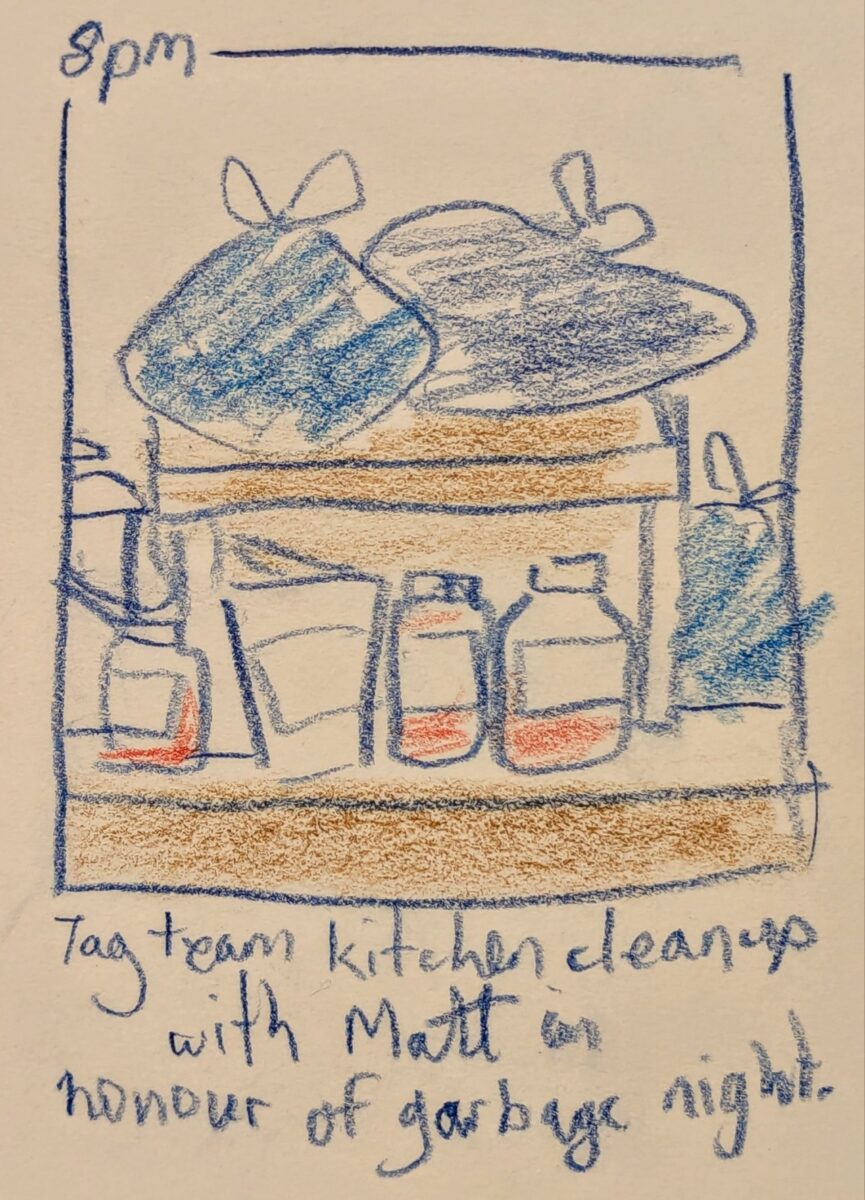
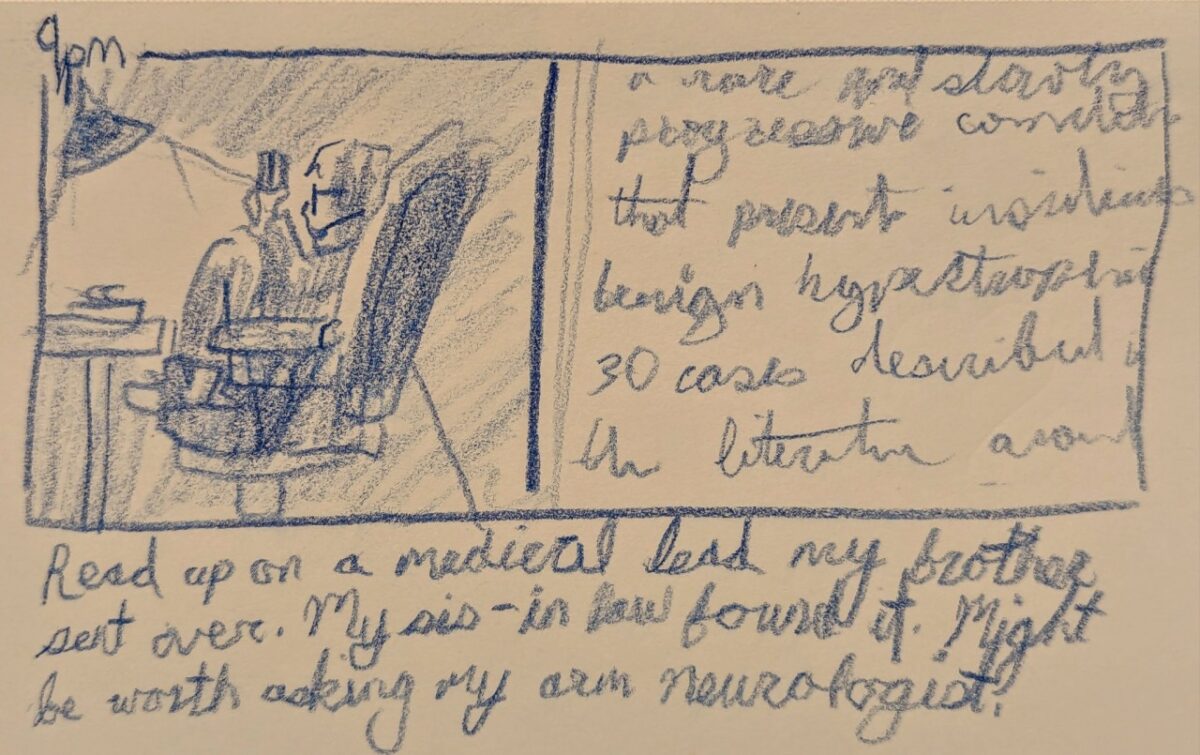
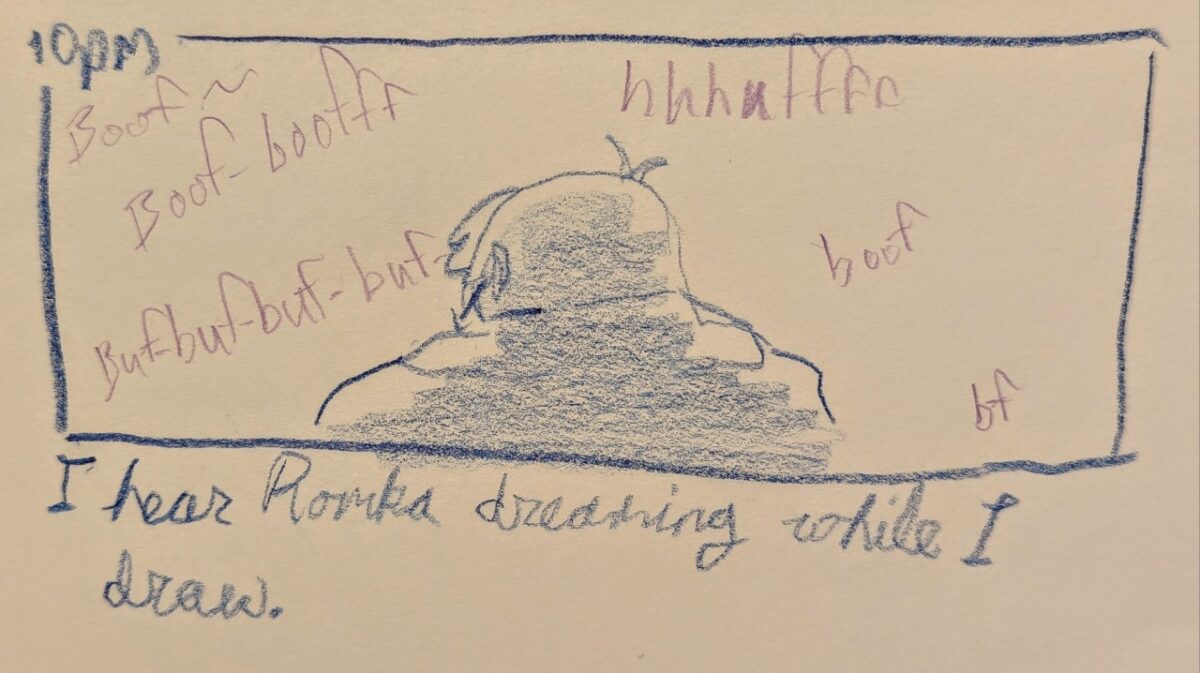
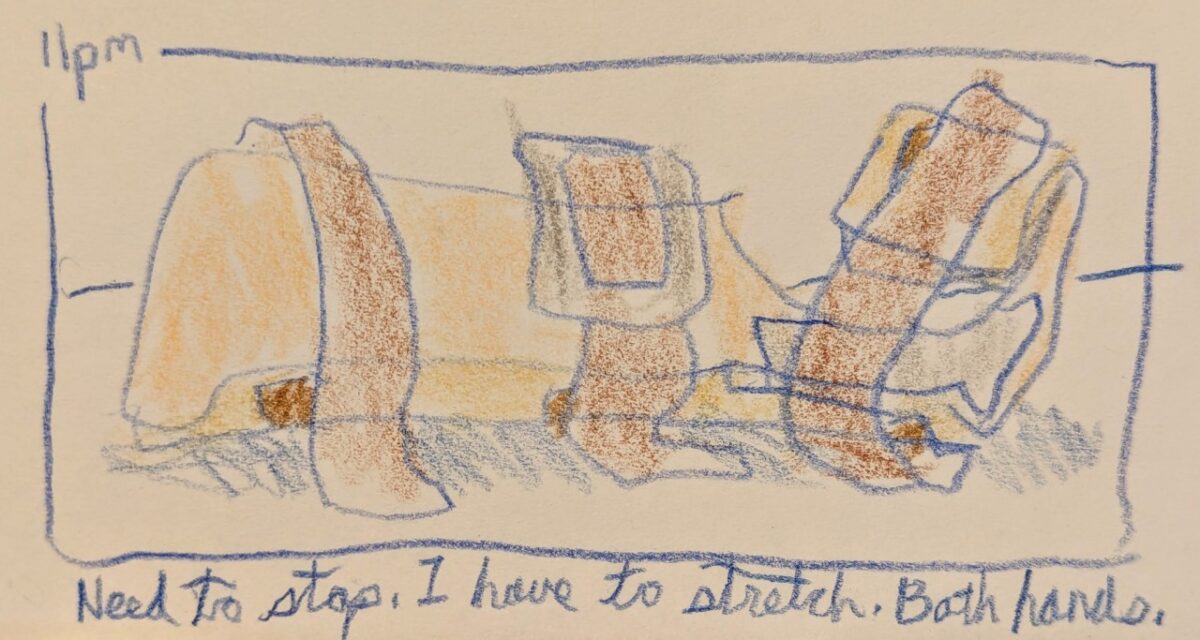
very proud of these sketchy pencil crayon autobio comics!
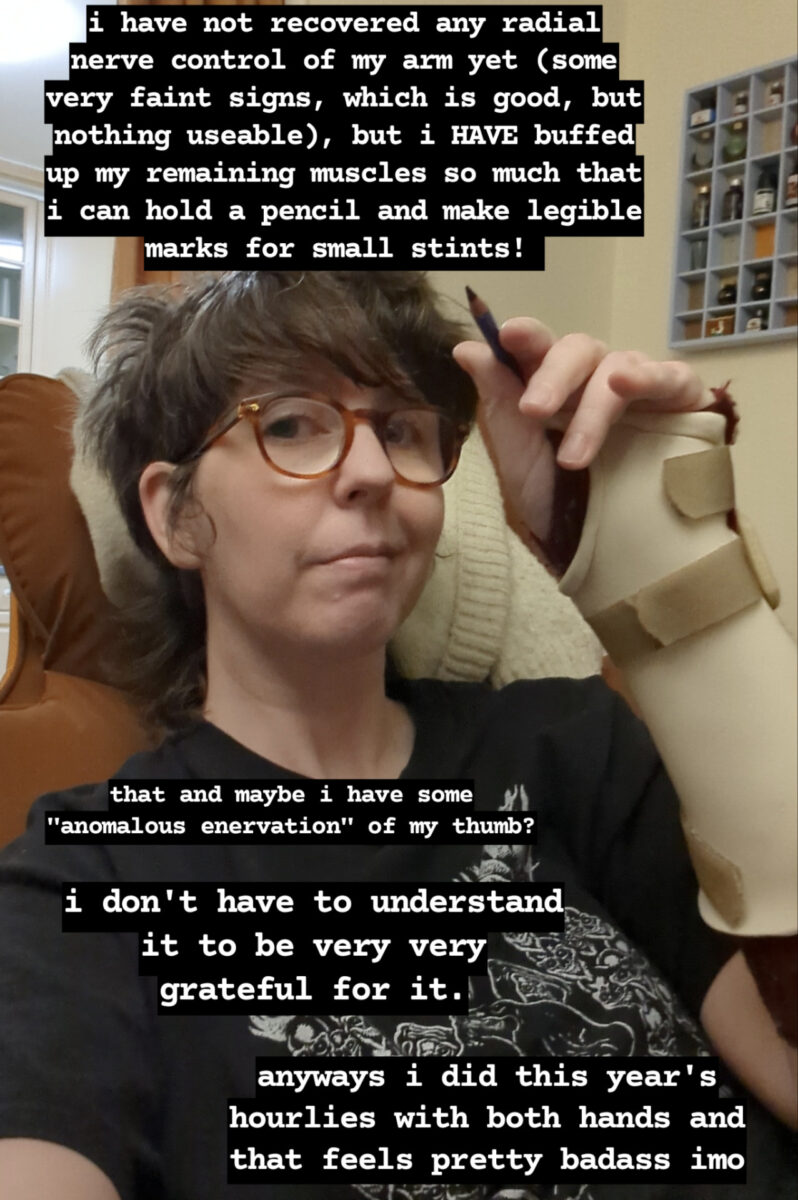
and an arm update for y’all as well:
leave a comment
Leave a Reply
-
Watercolour in my etchr coldpress sketchbook.

And some process shots, which I always find so enticing in their own way:
leave a comment
Leave a Reply
-
Oversized Equipment
With a base set of equipment solved for Astronomics – demo on steam right now! – there were two things next on the checklist: thinking about colour design, and thinking about some of the equipment that didn’t fit into the neat little categories of drilling/pumping/vaccuuming etc.
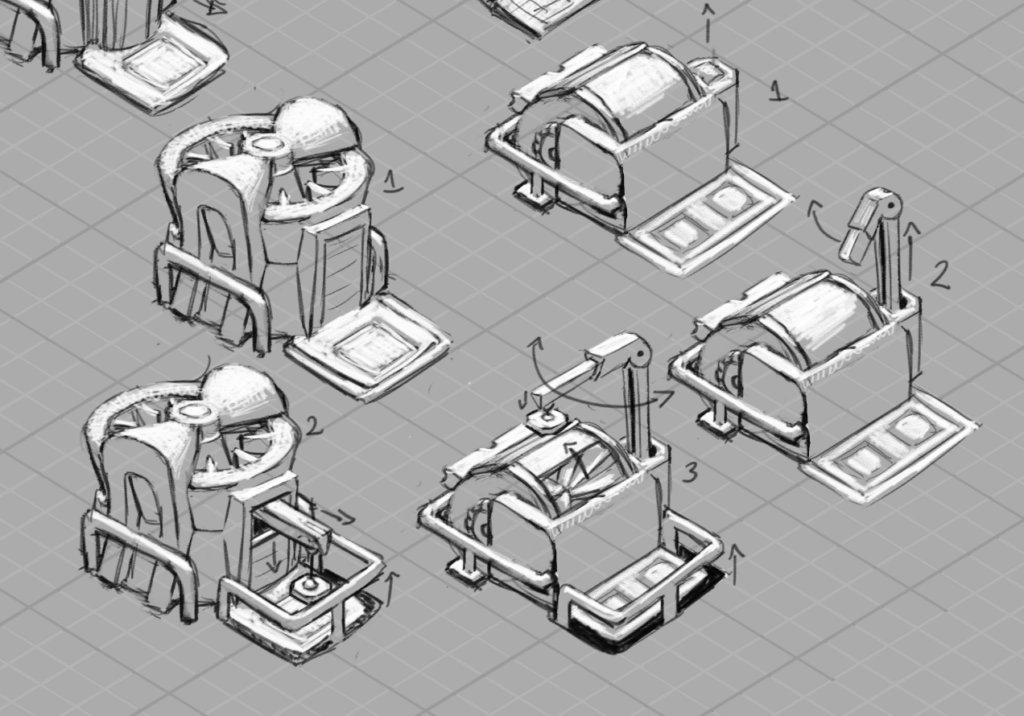
Firstup, we tackled some big ones: one of the things we wanted the player to get to work towards was processing raw materials — and that meant big processing equipment that could intake entire containers of raw material and spit out something different. These were a really fun challenge to keep in the same design language as our smaller machines while pushing the scale.
This is one place where our safety-bar themed style really helped — the ubiquitous bars were very useful as a shared unit of scale between the smaller and larger equipment – and in these early drawings they were a clear warning sign that I hadn’t fully measured out the scale relationships:
Here you can see the containers, when scaled down to a size where both could fit into that protected area on drawing 3, have safety bars about half or less as thick as the safety bars on the machine. Scale remained something we had to wrestle with and fine tune as we went, and we’ll actually come back to the containers in a little bit.
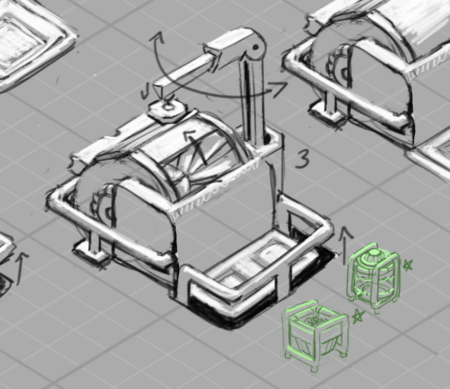
The other larger piece of equipment we needed was one that’s central to the demo — the crane! Here you can see a few of the different ideas we were exploring.

Key elements were: we wanted it to attach securely to the ground, and we wanted the player to feel like they had maximum options when it came to positioning its pickup and dropoff points. With those priorities and with our low-poly 3D outcome in mind, we ended up grabbing the legs from A and putting them on D — D felt like the most flexible in terms of how far we could spin or stretch the reach of the crane, and also the most simple in terms of modelling and animation challenges.
There were further edits and redesigns and tweaks and additional passes on a lot of this stuff — especially the containers — but I thought folks might like to see how we approached colour for the equipment! And that’s a HUGE question, so I’ll be saving that for its own post, alongside the epic journey that colour took while I was on the project.
leave a comment
Leave a Reply
by definition, not static
construction is continuing / old posts are being rebuilt / new archives are being built


Leave a Reply